Model 3 installation

Front Shade
Use clip locator to find location for both black front clips: make sure the mark in the middle aligns with the emergency light button. Insert both black clips onto the roof.
Front Shade
Remove clip locator by loosening both screws on the black clips.
Front Shade
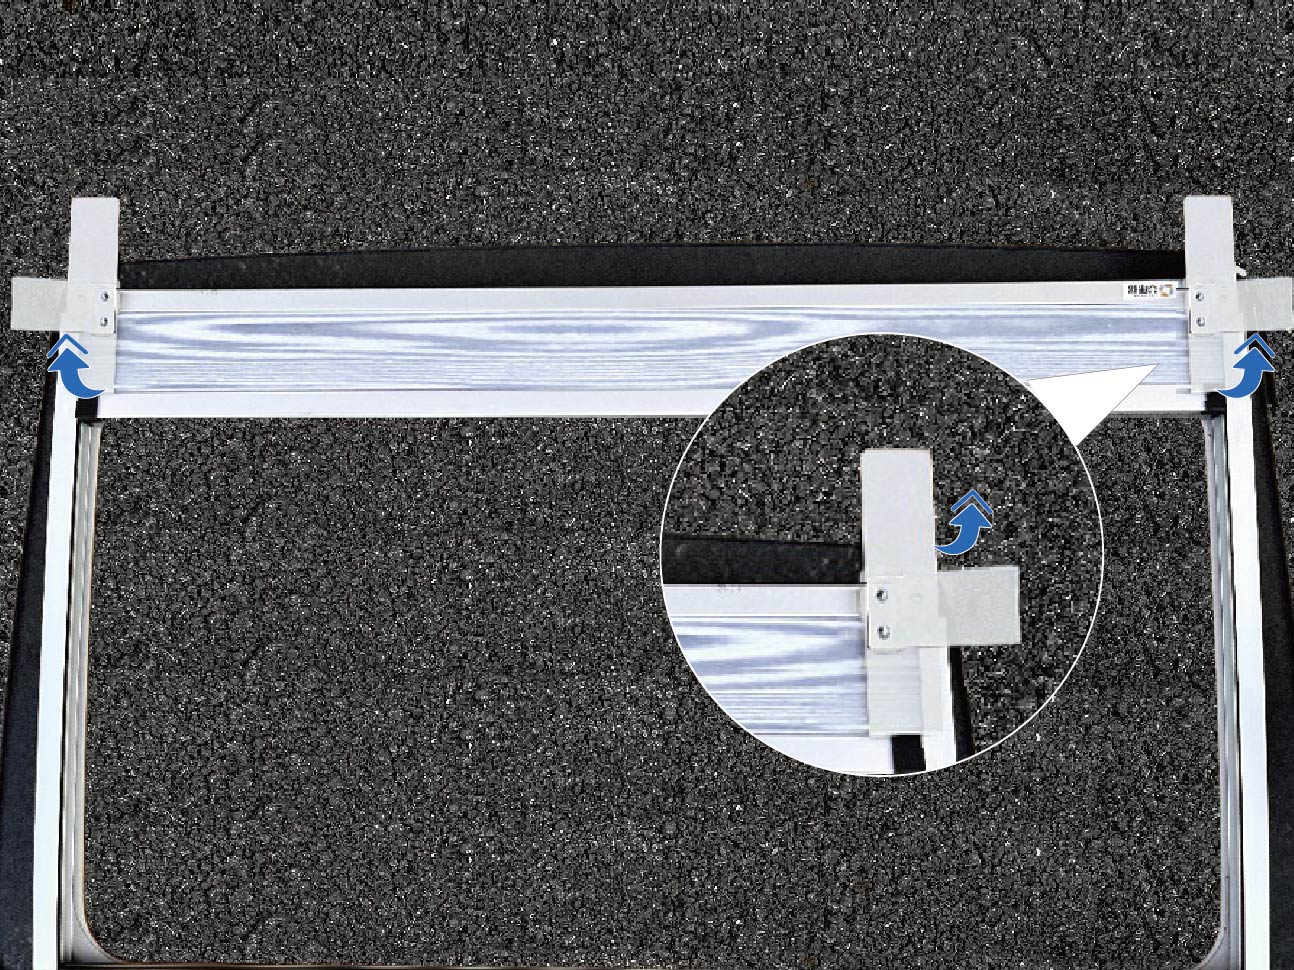
Find both plastic inserts located at the back of the sunshade. Turn the insert 180 degree backwards and fasten the insert using provided rear screw. Repeat to rotate both inserts.
Front Shade
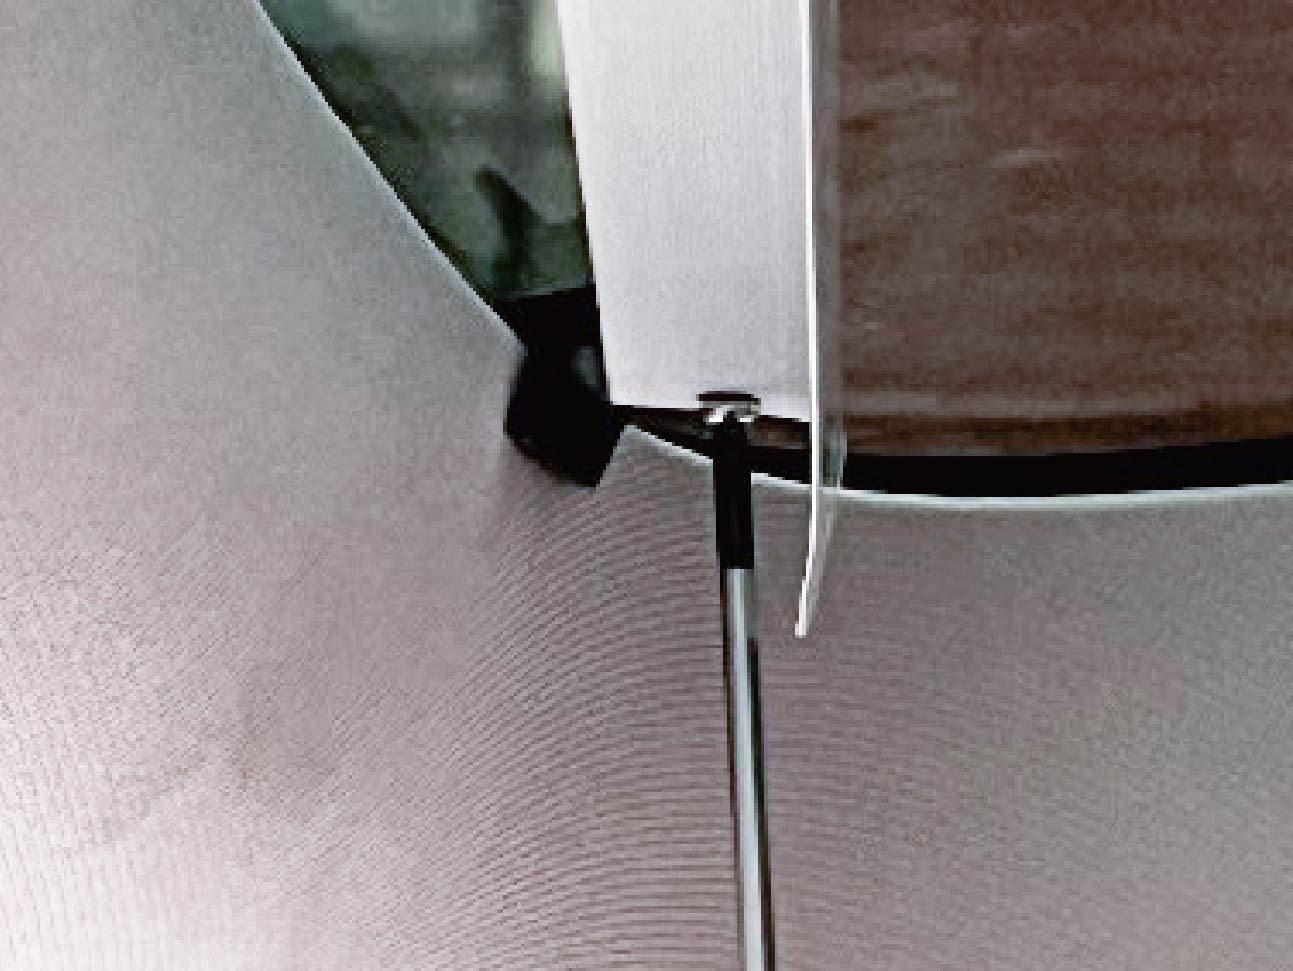
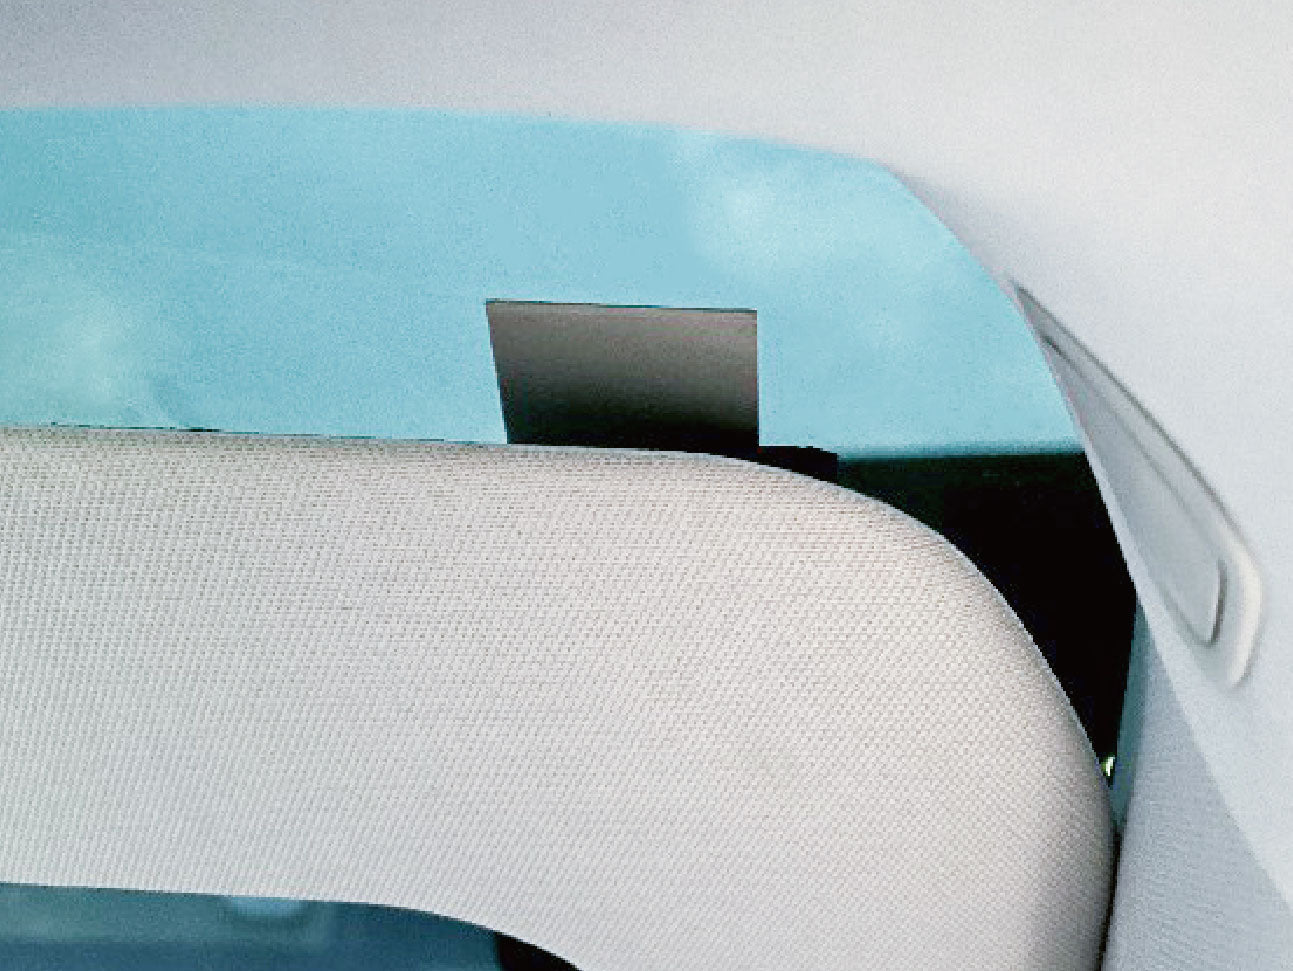
Take the sunshade into the car cabin with both inserts facing the back of the car. Push both inserts into between the glass roof and the ceiling.
Front Shade
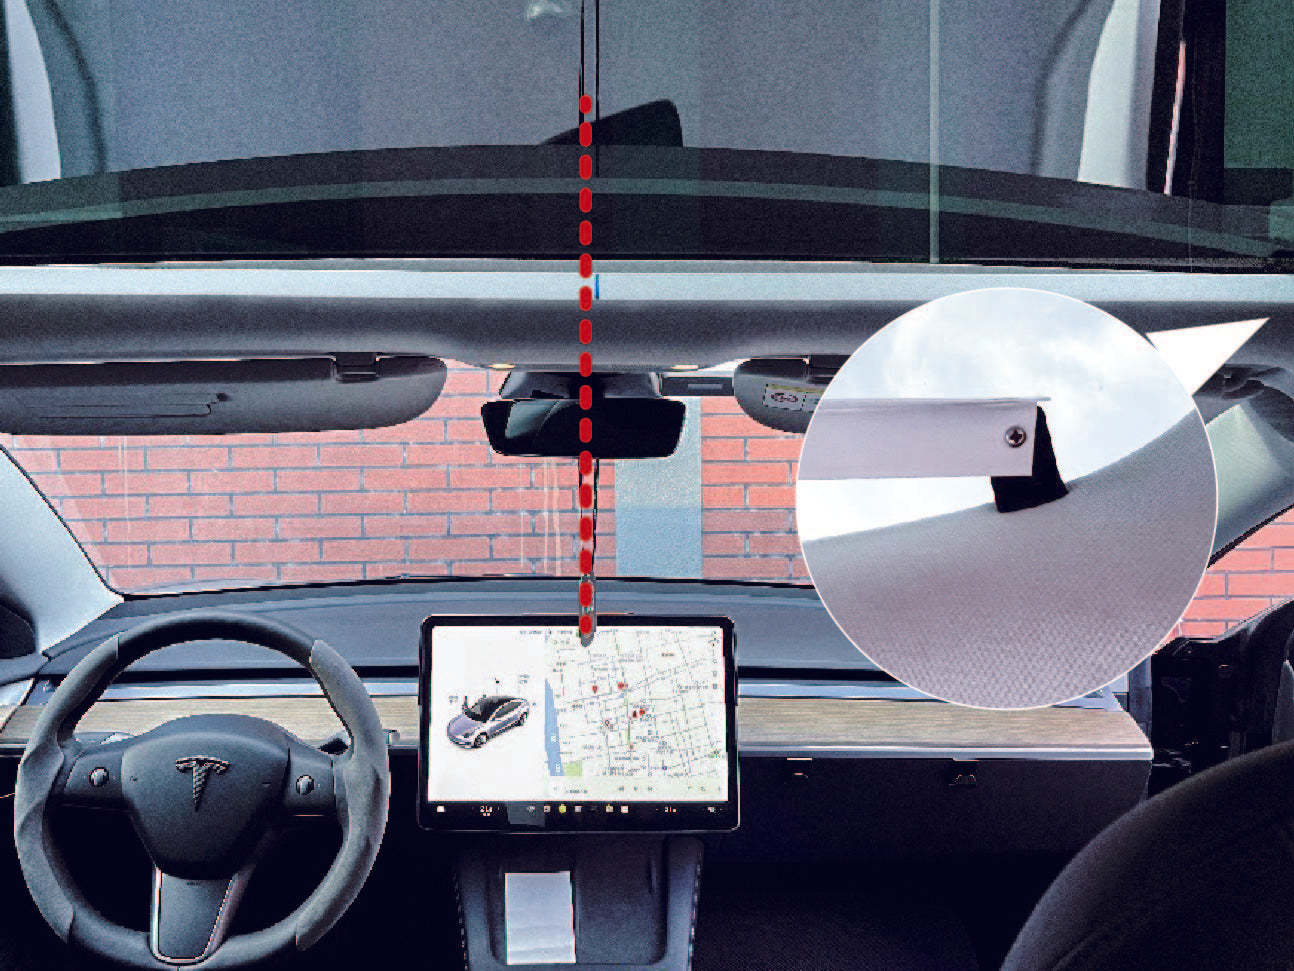
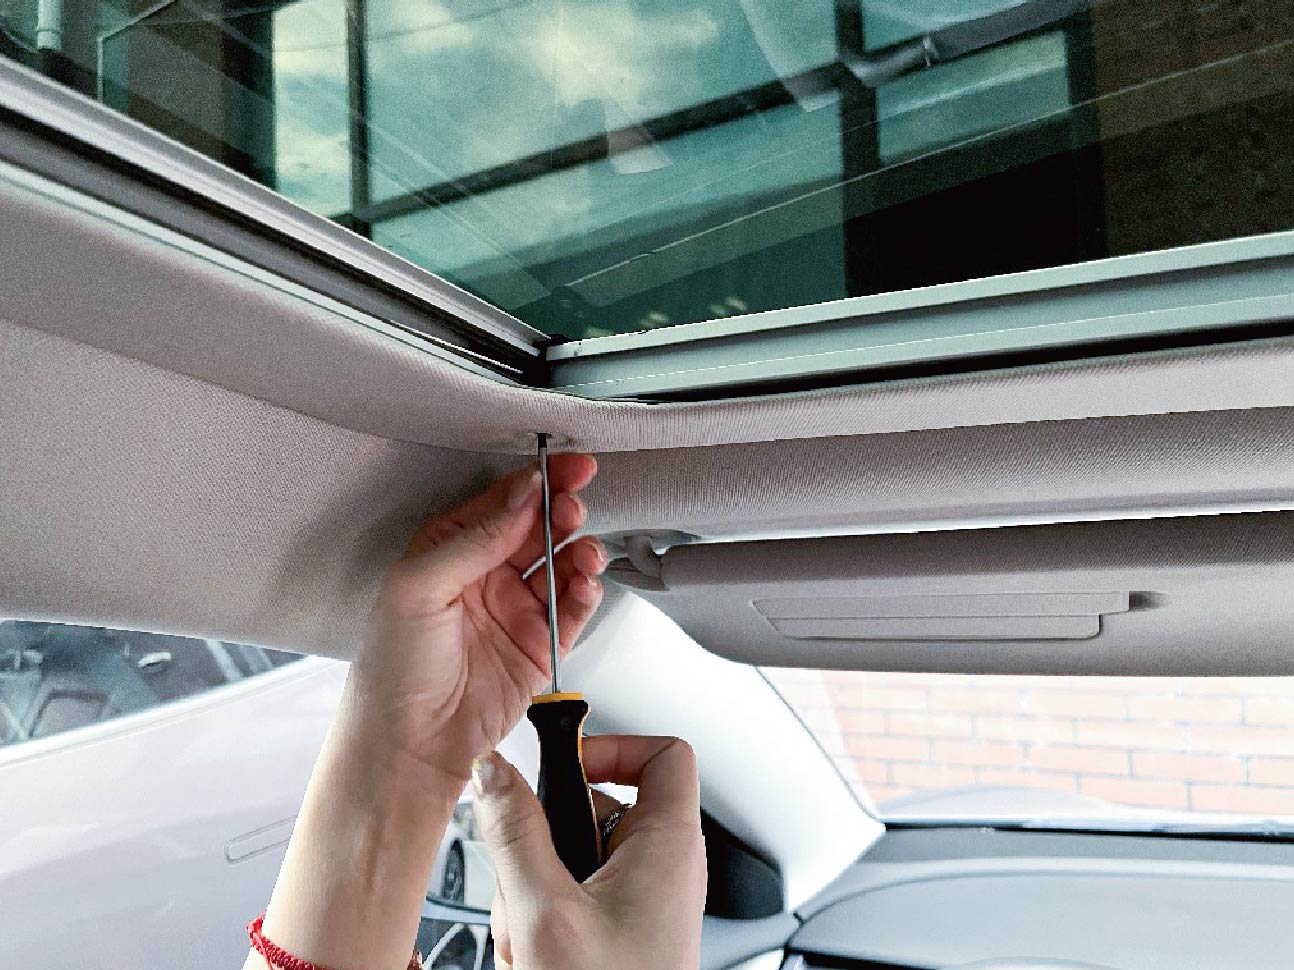
Through the fixing hole located at the front of the sunshade, use provided screwdriver to find the screw hole in the black front clip. If having any trouble doing so, push sunshade closer to the roof, or adjust the black clip a little bit. (This step is very critical)
Fasten up the sunshade to the clip with provided front screw.
Front Shade
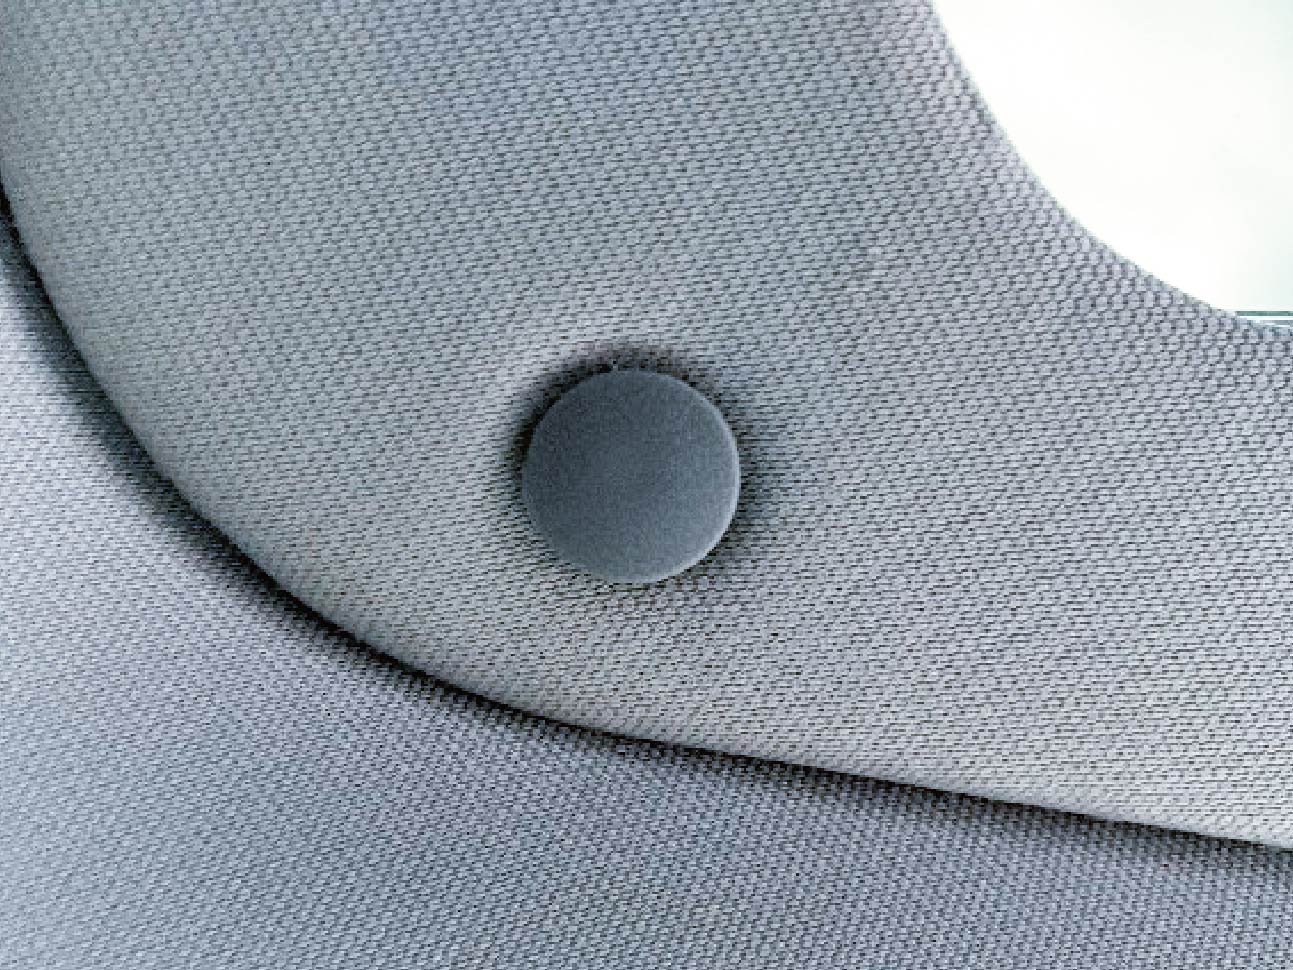
Insert provided decorative screw to cover the fixing hole.
Front Shade
Use clip locator to find location for both black front clips: make sure the mark in the middle aligns with the emergency light button. Insert both black clips onto the roof.
Front Shade
Remove clip locator by loosening both screws on the black clips.
Front Shade
Find both plastic inserts located at the back of the sunshade. Turn the insert 180 degree backwards and fasten the insert using provided rear screw. Repeat to rotate both inserts.
Front Shade
Take the sunshade into the car cabin with both inserts facing the back of the car. Push both inserts into between the glass roof and the ceiling.
Front Shade
Through the fixing hole located at the front of the sunshade, use provided screwdriver to find the screw hole in the black front clip. If having any trouble doing so, push sunshade closer to the roof, or adjust the black clip a little bit. (This step is very critical)
Fasten up the sunshade to the clip with provided front screw.
Front Shade
Insert provided decorative screw to cover the fixing hole.
Rear Shade
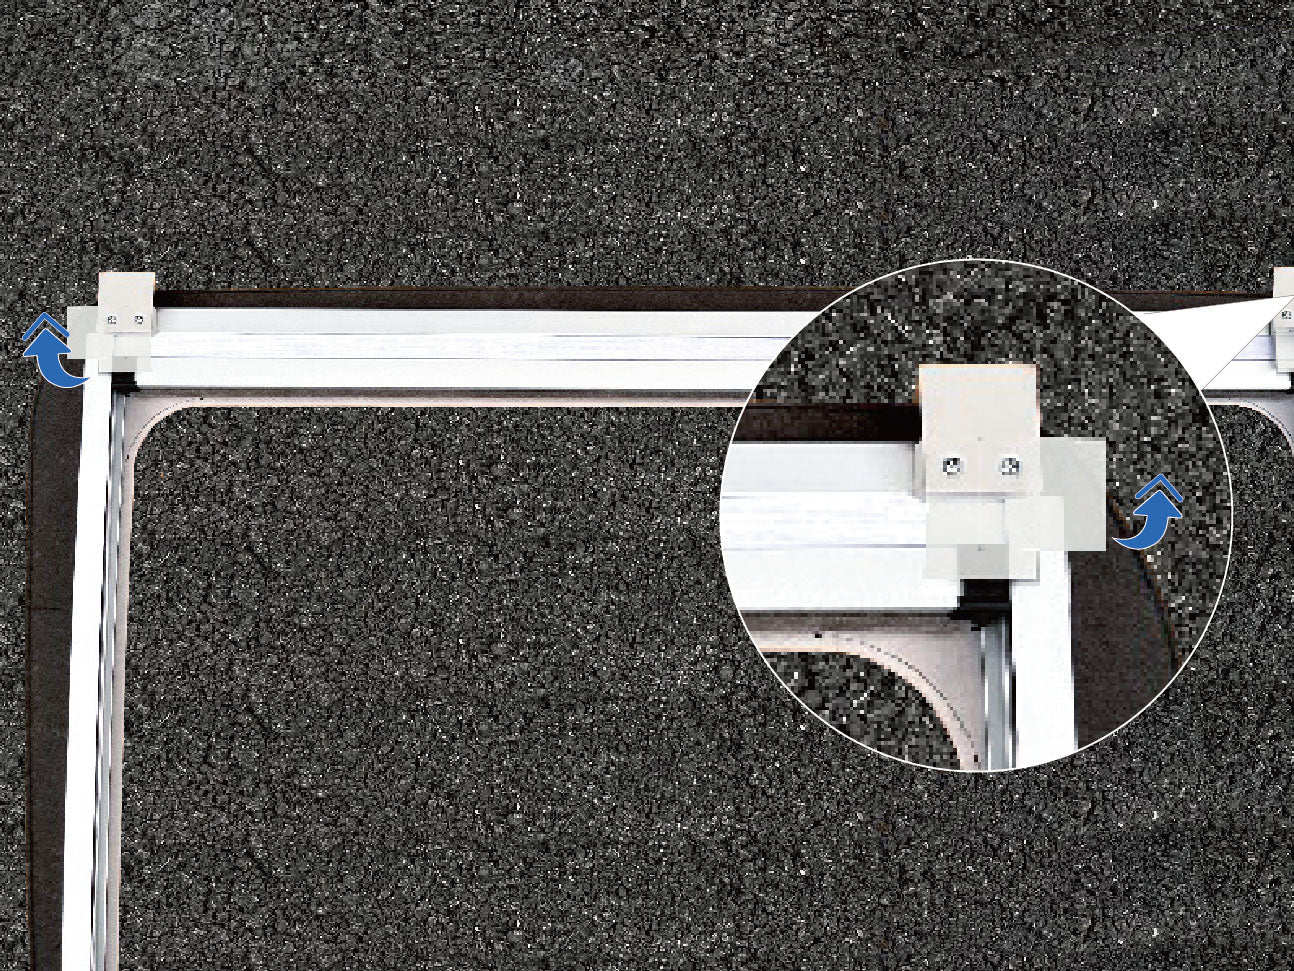
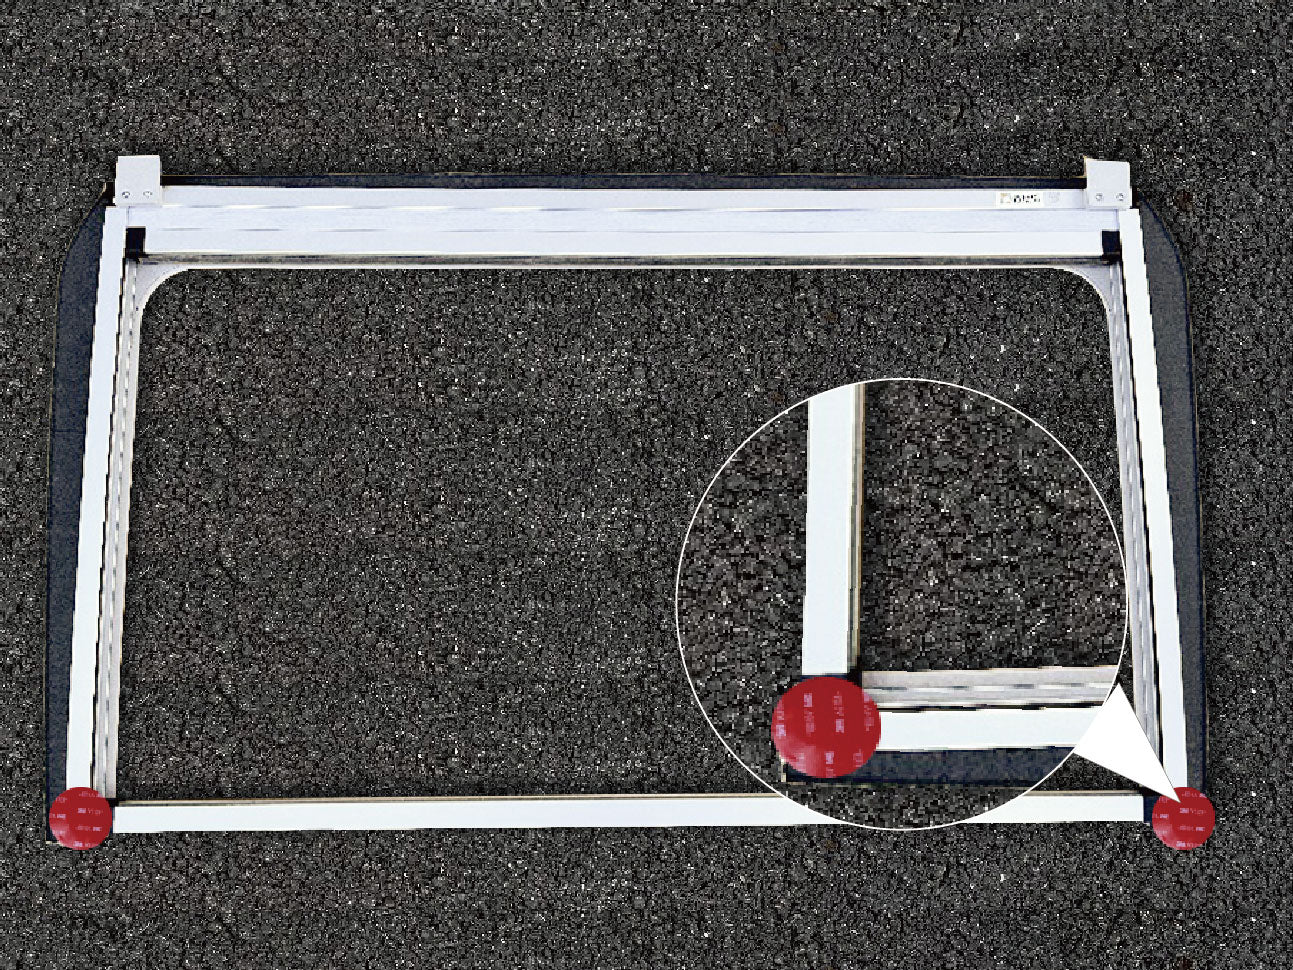
Find both inserts located at the back of the rear shade. Turn the insert 180 degree backwards and fasten the insert using provided rear screw. Repeat to rotate both inserts.
Rear Shade
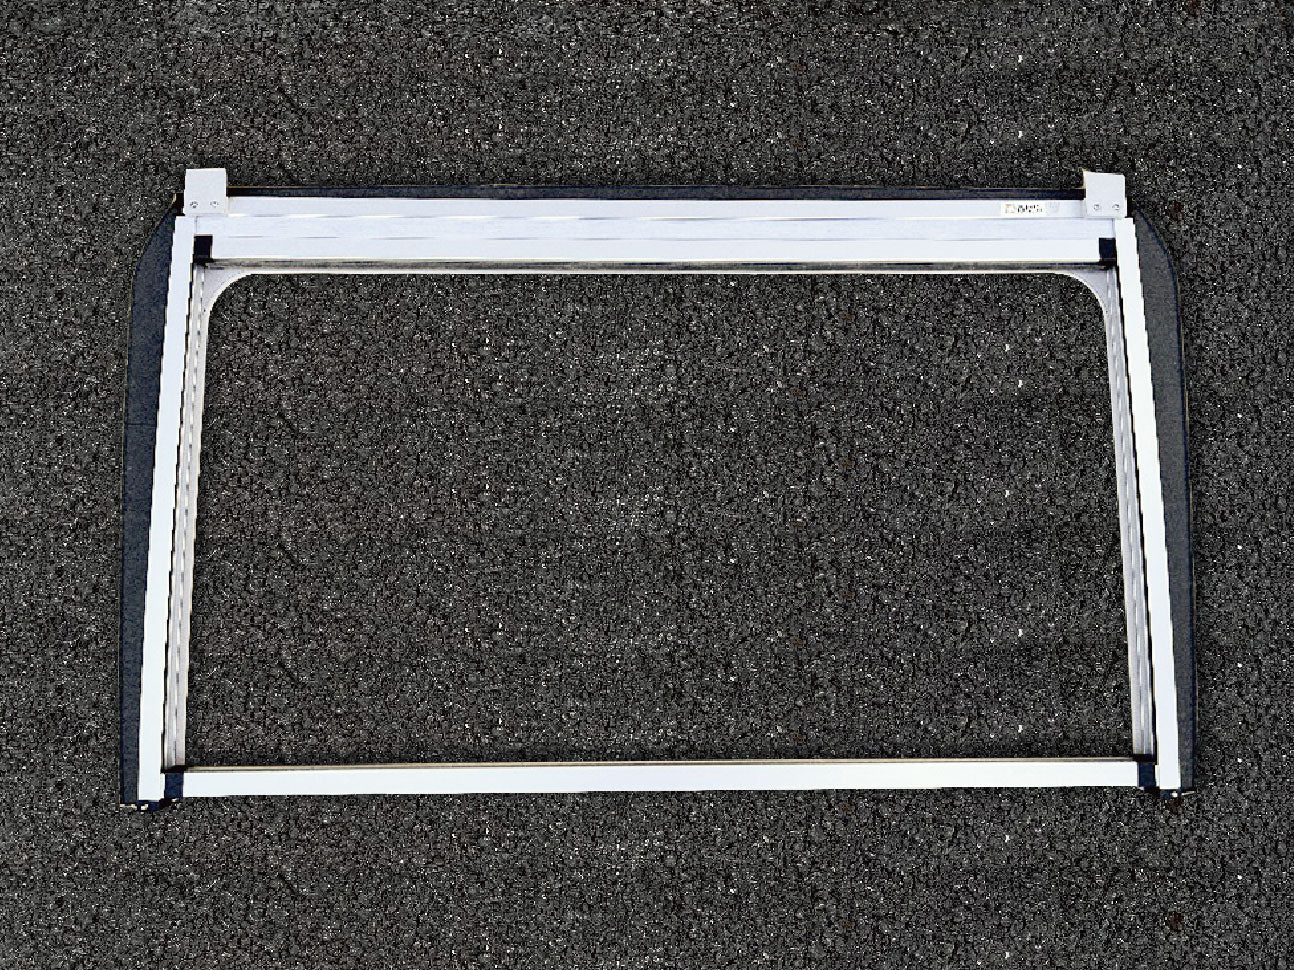
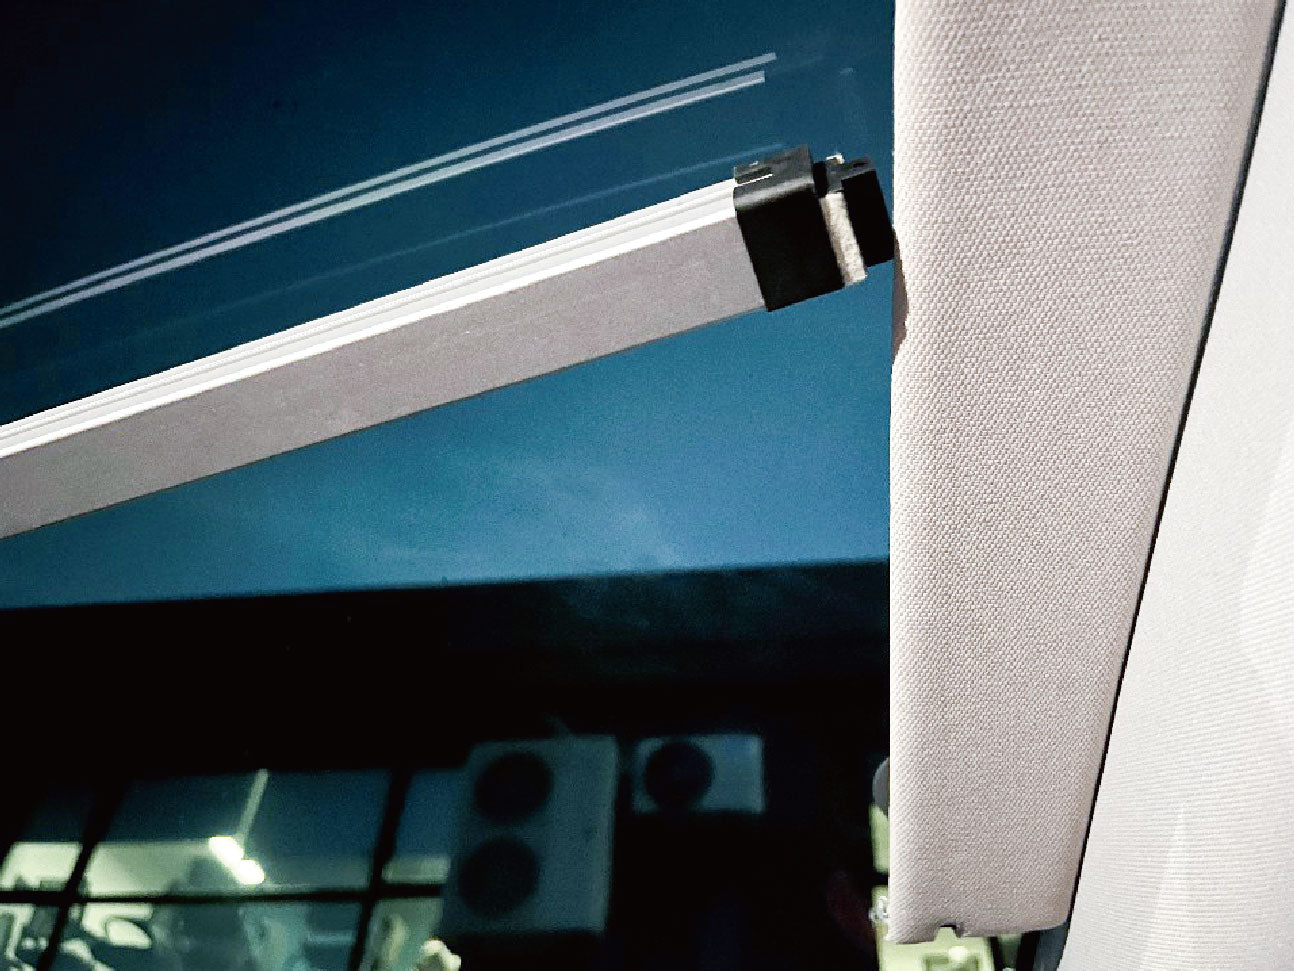
Insert aluminum supporting stick and push it to the end. (Supporting stick is used to prevent the opening being too wide or too close)
Rear Shade
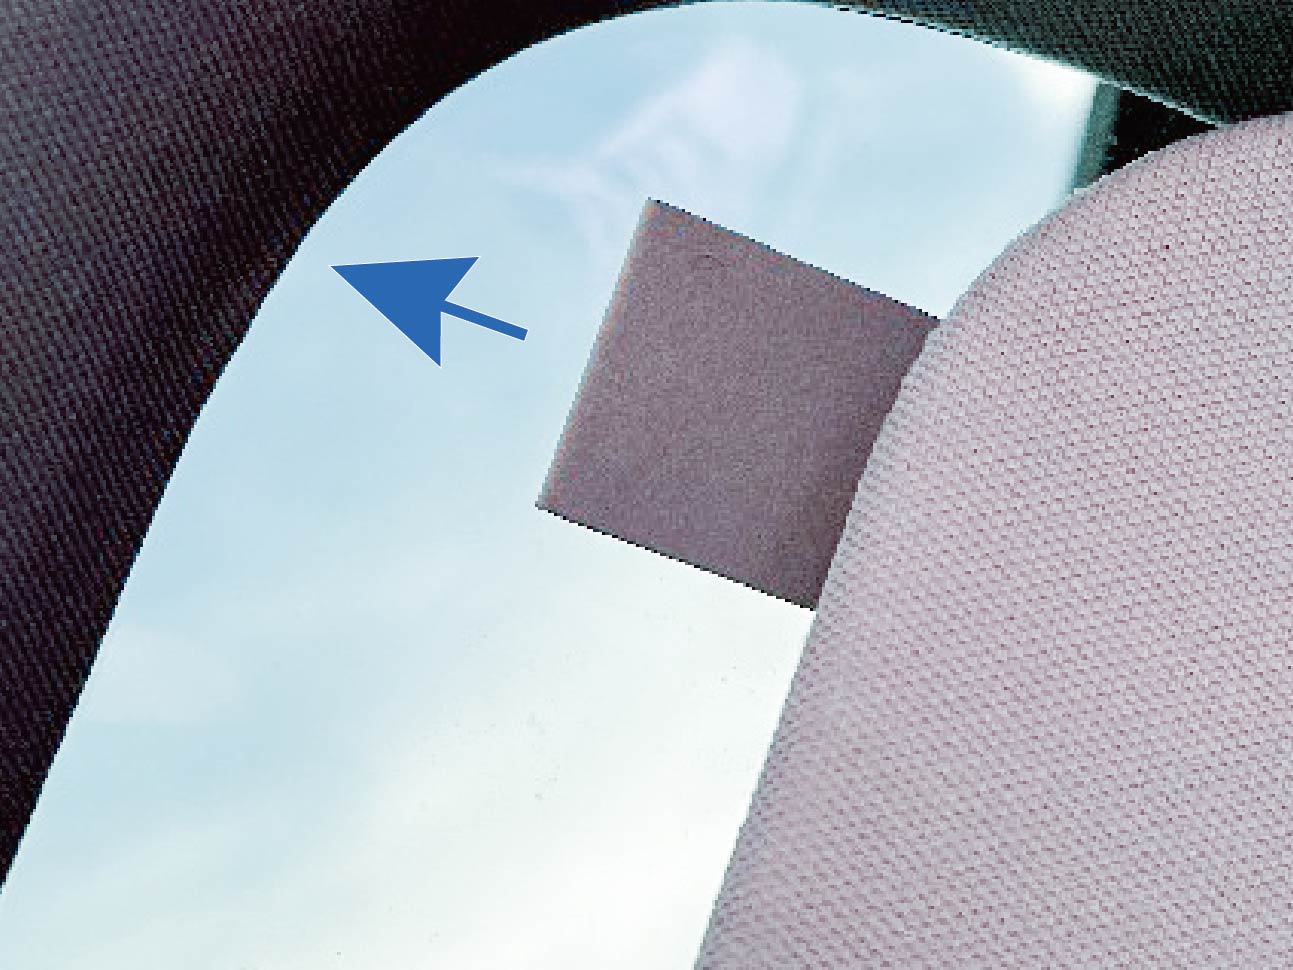
Fasten both 3M glue pads to the rear end of the sunshade.
Rear Shade
Take rear shade into the car cabin with both inserts facing the front of the car. Push both inserts into the between the glass roof and the ceiling.

Rear Shade
Push both sides of the sunshade close to the rear glass roof to find the area where 3M glue pad will stick to the glass. Use adhesion promoting wipe to wipe that area. Repeat to wipe both sides.
Rear Shade
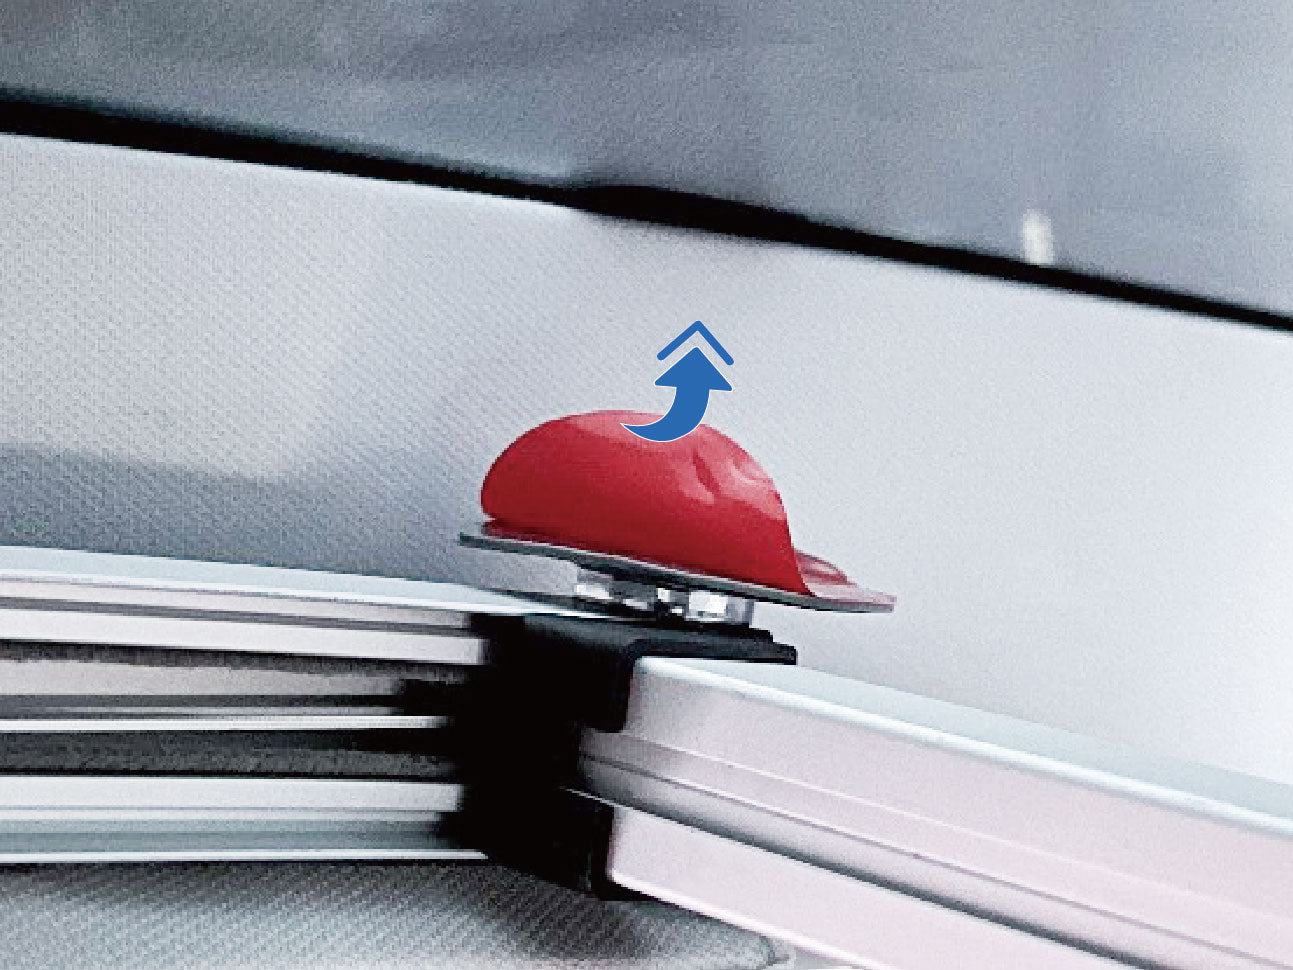
Push both 3M glue pads to make them stick to the glass roof.
Rear Shade
Gently remove the aluminum supporting stick from the shade.
Rear Shade
Find both inserts located at the back of the rear shade. Turn the insert 180 degree backwards and fasten the insert using provided rear screw. Repeat to rotate both inserts.
Rear Shade
Insert aluminum supporting stick and push it to the end. (Supporting stick is used to prevent the opening being too wide or too close)
Rear Shade
Fasten both 3M glue pads to the rear end of the sunshade.
Rear Shade
Take rear shade into the car cabin with both inserts facing the front of the car. Push both inserts into the between the glass roof and the ceiling.
Rear Shade
Push both sides of the sunshade close to the rear glass roof to find the area where 3M glue pad will stick to the glass. Use adhesion promoting wipe to wipe that area. Repeat to wipe both sides.
Rear Shade
Push both 3M glue pads to make them stick to the glass roof.
Rear Shade
Gently remove the aluminum supporting stick from the shade.
FAQ
Will it make the skylight smaller after installation?
Our Fullshade is an add-on. Without removing the original car accessories, the space of the slide rail will be sacrificed, but it can be ignored.
Can it be removed after installation?
Obviously yes, it's just an add-on, but I think it will last a lifetime when you put it on, just turn it on when you need sunlight, it's very convenient.
Will installing this Fullshade damage my Tesla?
Our snap design will not cause damage to your Tesla at all and can be installed without damage.