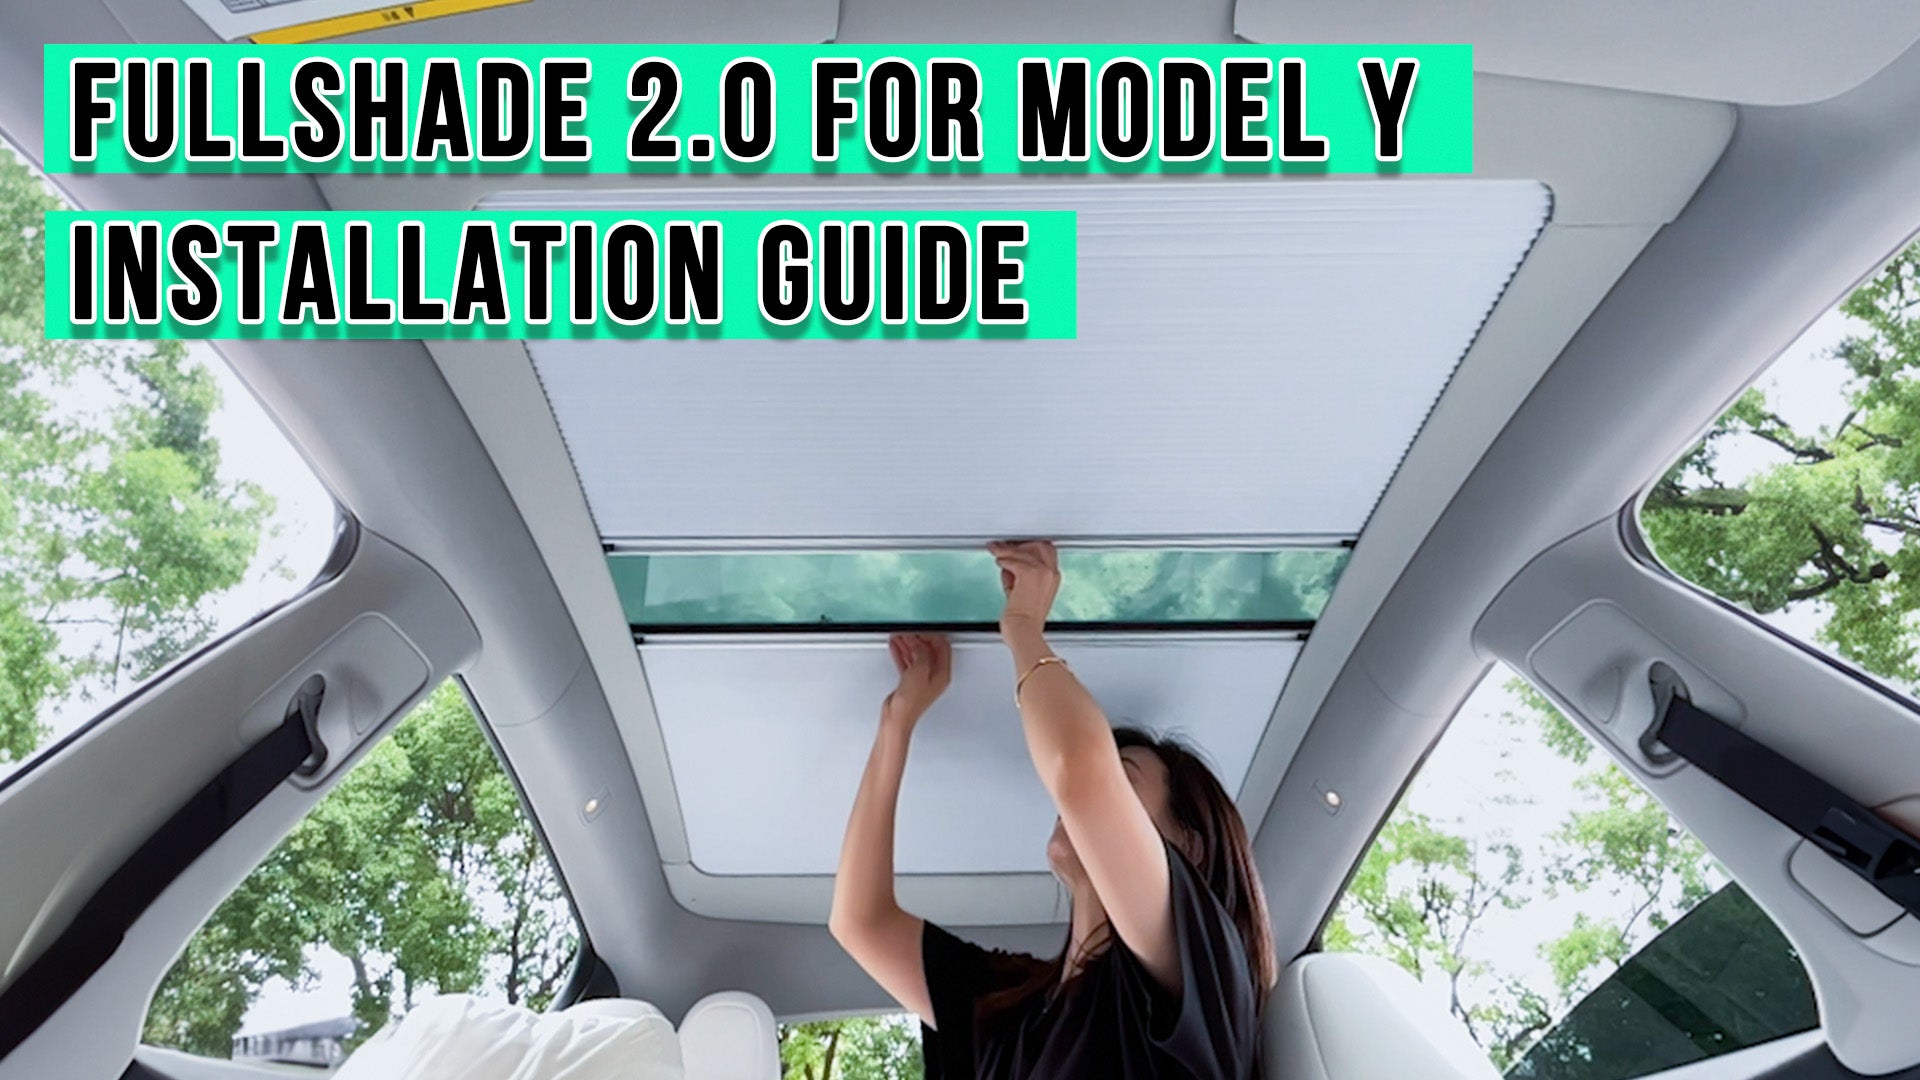
Installation Guide
For FullShade 2.0 | Model Y
01
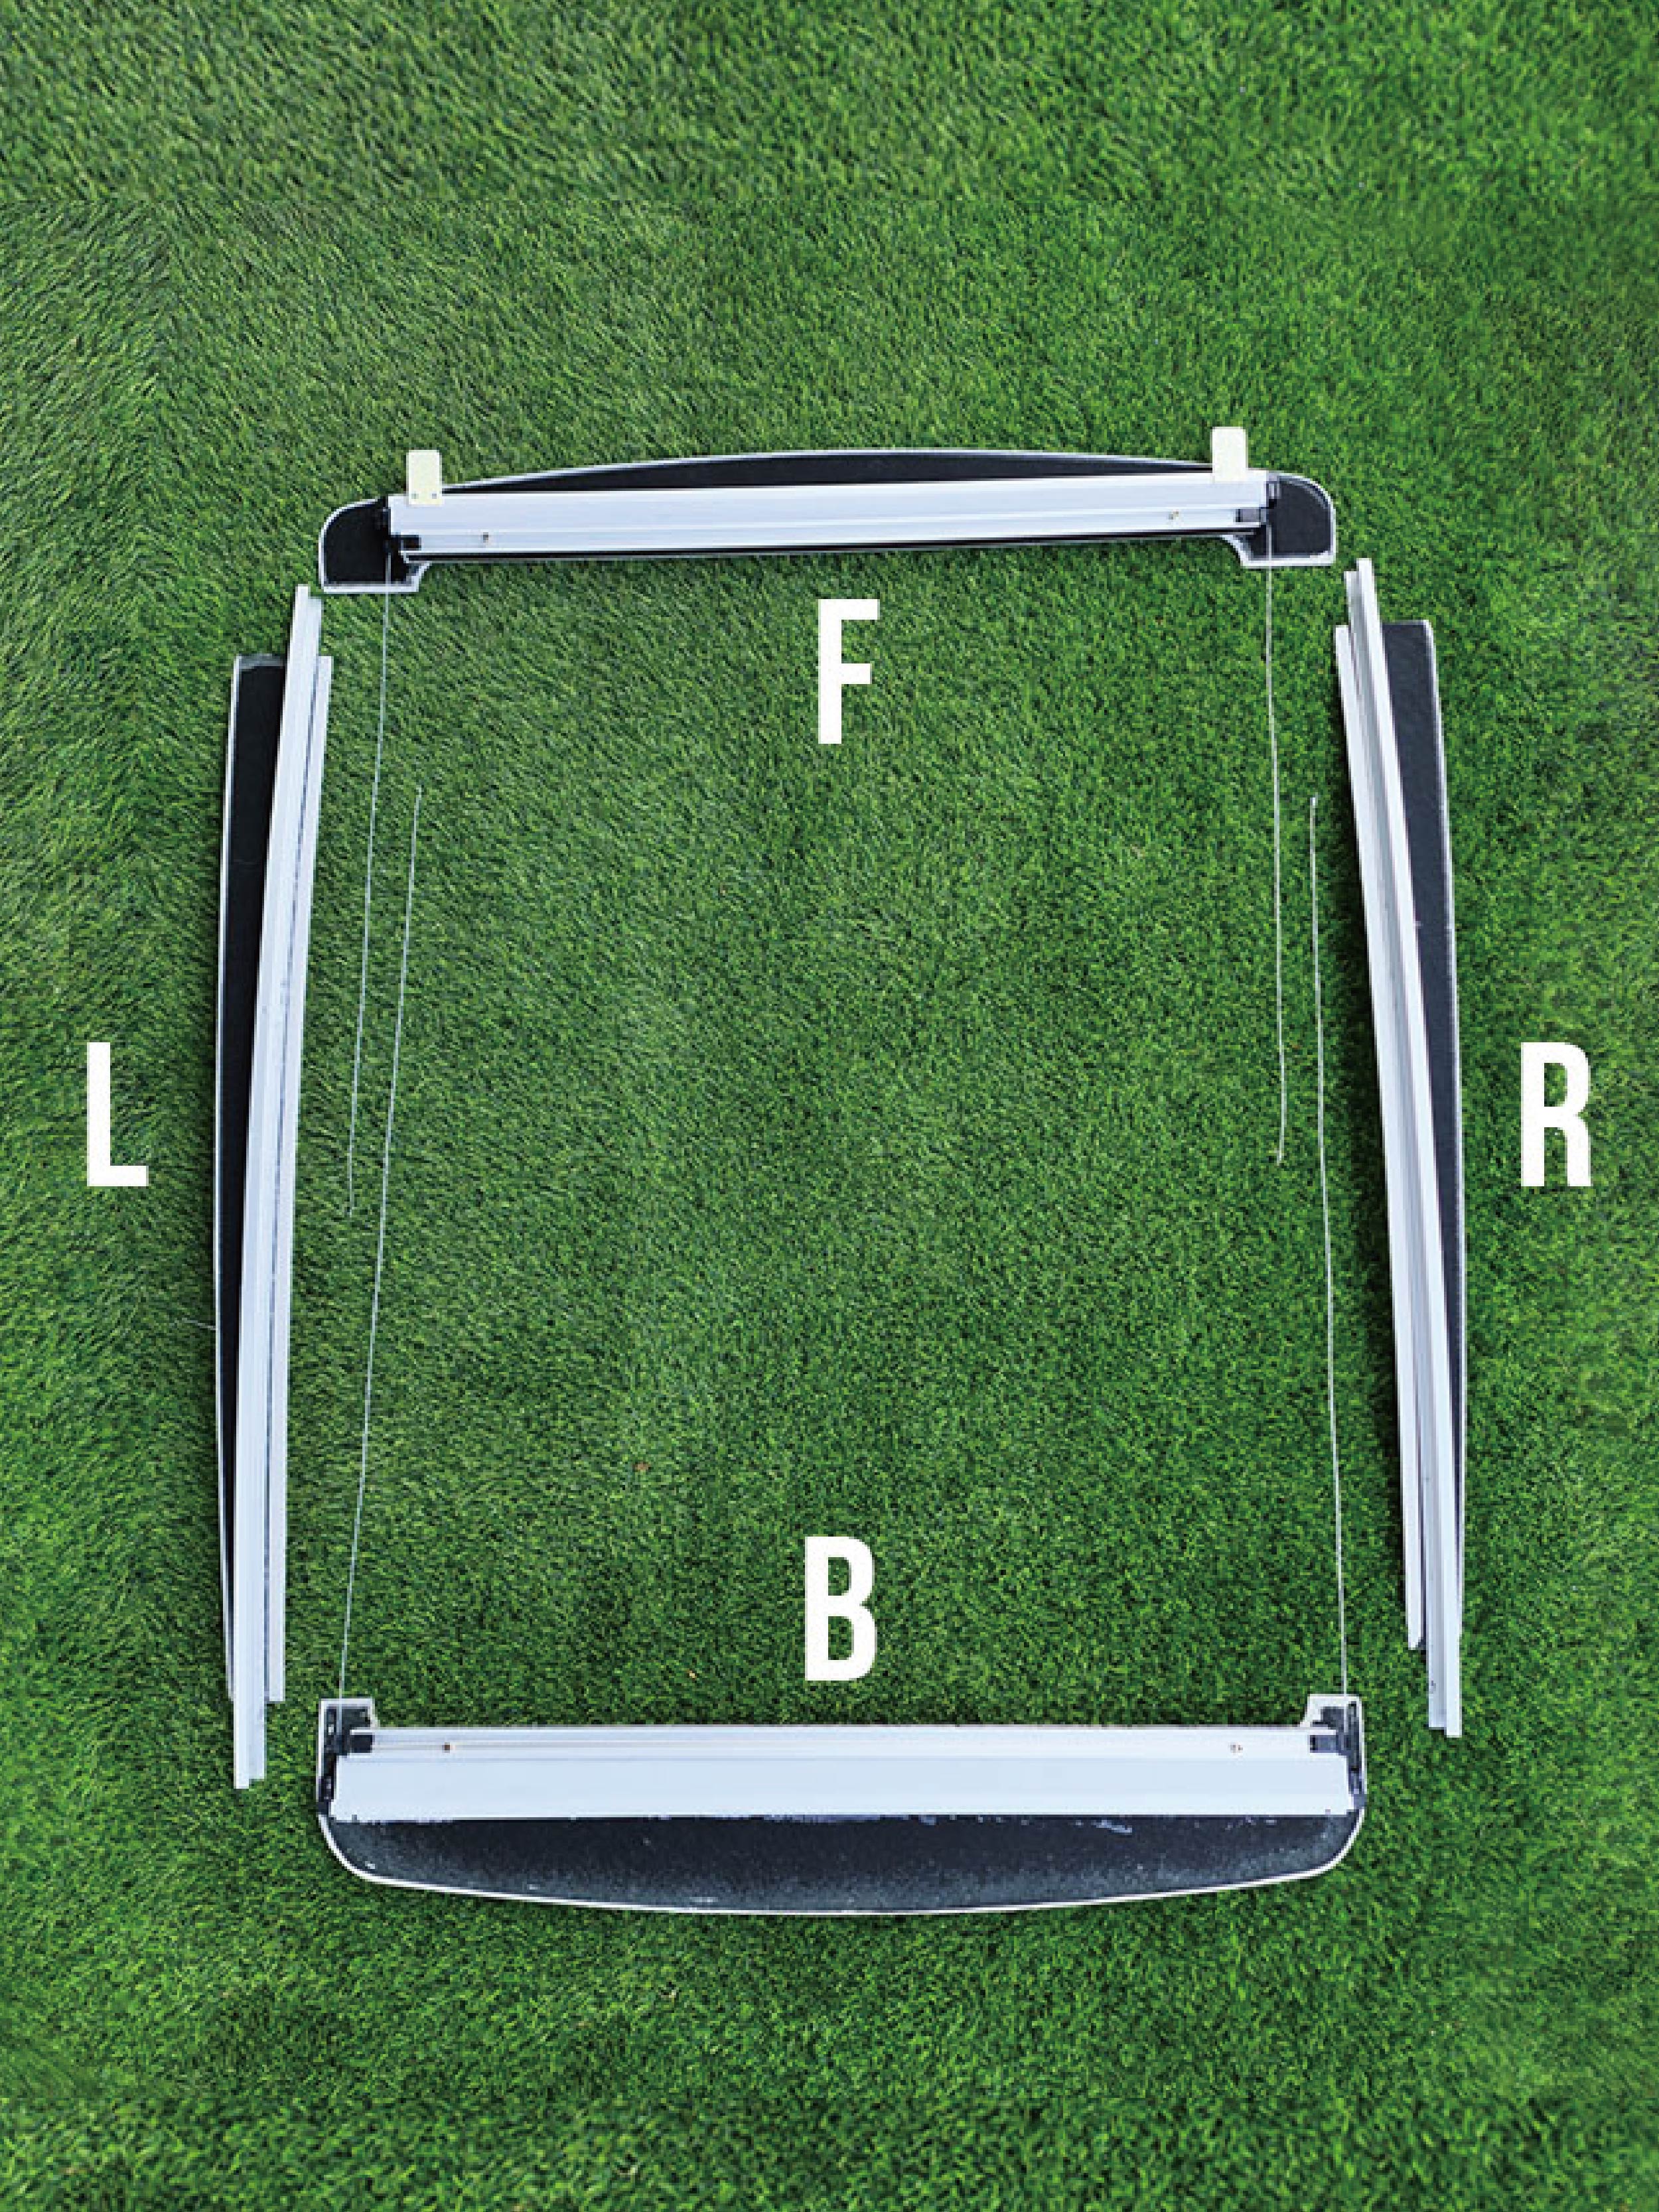
According to the markings on the four components, find the positions of the four components and place them in order.
( F - Front; B - Back; L- Left; R- Right )
02
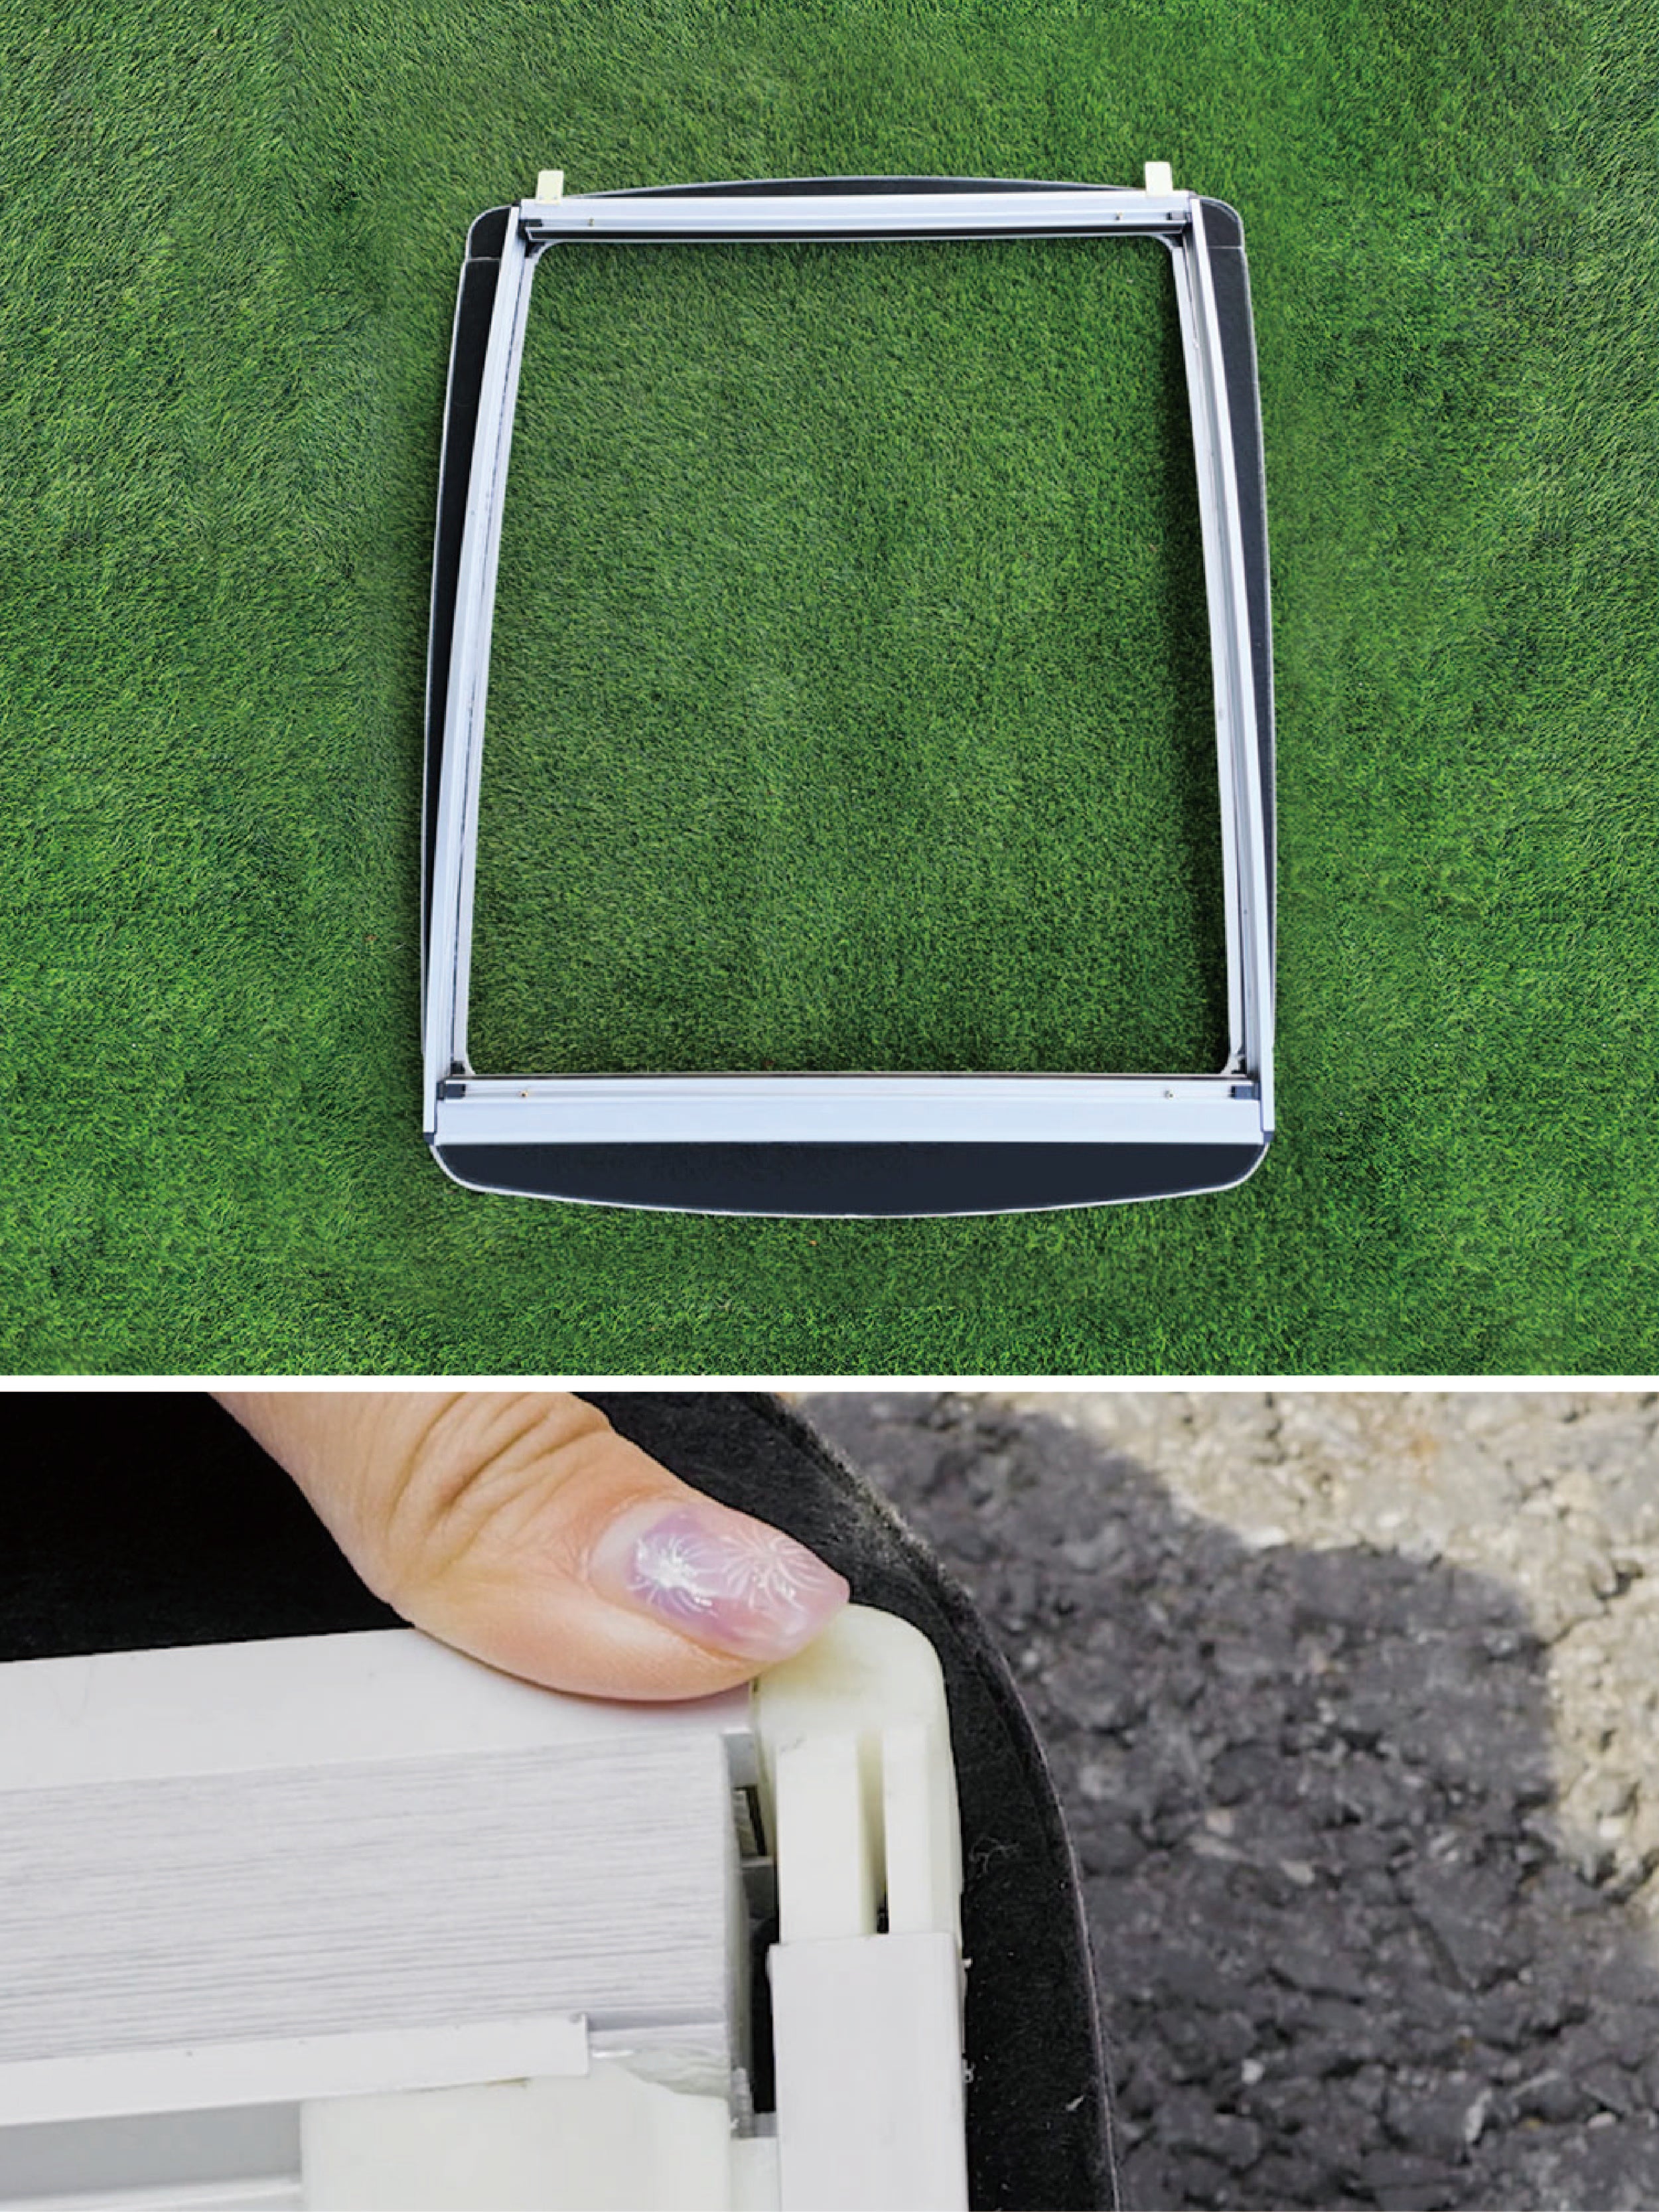
Assemble the four components together. (Note: During the assembly process, be aware of the ropes and take them out to prevent them from getting caught in the rails).
03
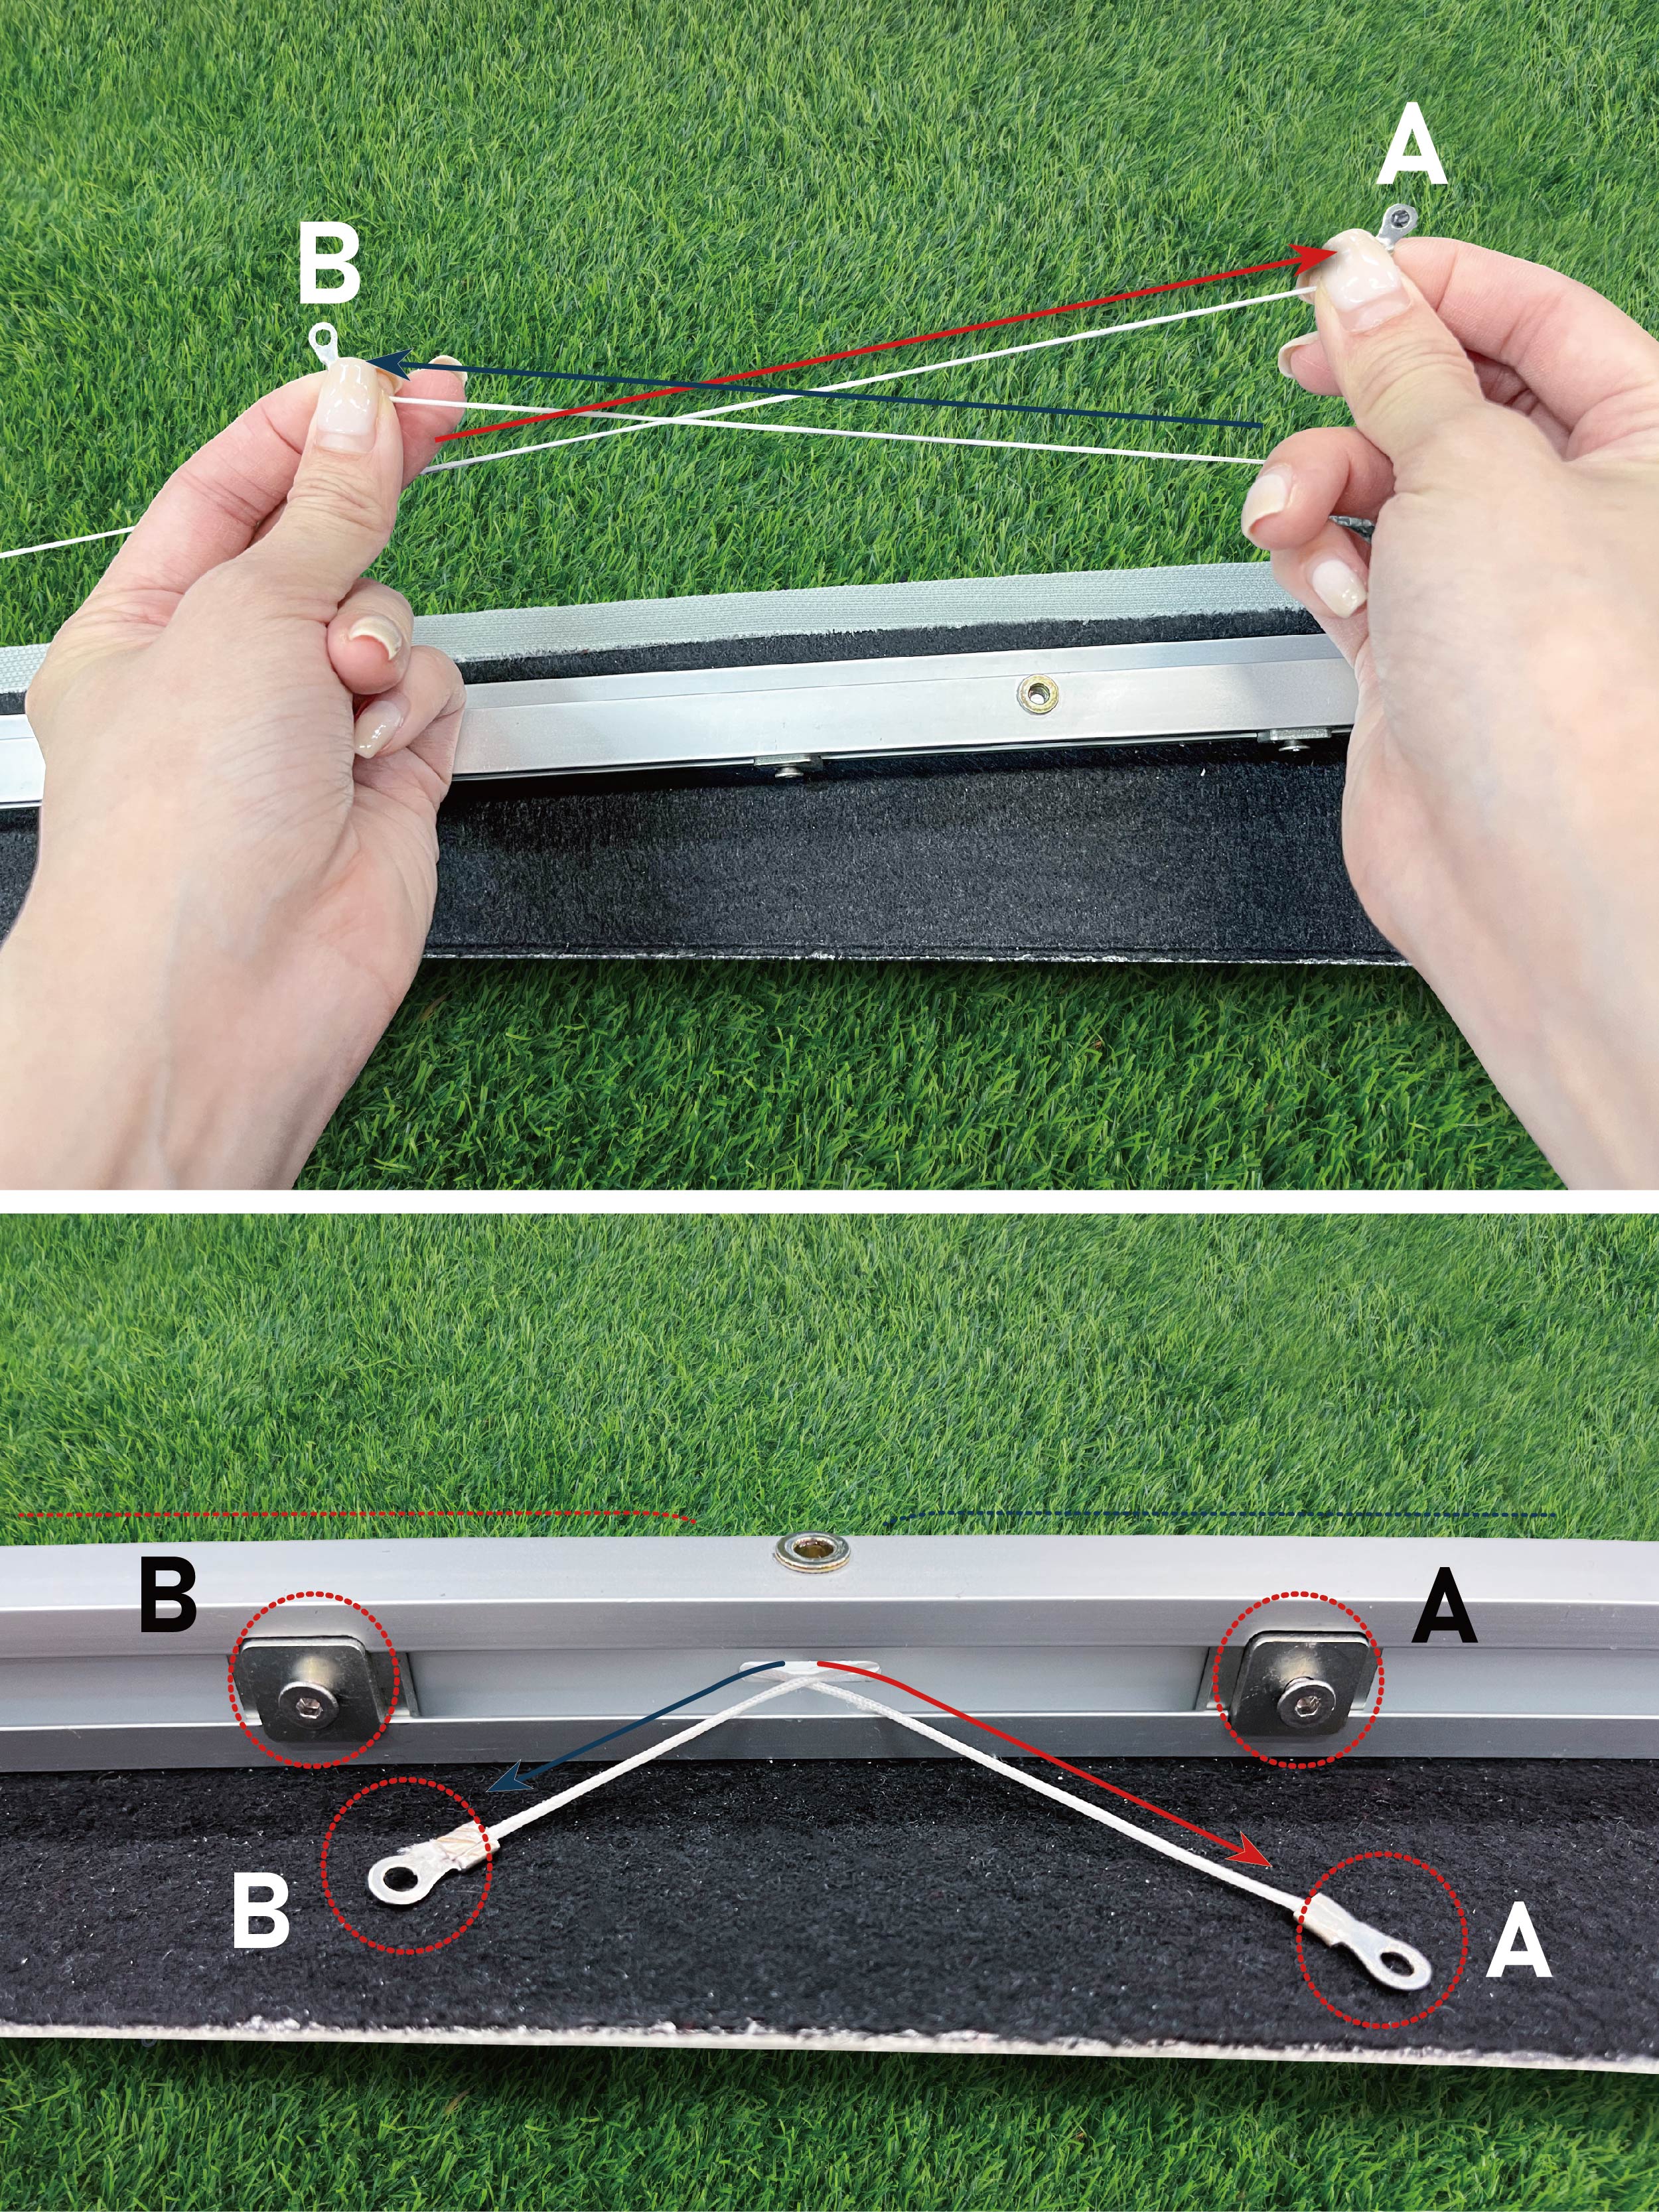
Find the two ropes on the right side of the sunshade, and pass rope A and rope B from the inside out. The final state should look like this. Repeat and pass the two ropes on the left side from the inside out.

04
Unscrew the A screw (on the right), after threading the A rope over the screw, screw it back tightly; Unscrew the B screw (on the left), after threading the B rope over the screw, screw it back tightly. During this process, it may be a bit tight, so you may need to gently pull and adjust the rope. The rope has a slight elasticity, so don't worry about breaking it, but it should be in a taut state.Repeat these steps for the other side to finish assembling the frame.
05
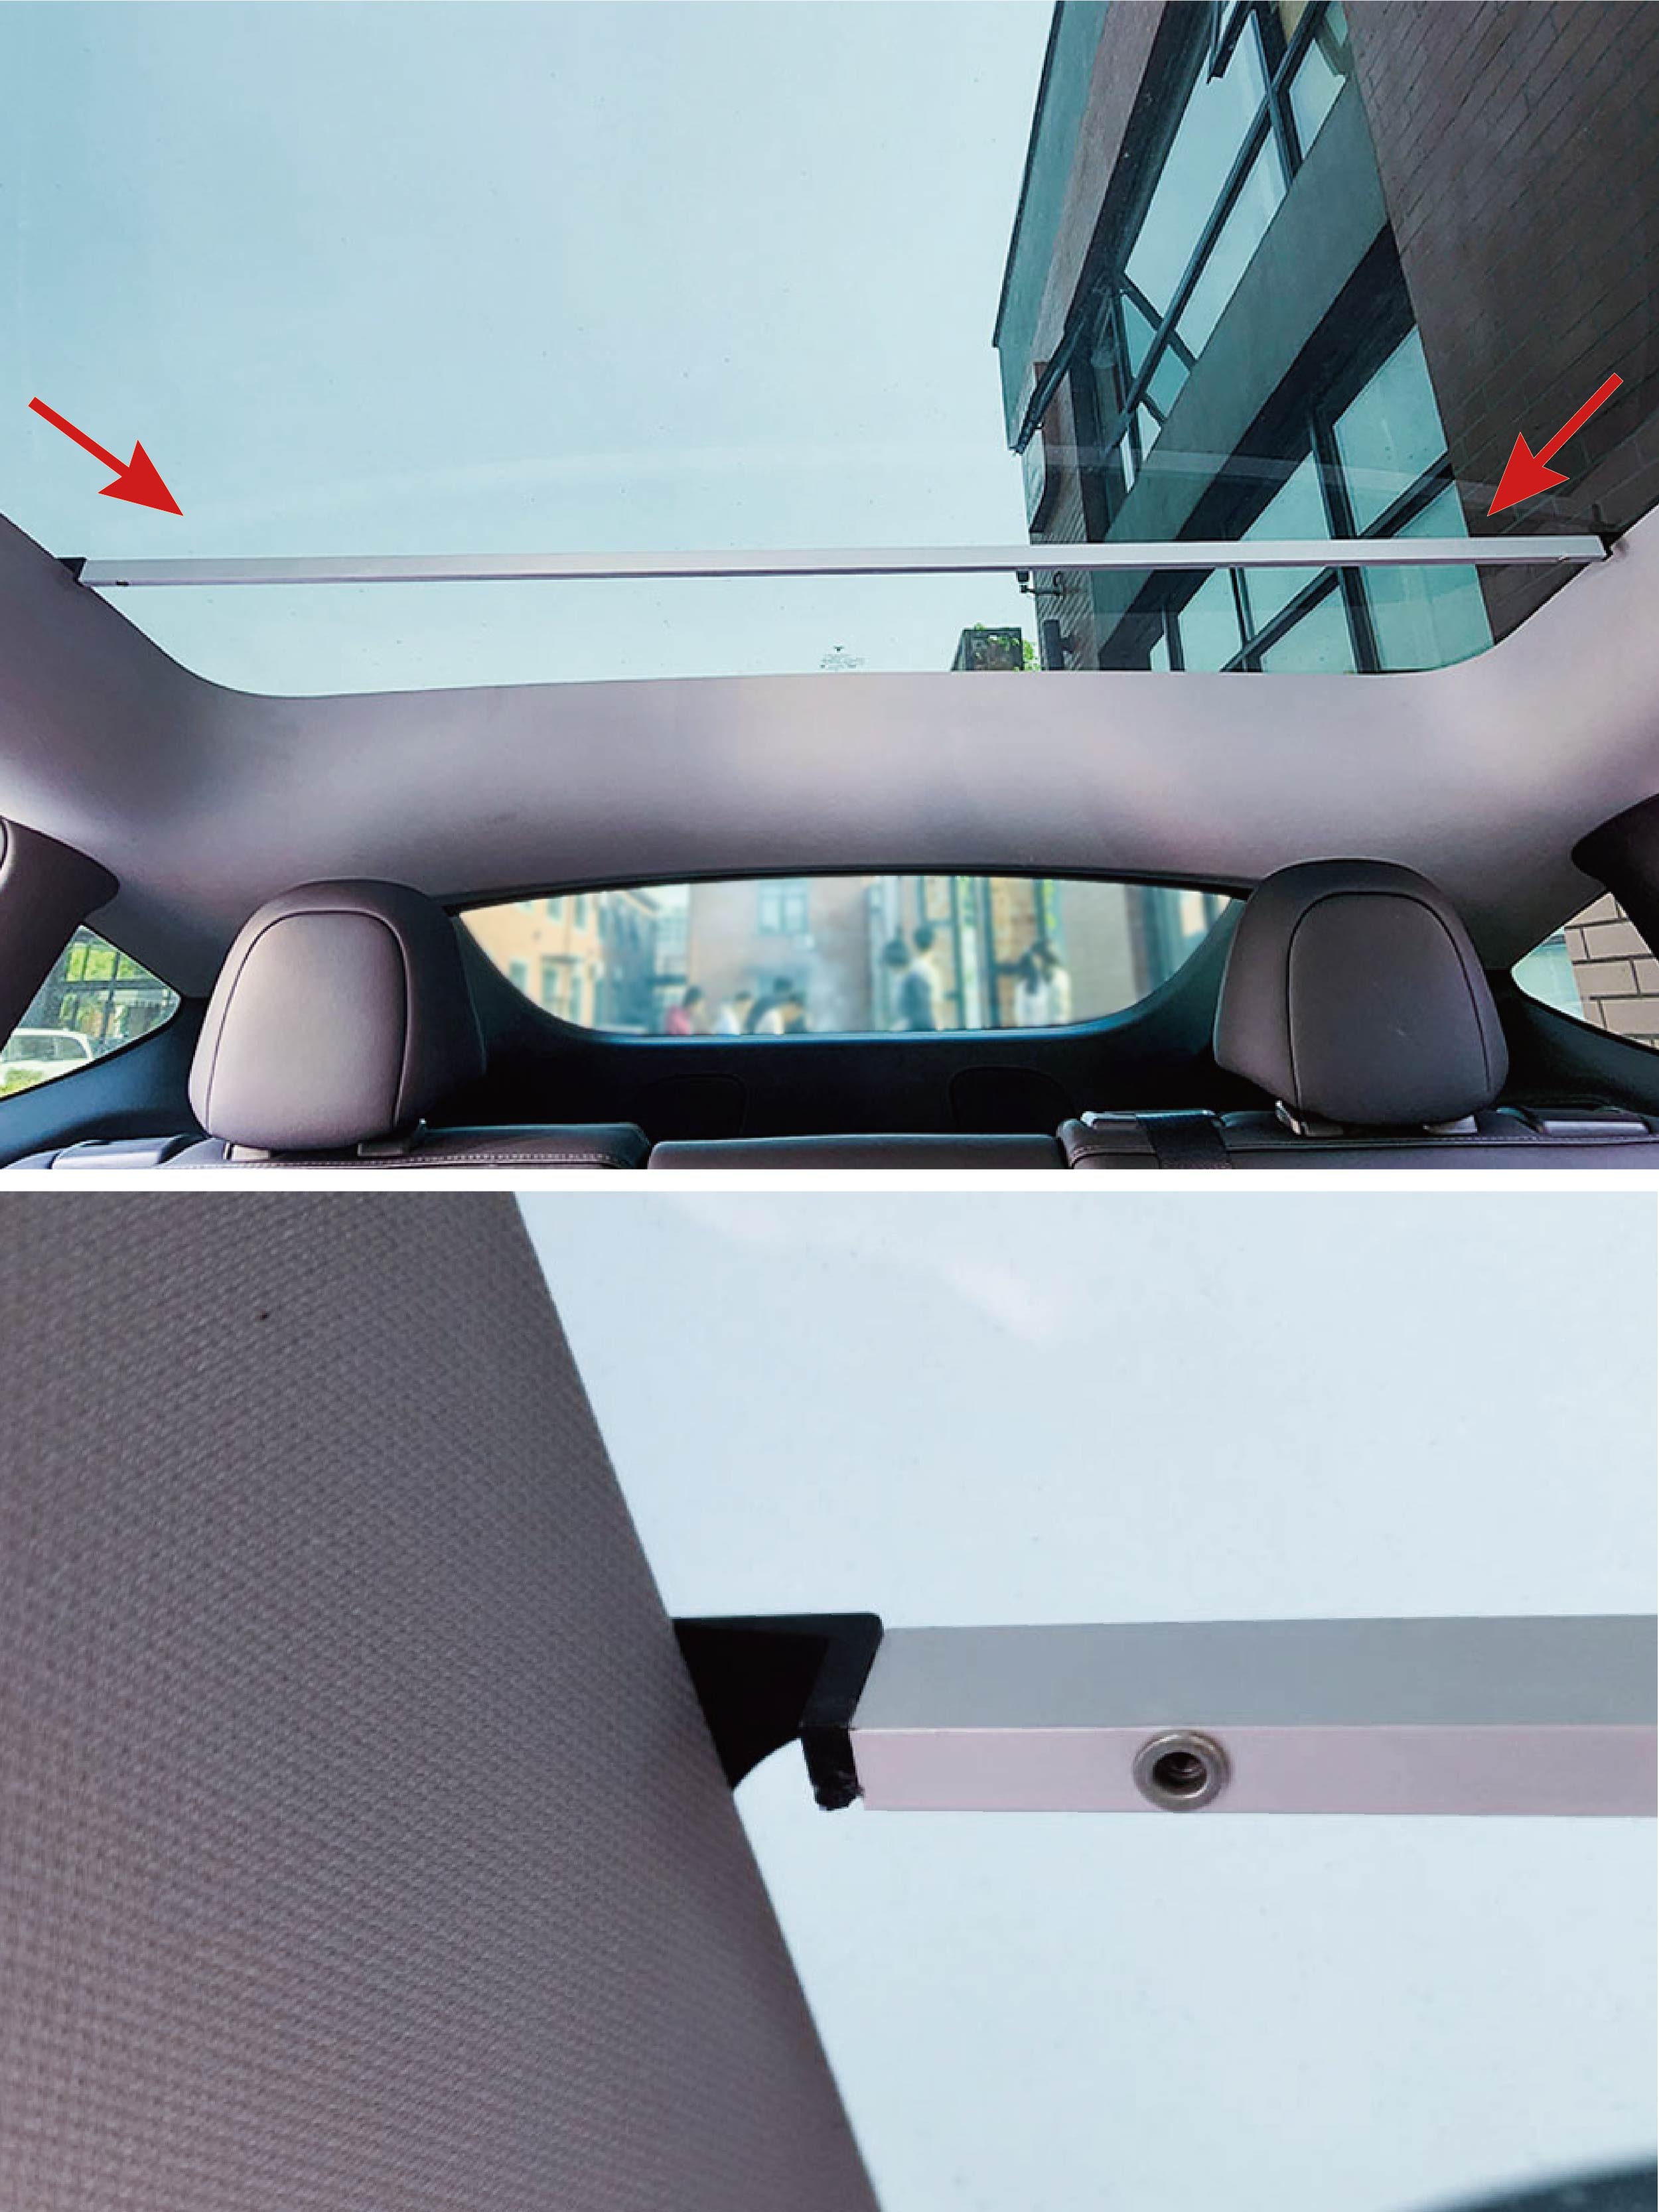
Enter the car with the aluminum rod, and insert the two ends of the rod to the car roof through the gap in the roof. Push the rod further towards the back of the car. Note: Make sure the direction of the mounting plate faces the back of the car, and the screw holes on the plate face downward.
06
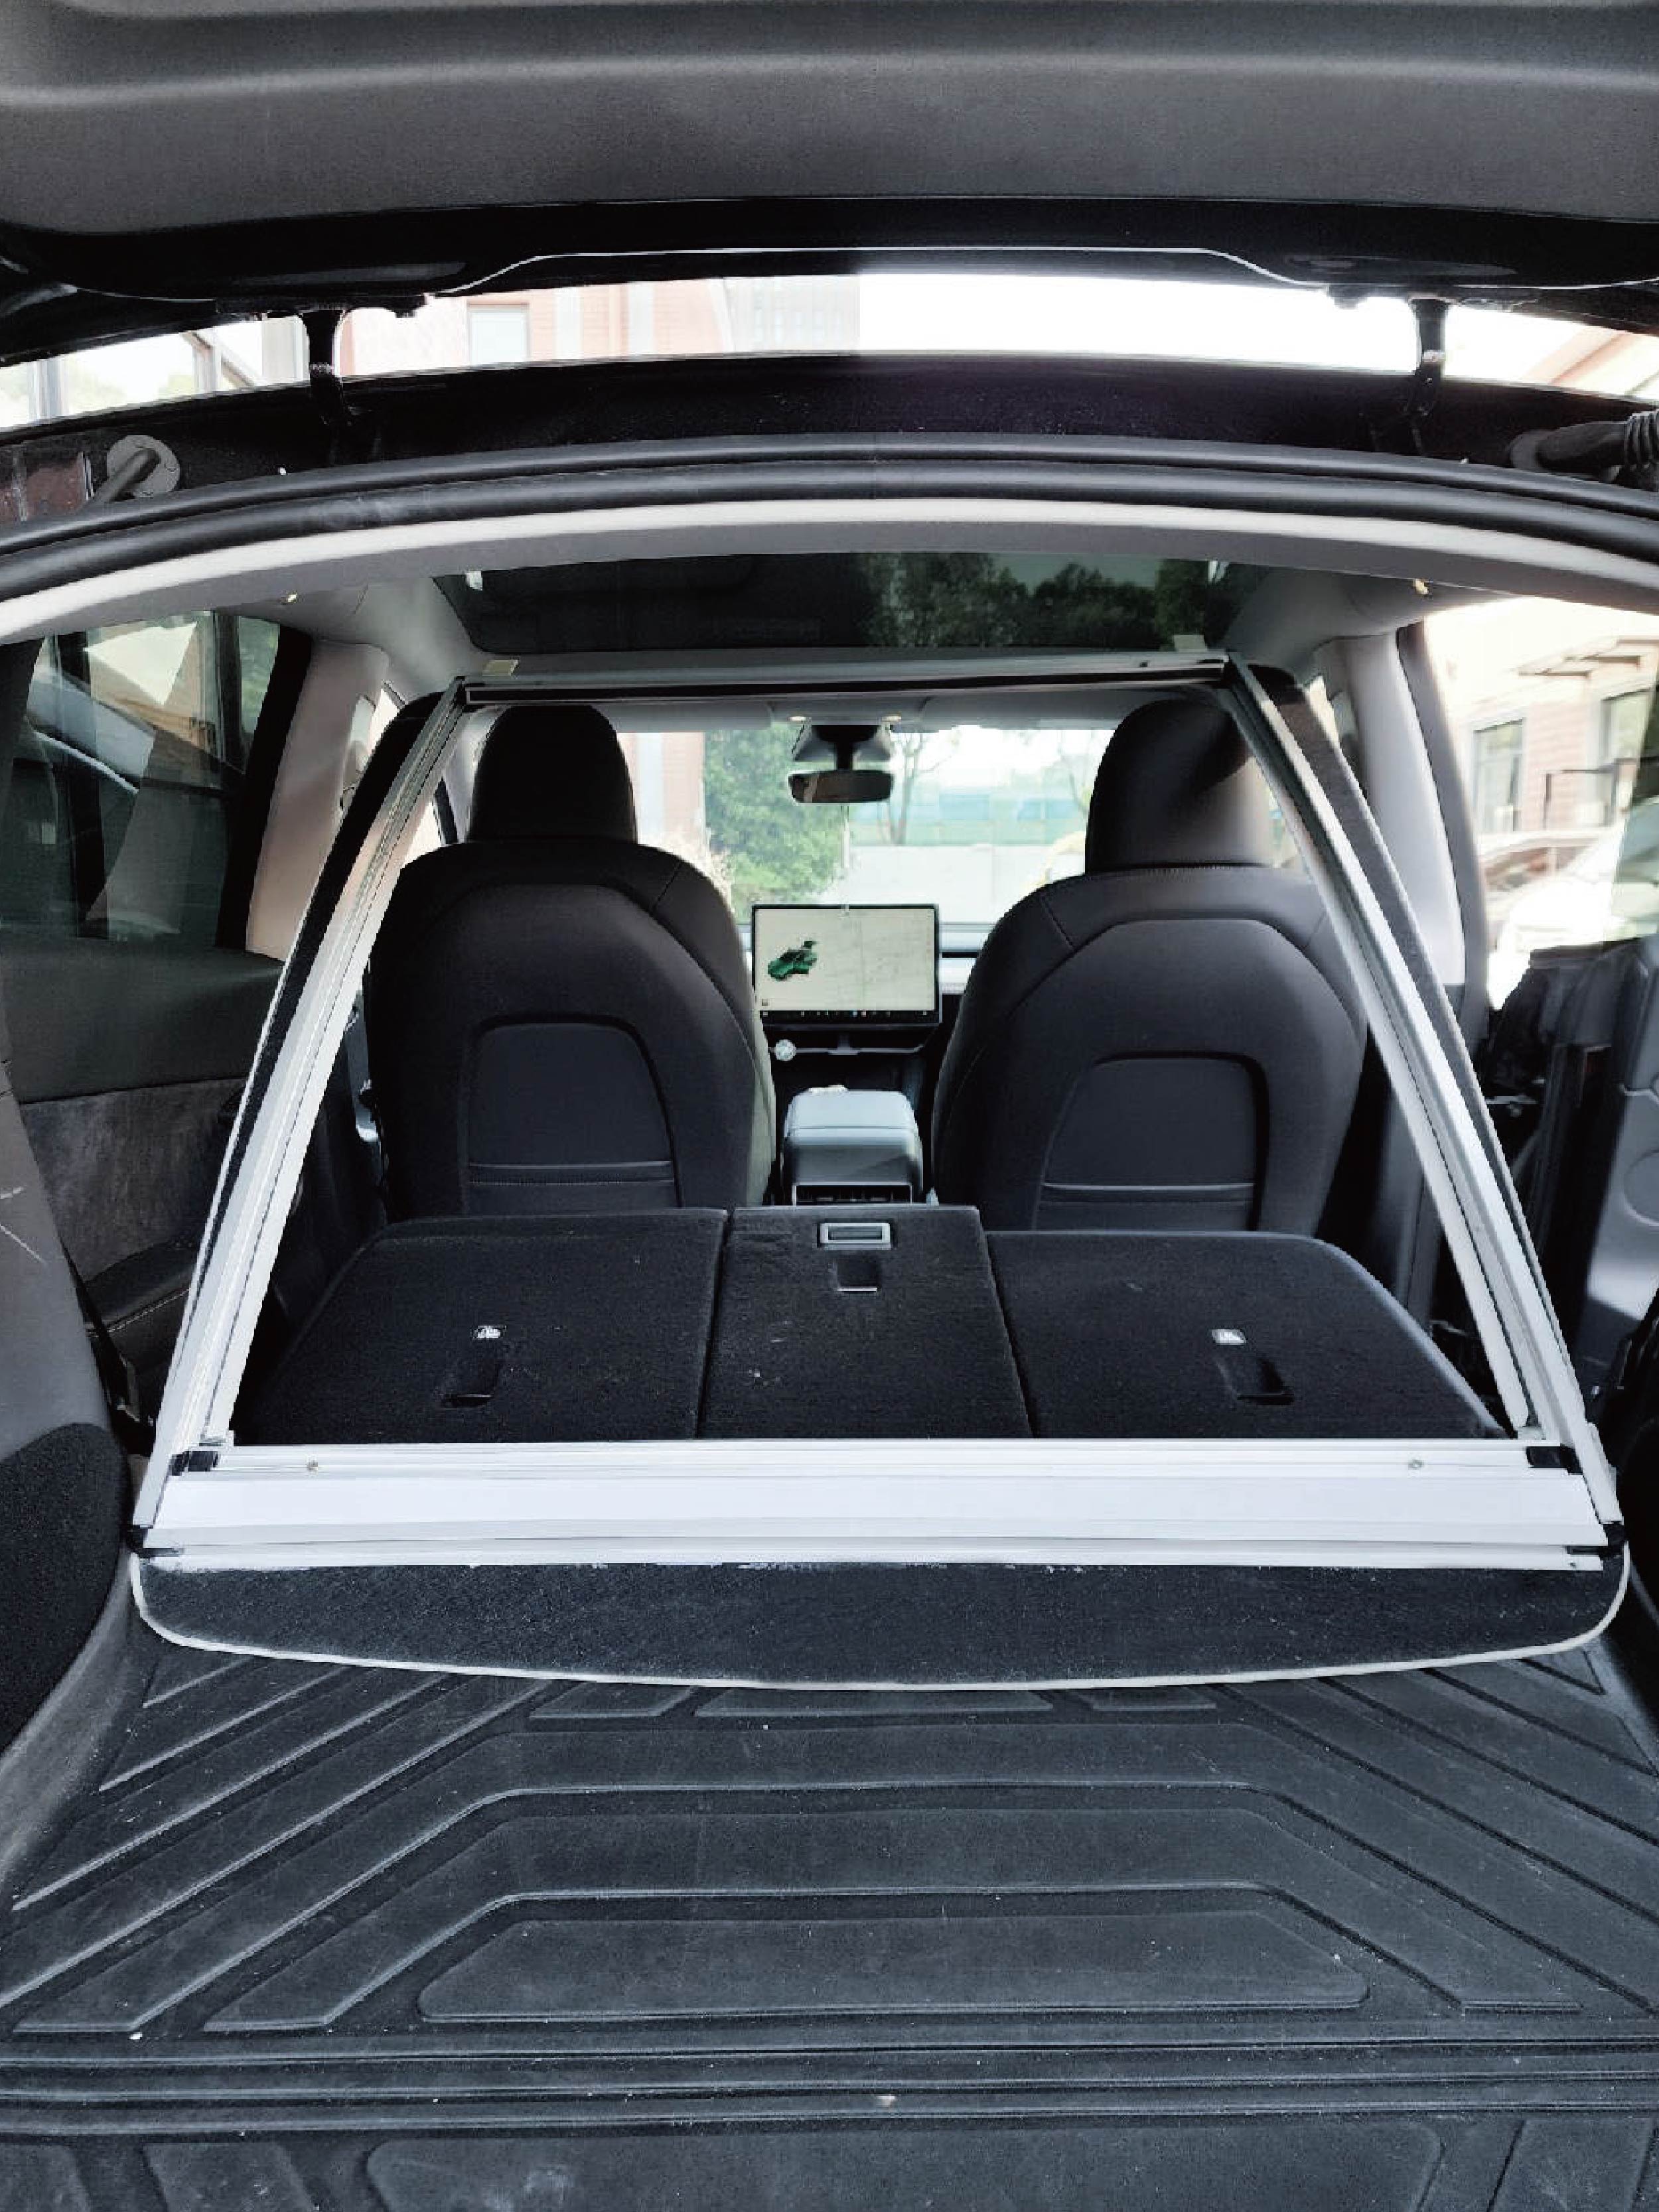
Take the sunshade into the car cabin with both inserts facing the front of the car.
07
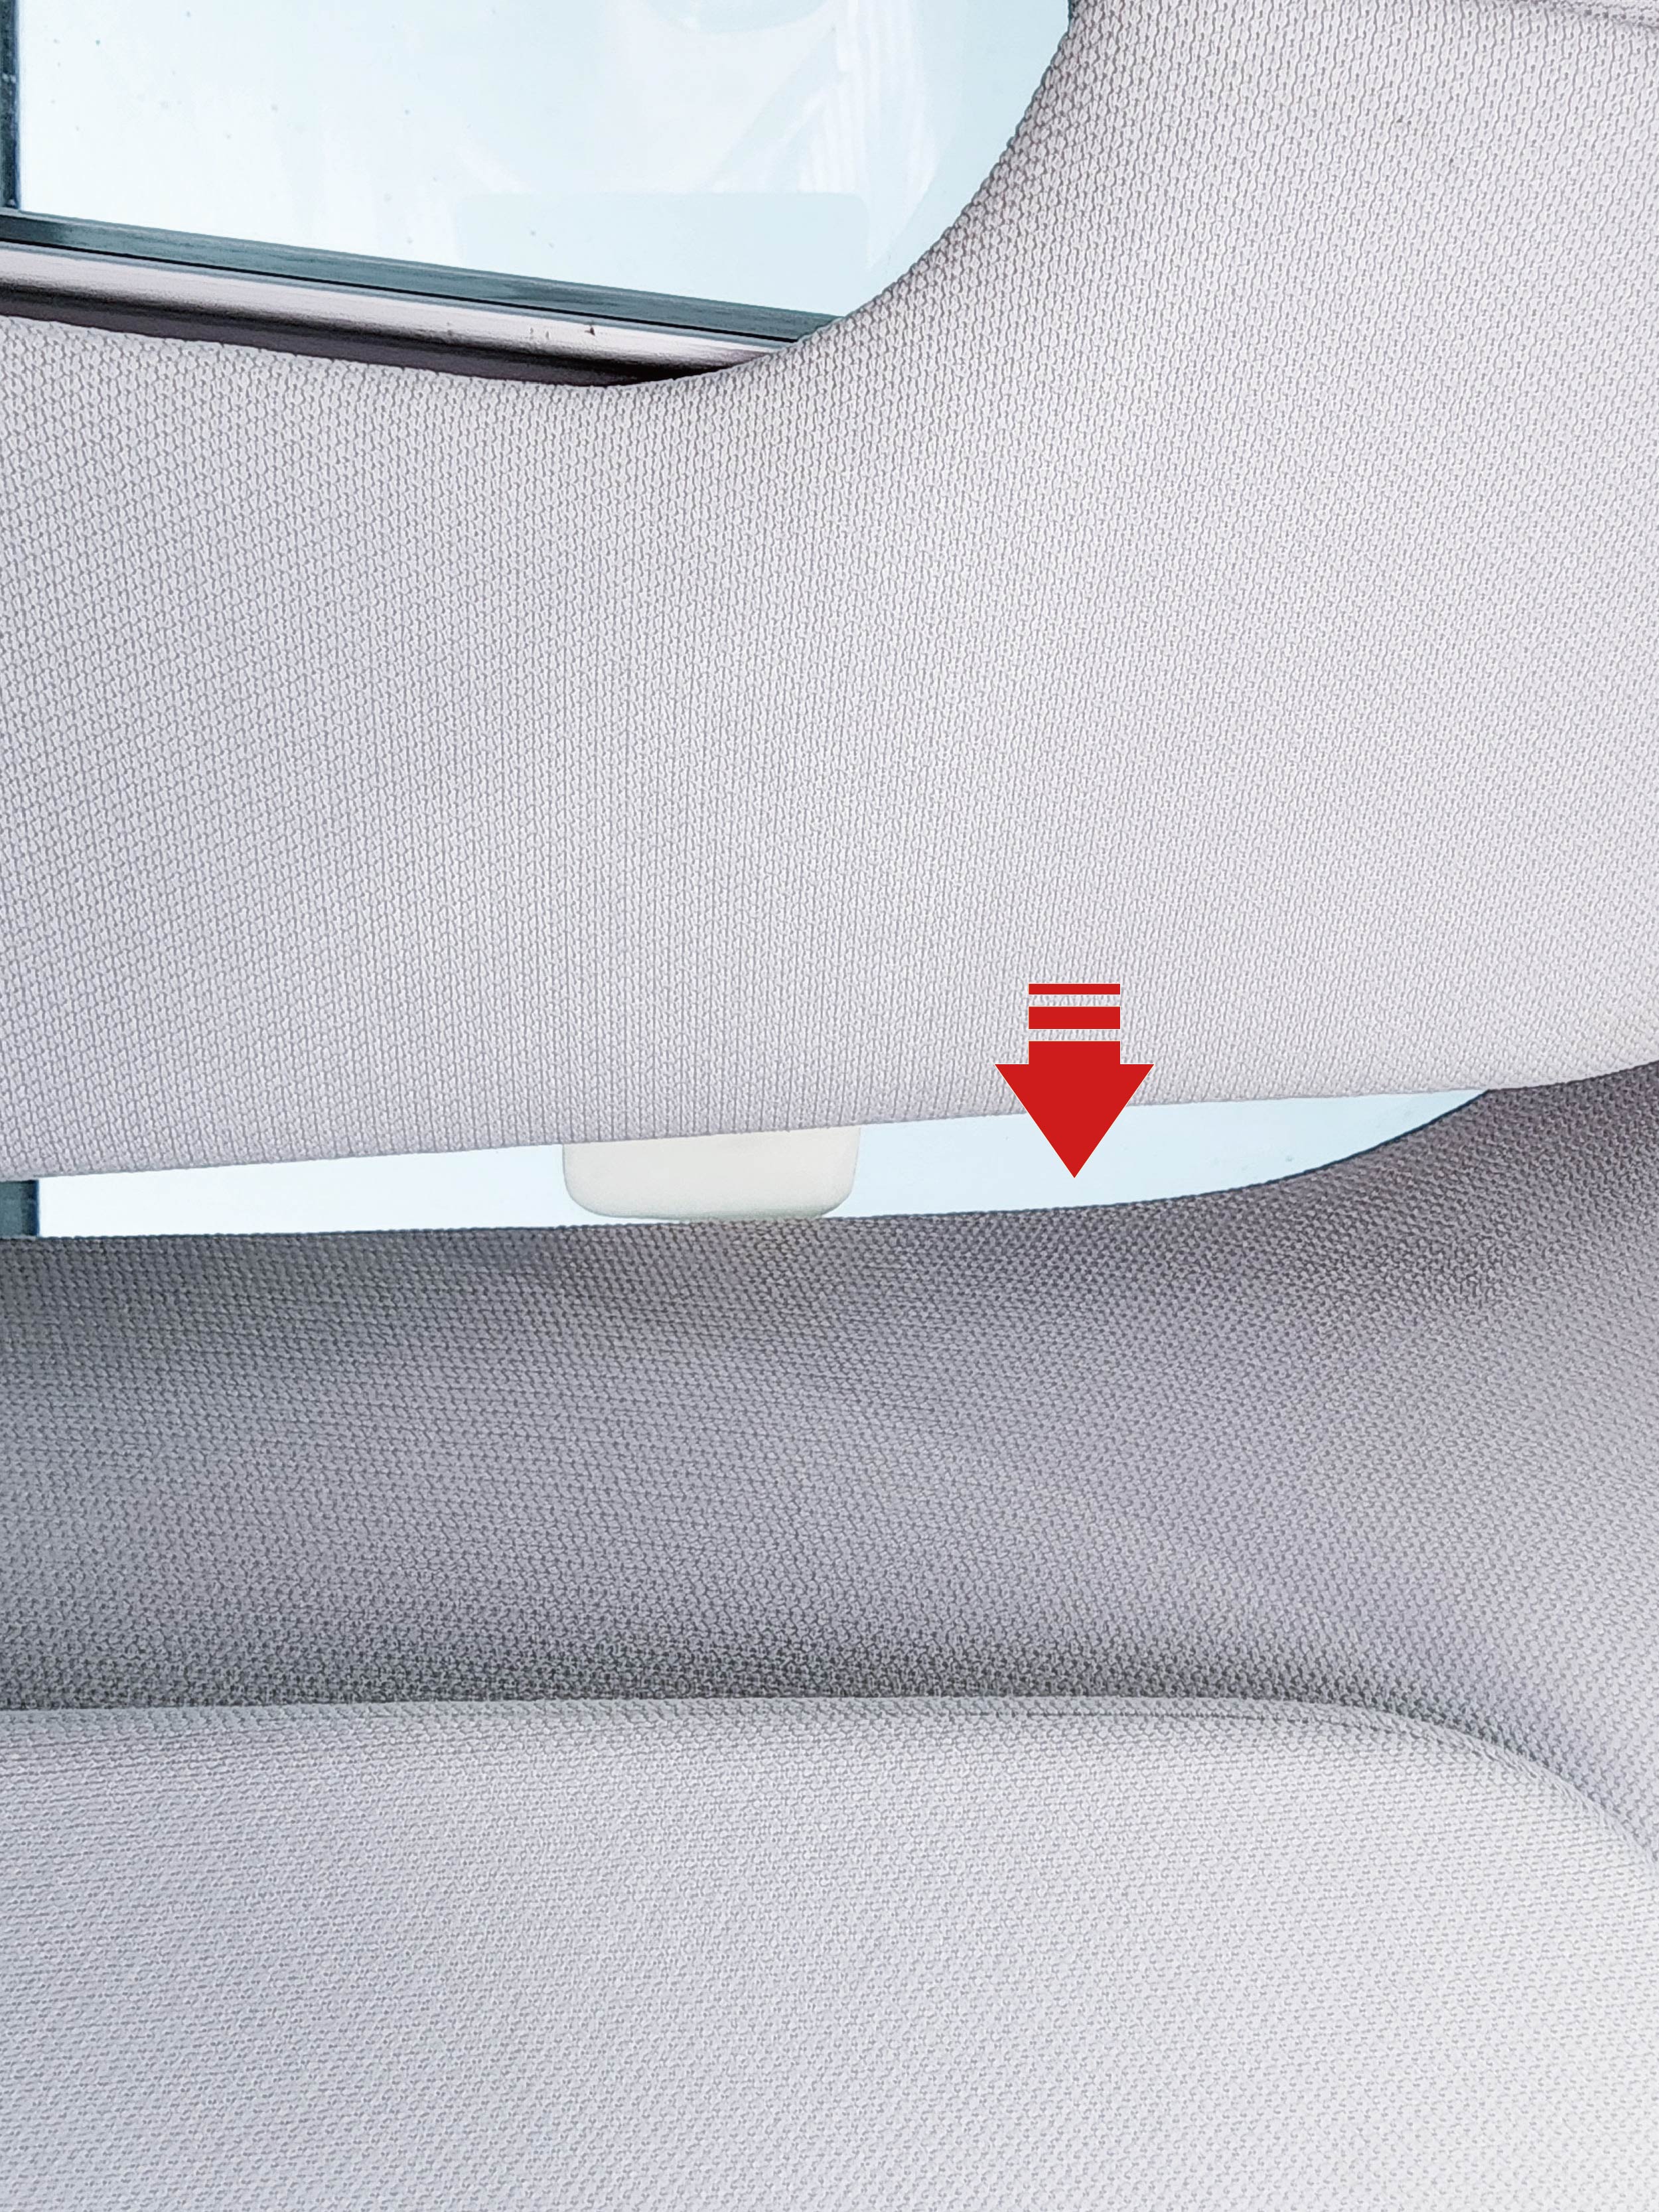
Lift the front half of the sunshade, bring it close to the sunroof glass, and insert the clips on both sides into the car roof.
08
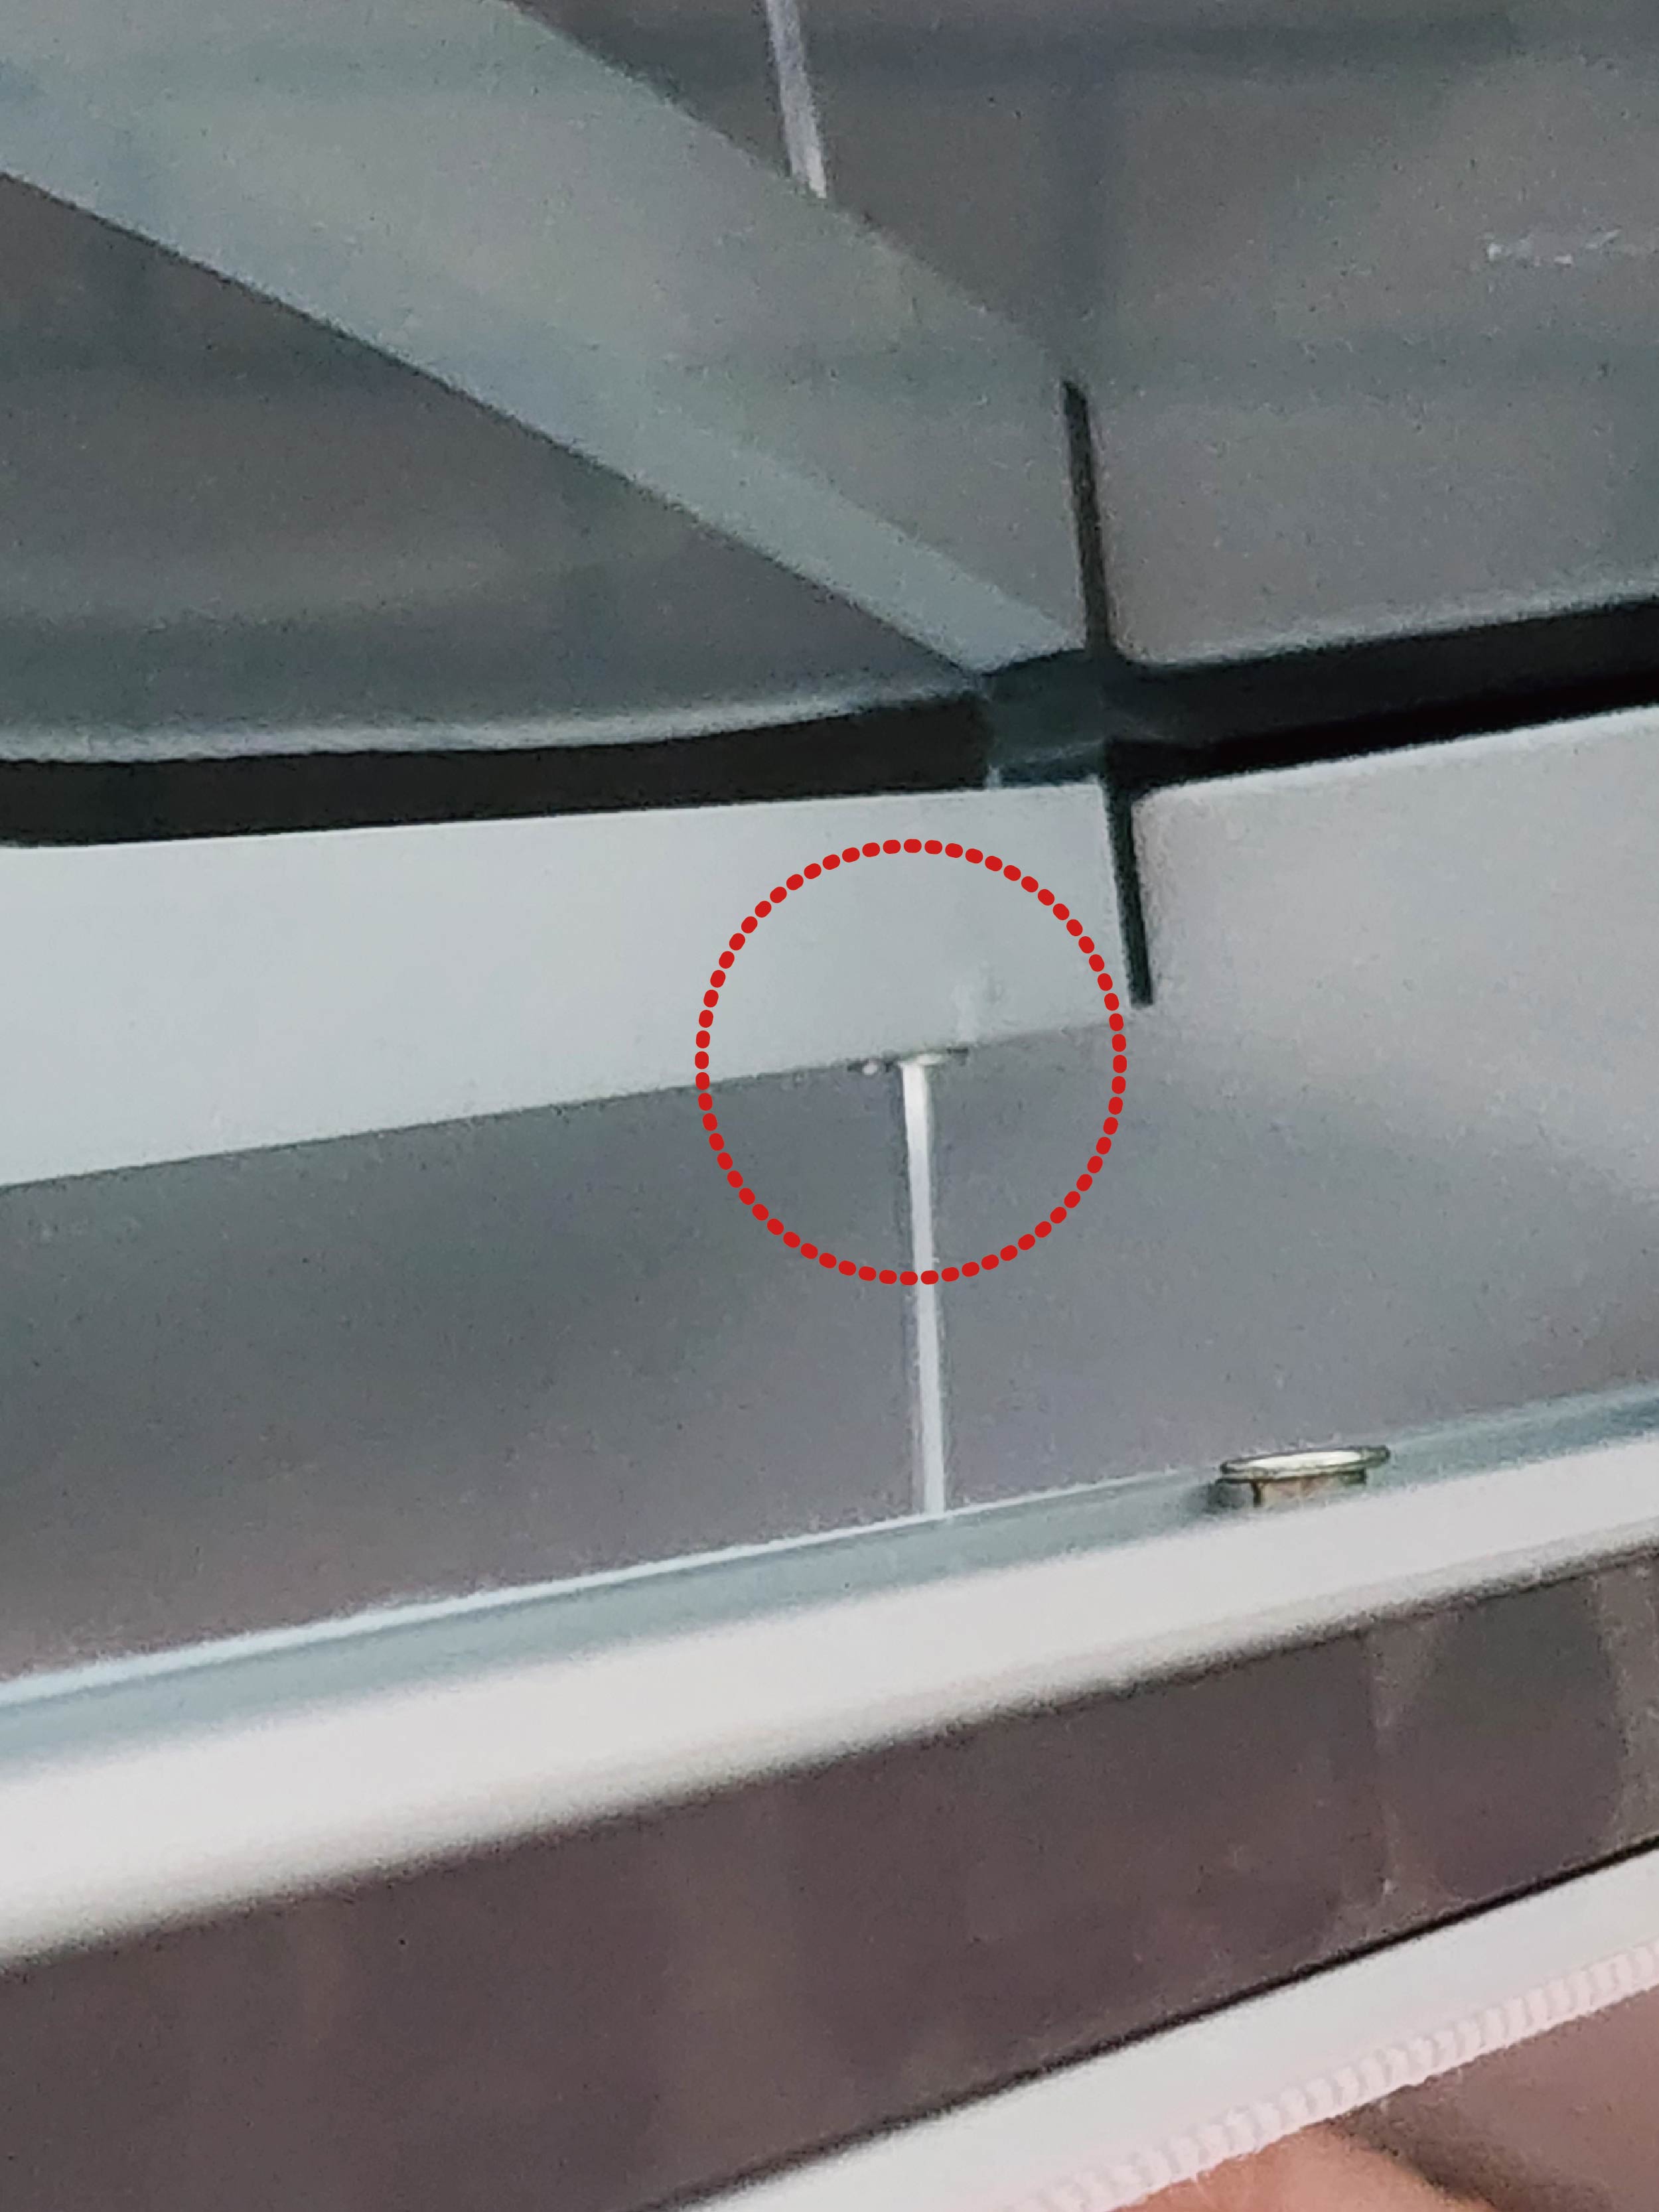
Through the reserved hole at the rear of the sunshade, locate the screw hole on the aluminum rod. Adjust position of the rod when necessary, until it perfectly sits behind the sunshade's aluminum frame when the sunshade is lifted.
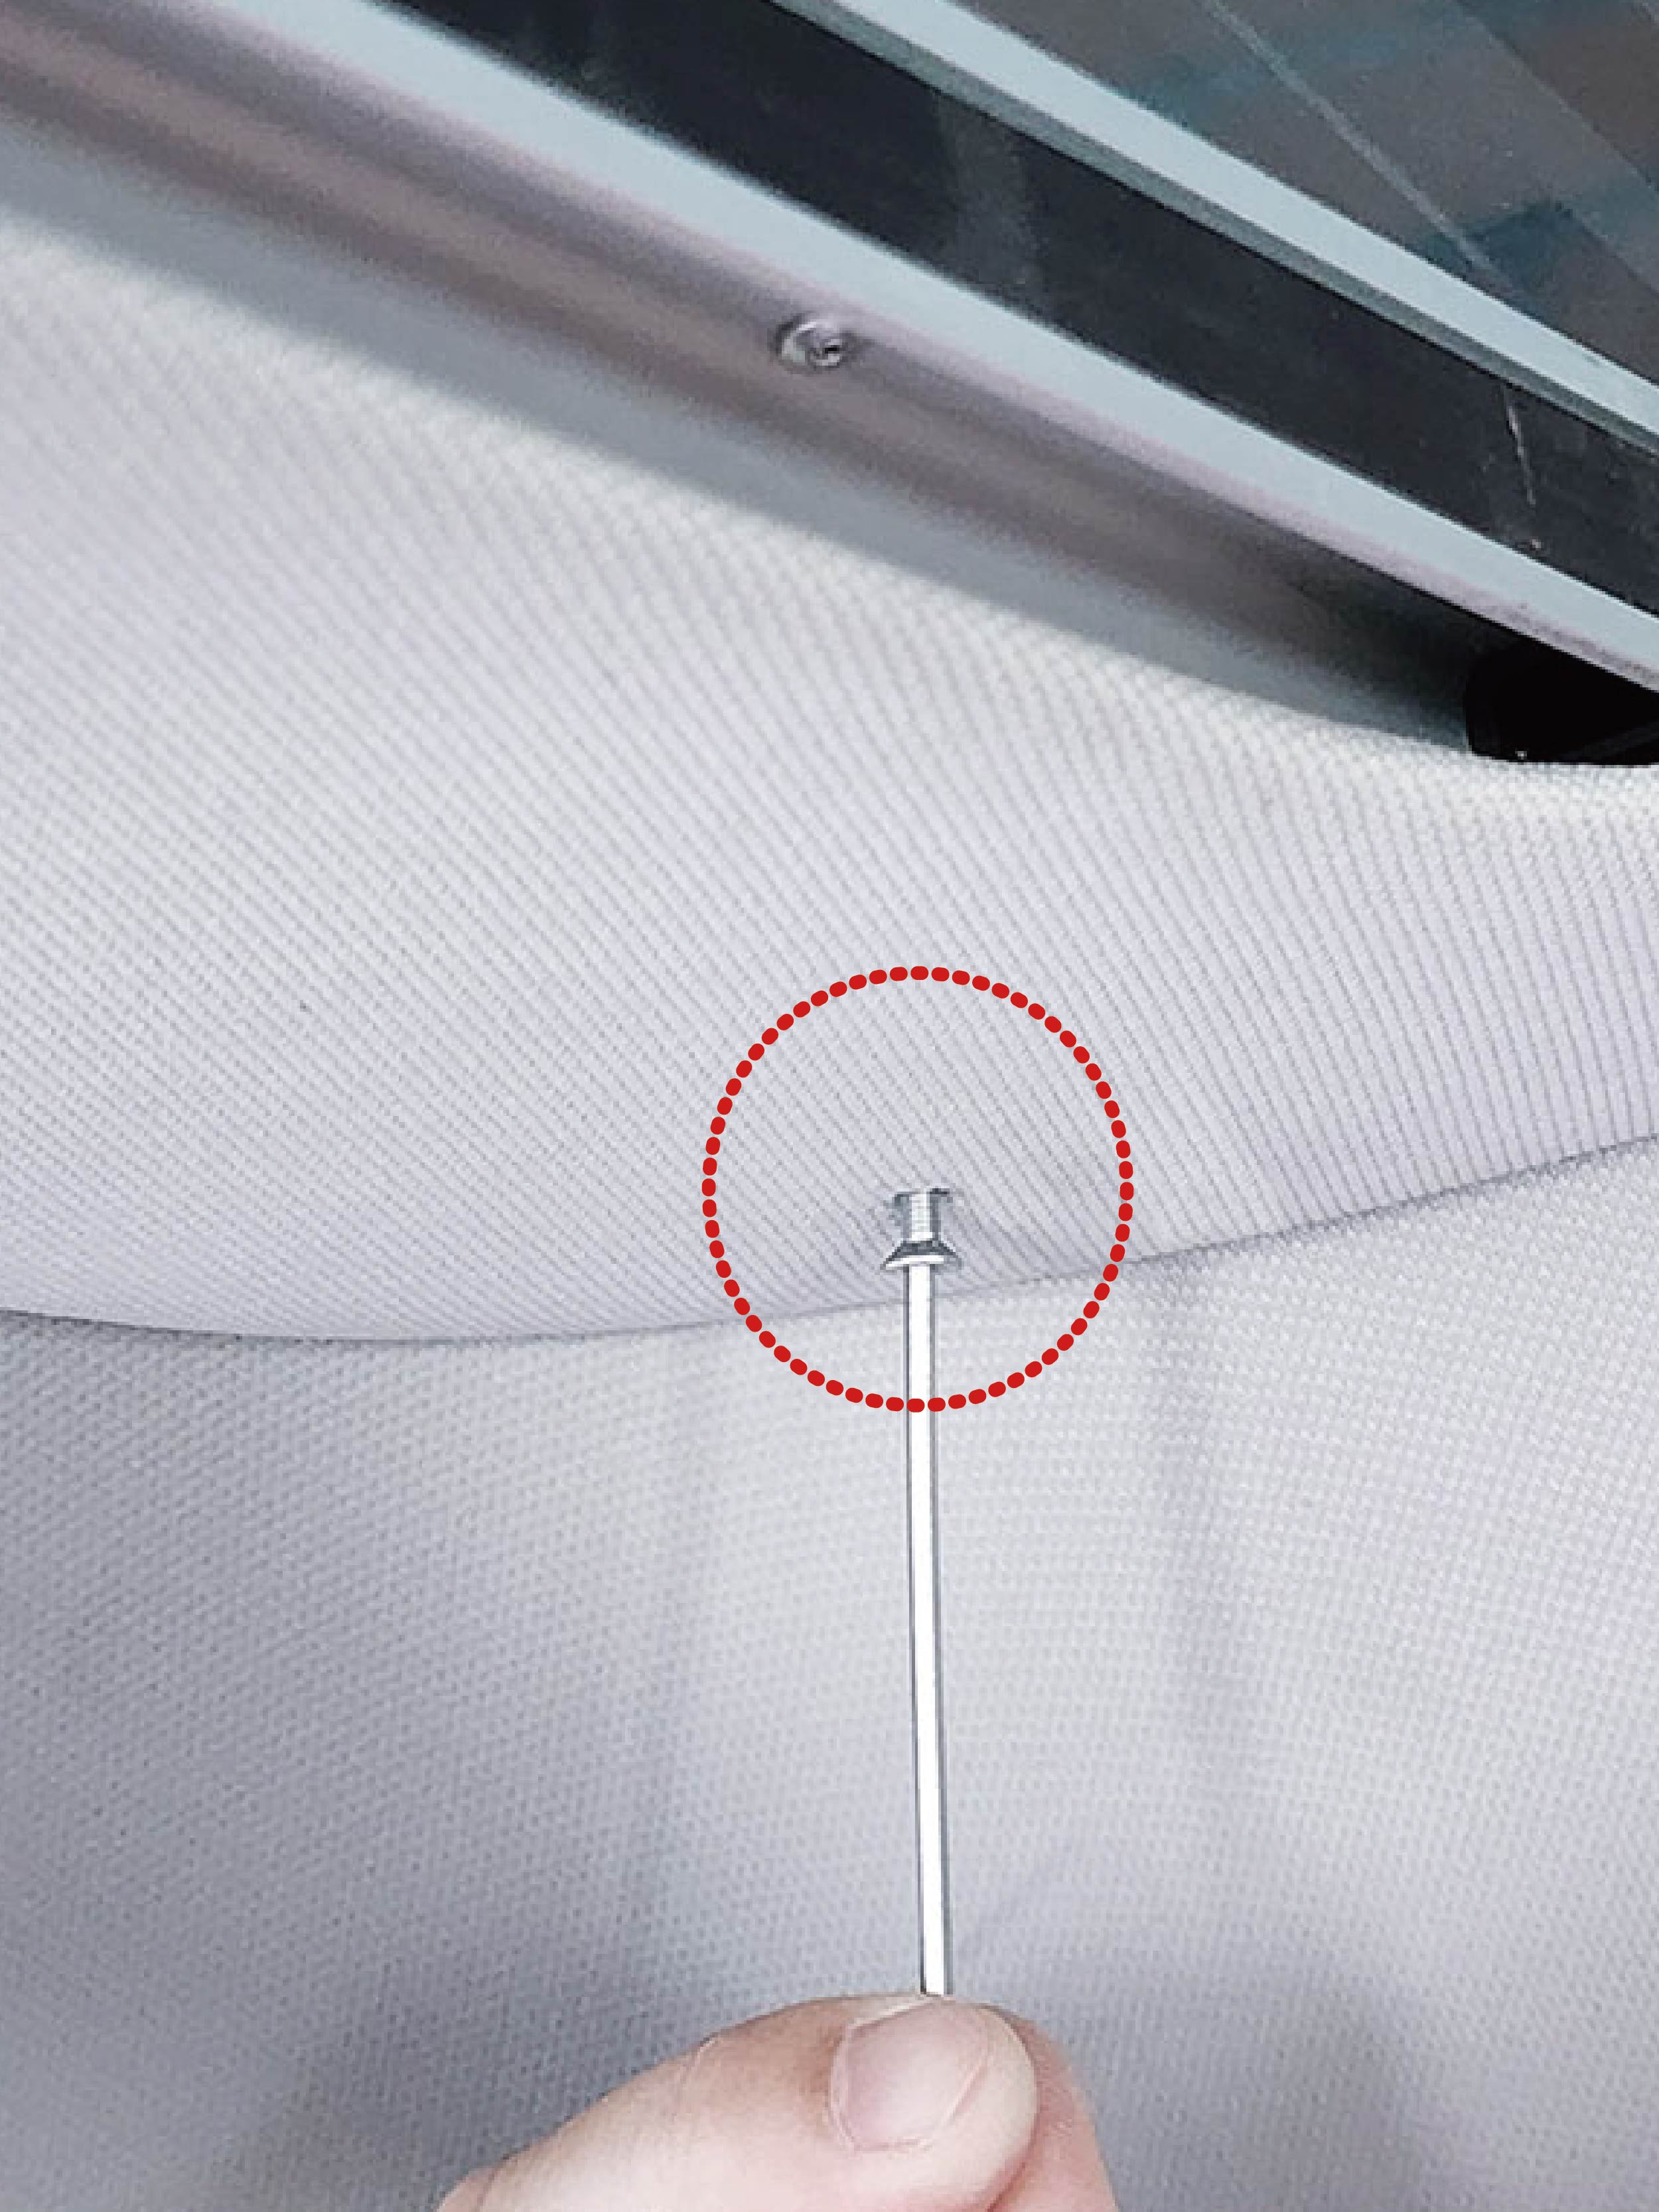
09
Repeat this step to complete the installation on both the left and right sides. Use screws to secure the sunshade to the crossbar. Repeat this step to complete the installation on both the left and right sides.
10
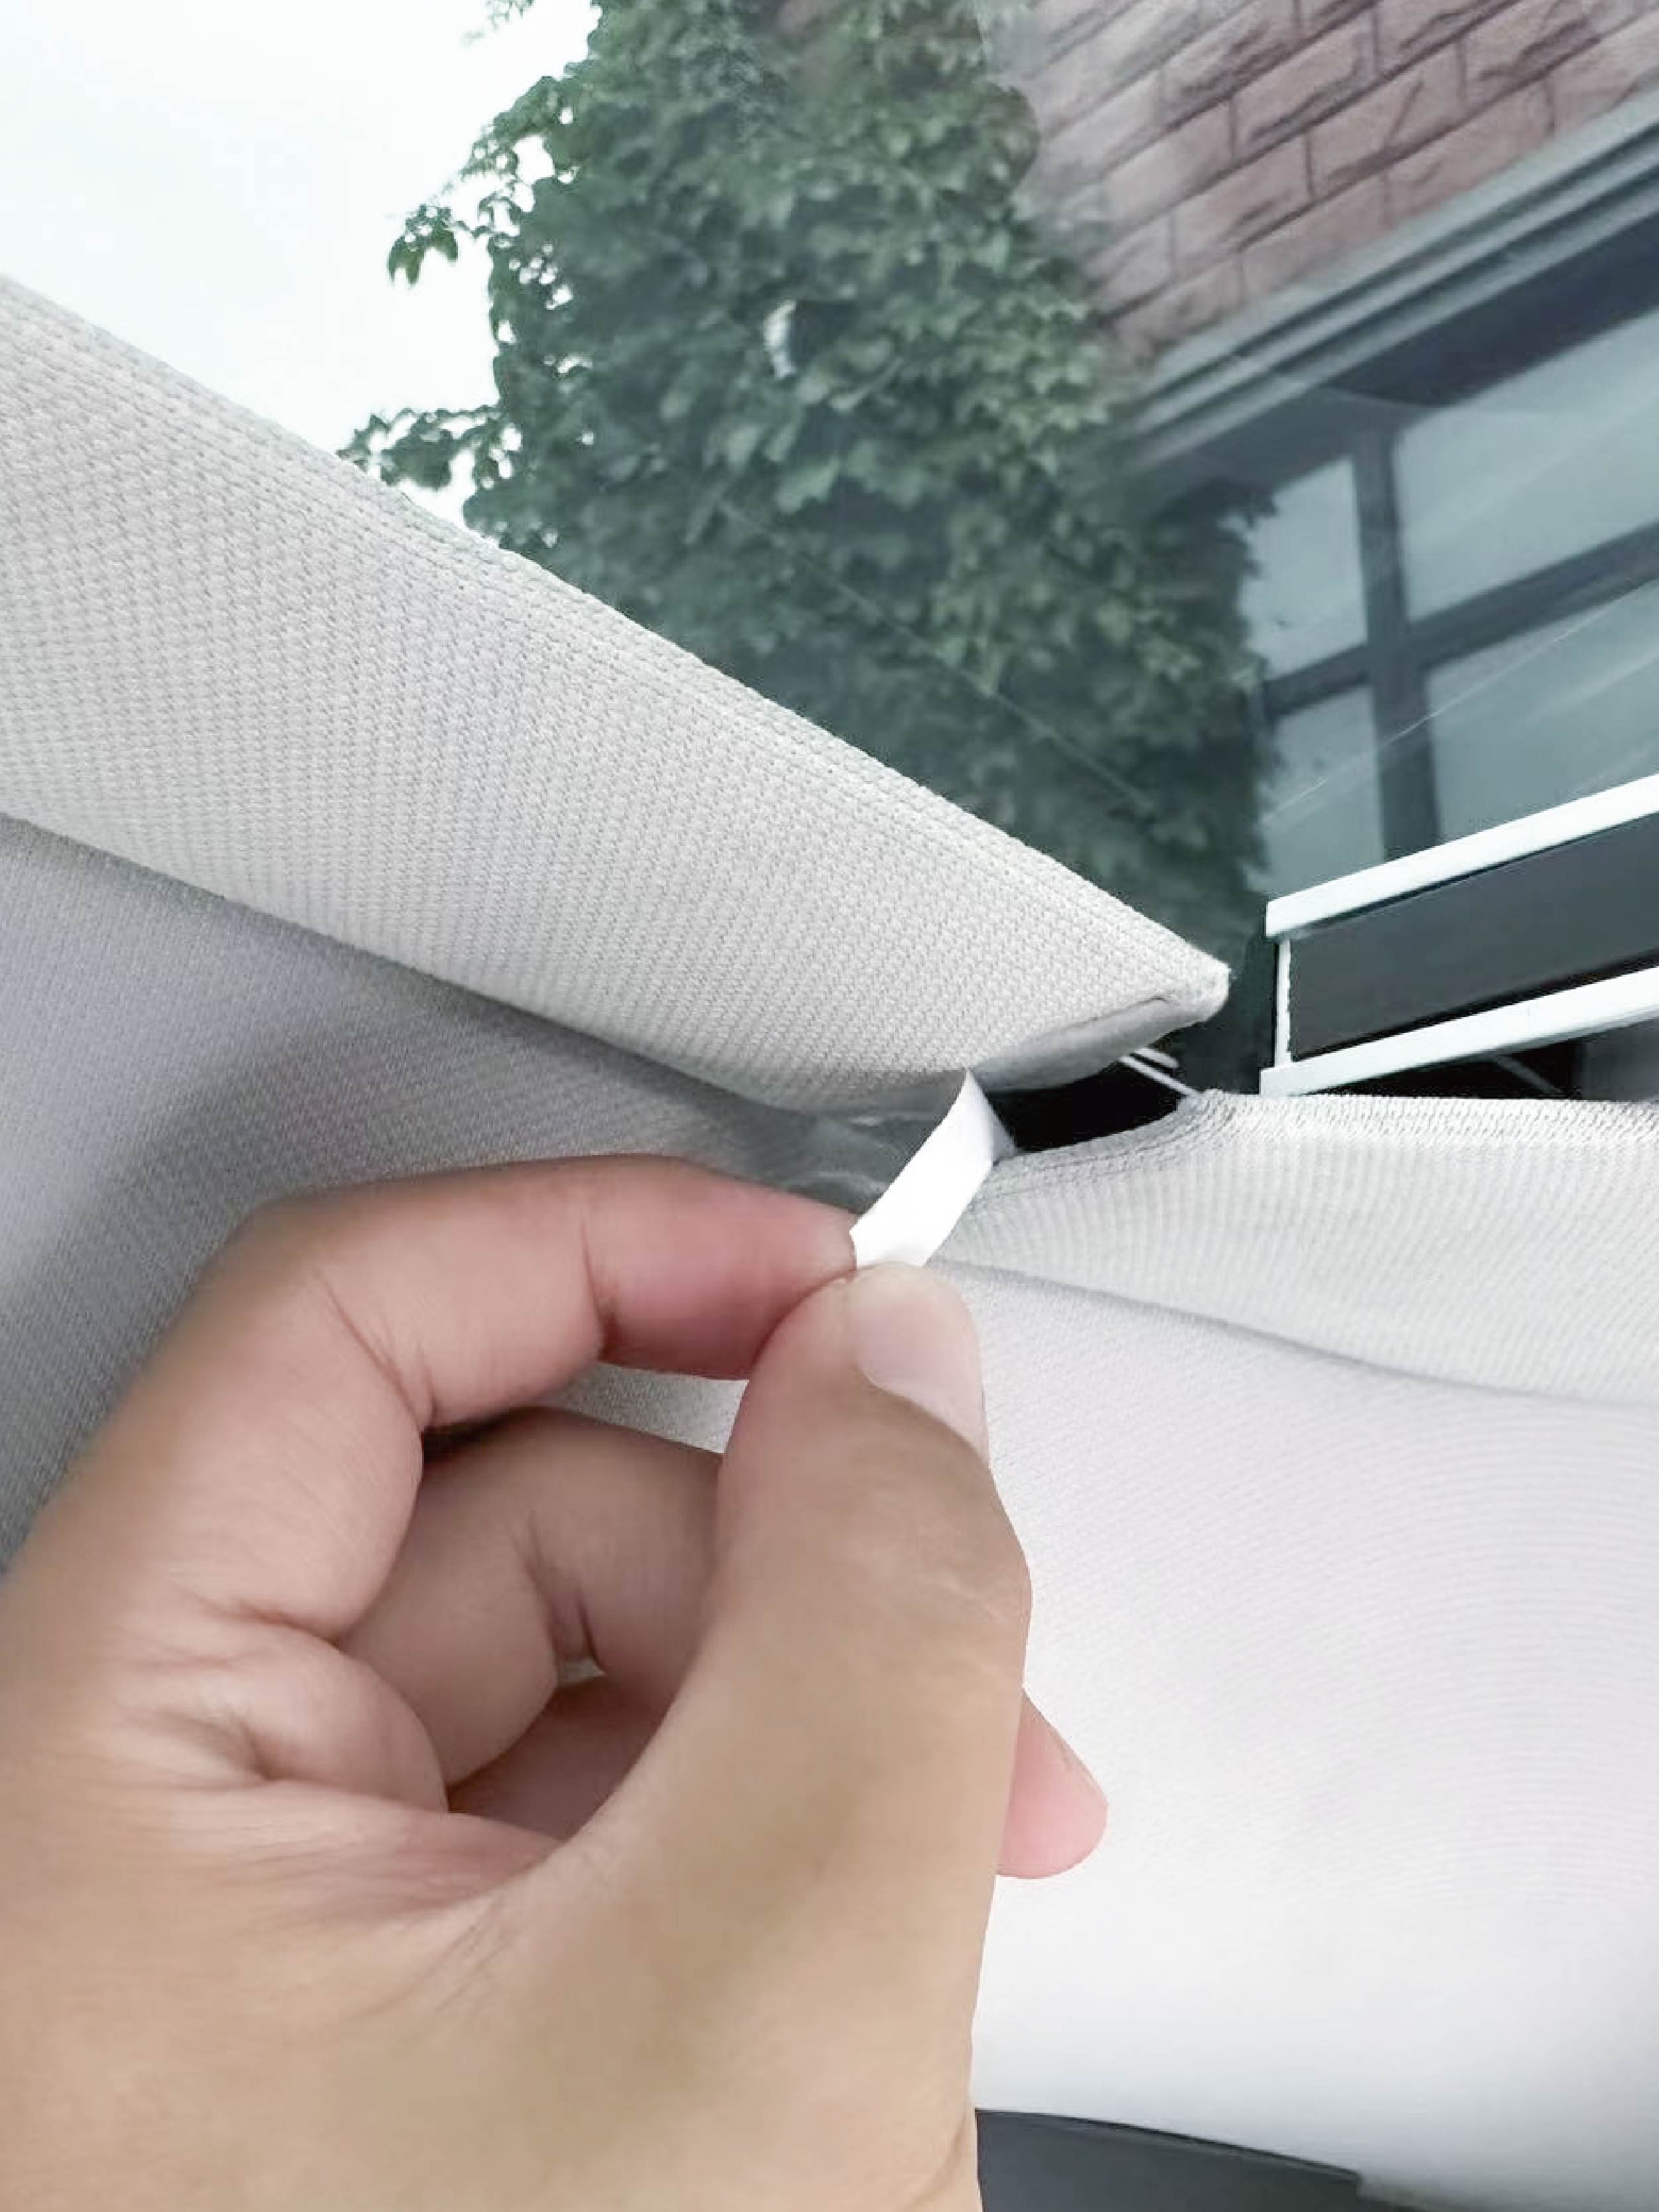
After completing step 9, make sure sunshade opens and closes smoothly, then peel off the adhesive at the four-panel junctions. Hold it in place for a while to allow the adhesive to stick firmly.
01
According to the markings on the four components, find the positions of the four components and place them in order.
( F - Front; B - Back; L- Left; R- Right )
02
Assemble the four components together. (Note: During the assembly process, be aware of the ropes and take them out to prevent them from getting caught in the rails).
03
Find the two ropes on the right side of the sunshade, and pass rope A and rope B from the inside out. The final state should look like this. Repeat and pass the two ropes on the left side from the inside out.
04
Unscrew the A screw (on the right), after threading the A rope over the screw, screw it back tightly; Unscrew the B screw (on the left), after threading the B rope over the screw, screw it back tightly. During this process, it may be a bit tight, so you may need to gently pull and adjust the rope. The rope has a slight elasticity, so don't worry about breaking it, but it should be in a taut state.Repeat these steps for the other side to finish assembling the frame.
05
Enter the car with the aluminum rod, and insert the two ends of the rod to the car roof through the gap in the roof. Push the rod further towards the back of the car. Note: Make sure the direction of the mounting plate faces the back of the car, and the screw holes on the plate face downward.
06
Take the sunshade into the car cabin with both inserts facing the front of the car.
07
Lift the front half of the sunshade, bring it close to the sunroof glass, and insert the clips on both sides into the car roof.
08
Through the reserved hole at the rear of the sunshade, locate the screw hole on the aluminum rod. Adjust position of the rod when necessary, until it perfectly sits behind the sunshade's aluminum frame when the sunshade is lifted.
09
Repeat this step to complete the installation on both the left and right sides. Use screws to secure the sunshade to the crossbar. Repeat this step to complete the installation on both the left and right sides.
10
After completing step 9, make sure sunshade opens and closes smoothly, then peel off the adhesive at the four-panel junctions. Hold it in place for a while to allow the adhesive to stick firmly.
FAQ
Will it make the skylight smaller after installation?
Our Fullshade is an add-on. Without removing the original car accessories, the space of the slide rail will be sacrificed, but it can be ignored.
Can it be removed after installation?
Obviously yes, it's just an add-on, but I think it will last a lifetime when you put it on, just turn it on when you need sunlight, it's very convenient.
Will installing this Fullshade damage my Tesla?
Our snap design will not cause damage to your Tesla at all and can be installed without damage.
Our customer support is available Monday to Friday: 9:30am-6:30pm. We will try our best to reply to you in 24 hours.