Installation Guide
For FullShade 2.0 | Model 3

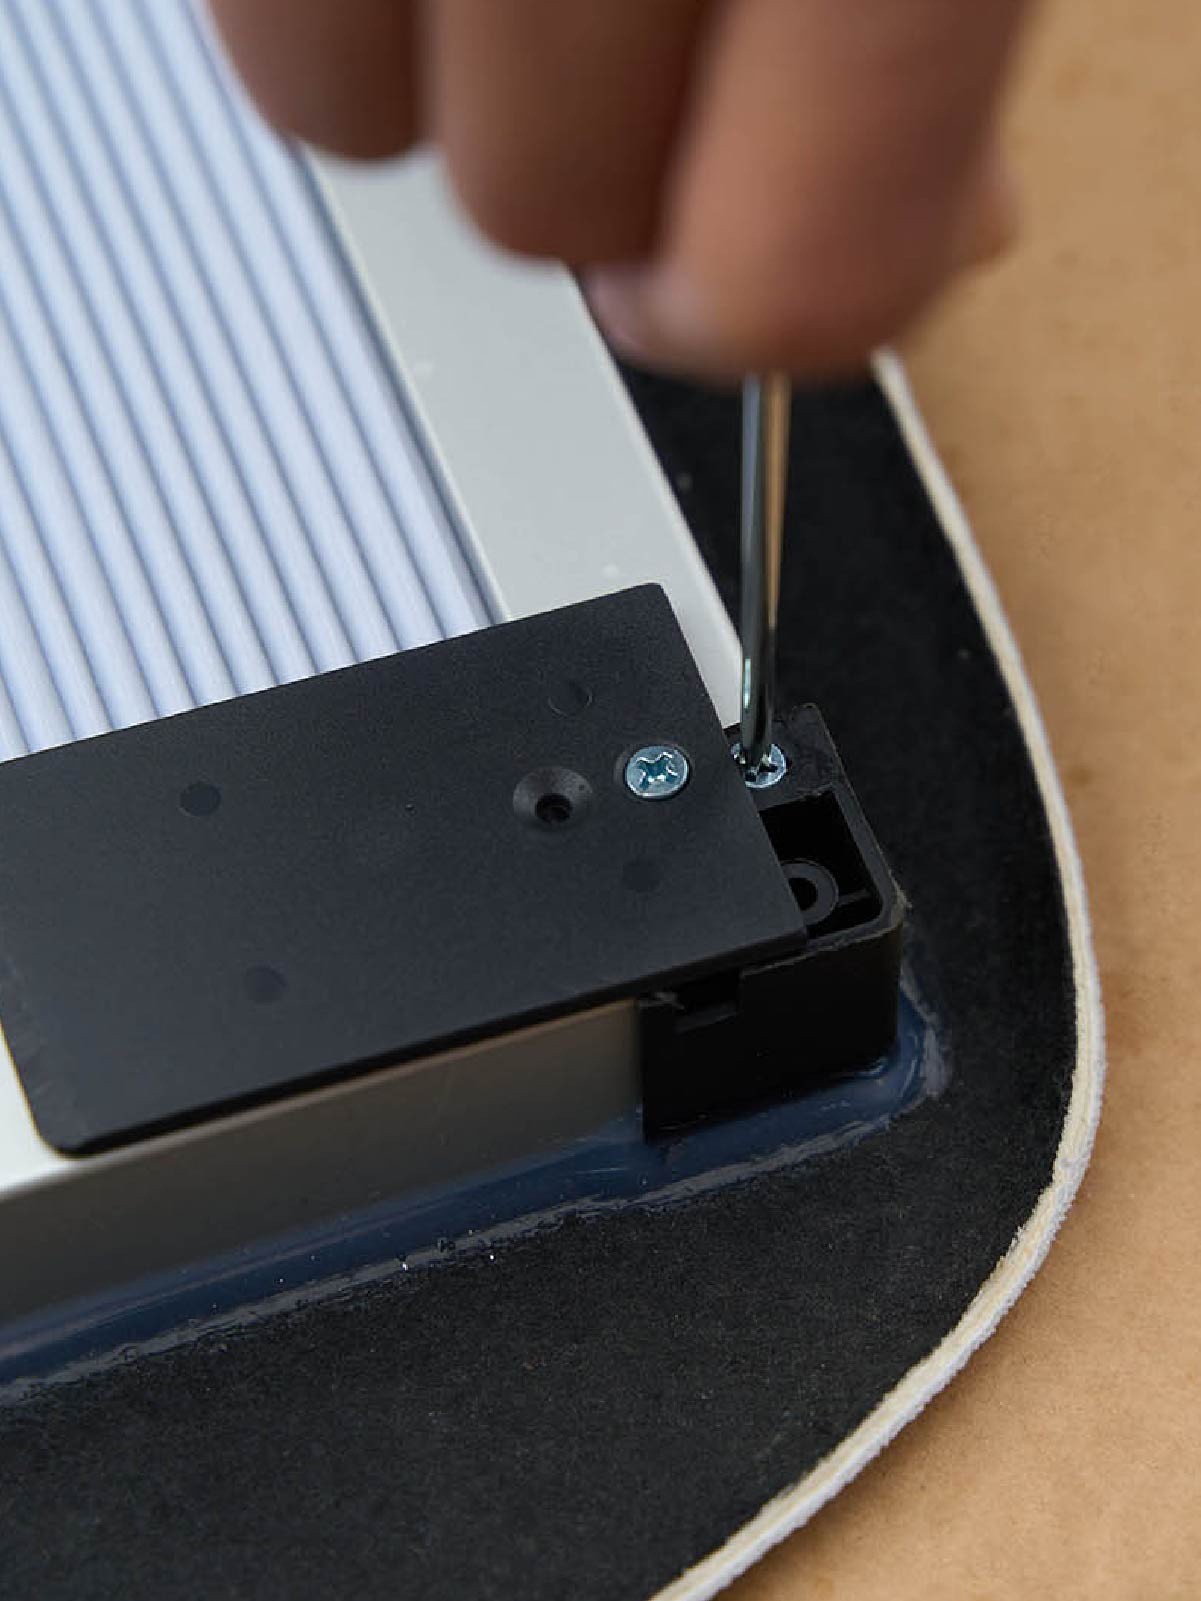
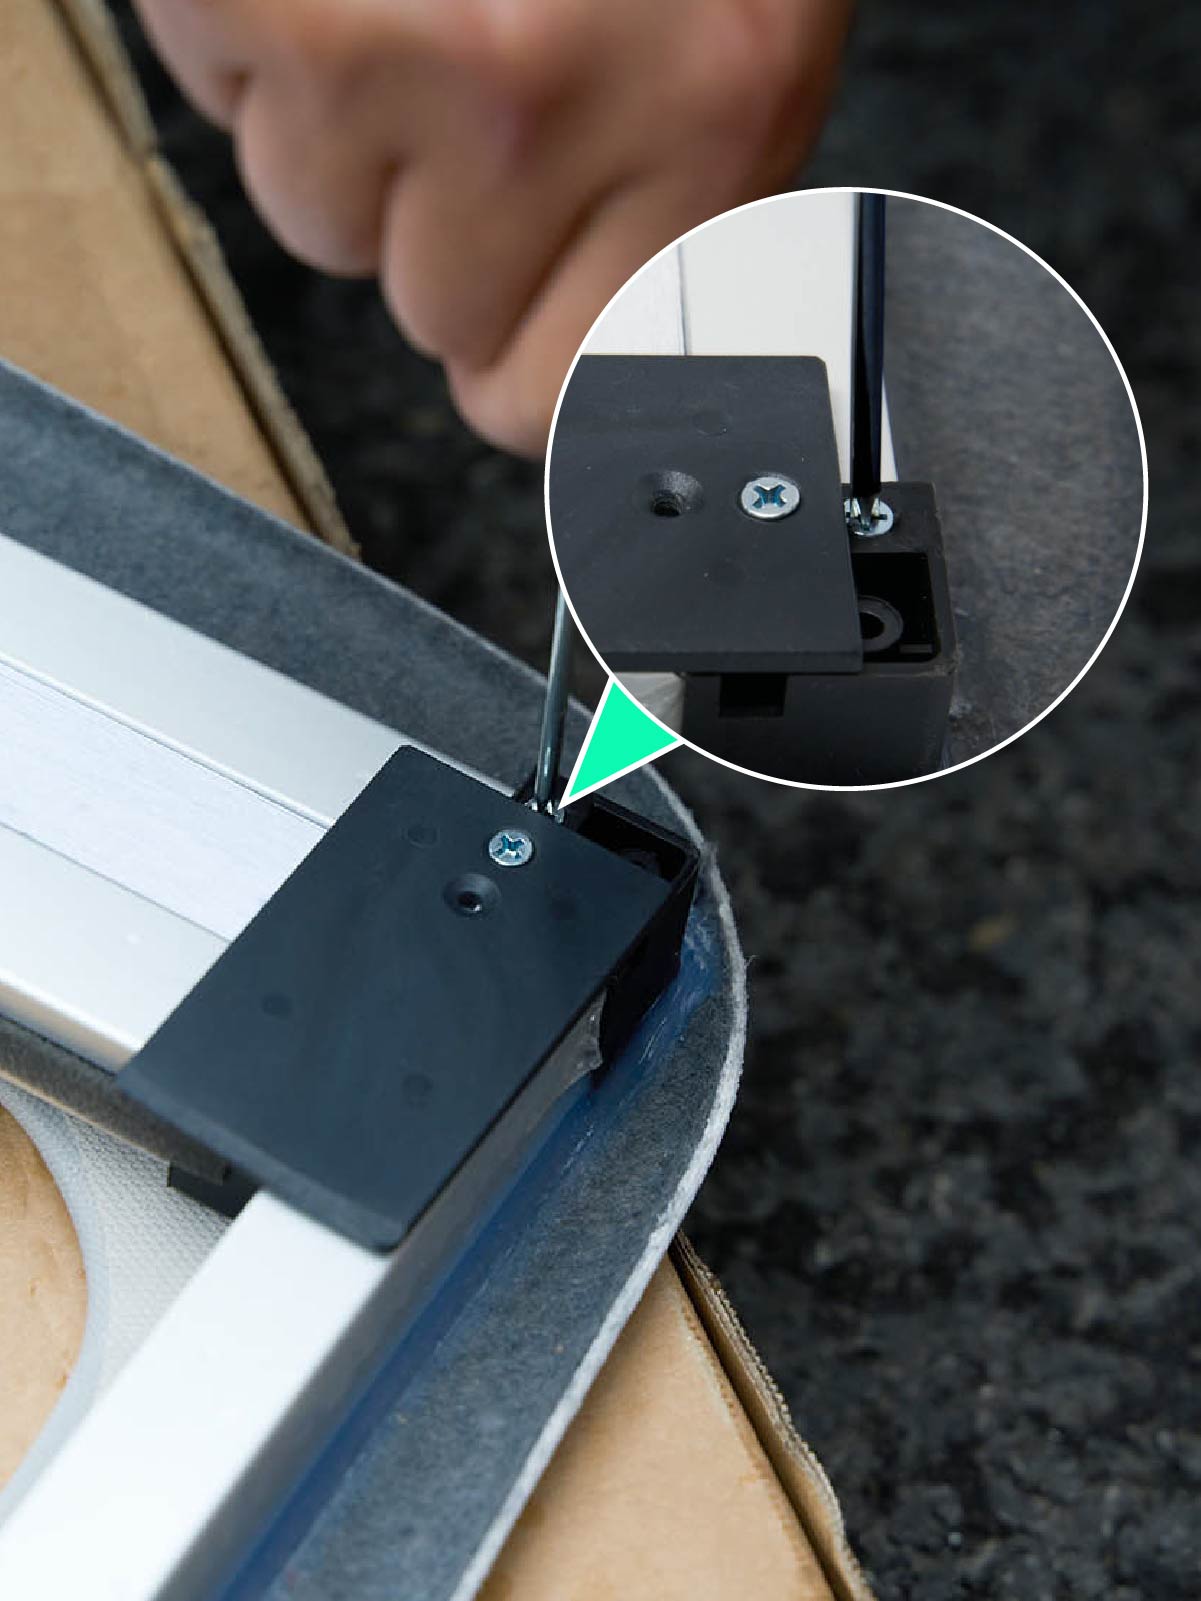
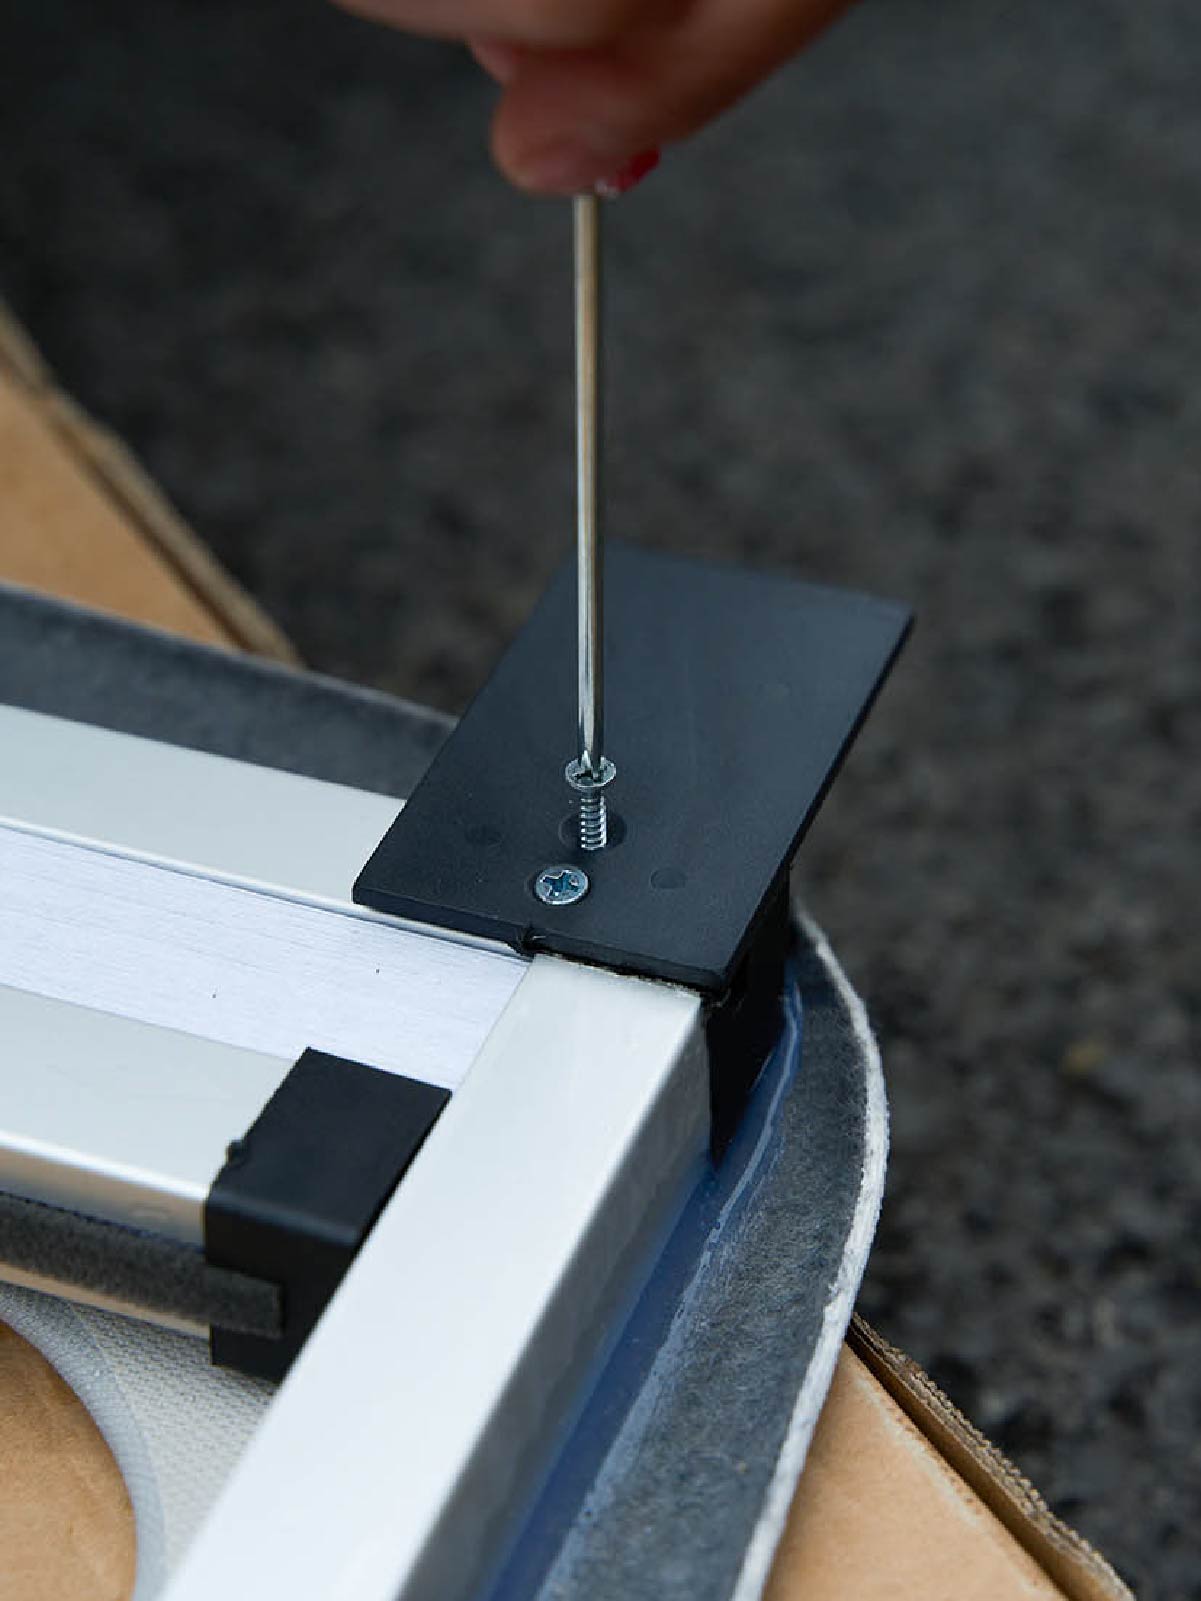
Loosen the screw located behind the black insert. Repeat for both sides.
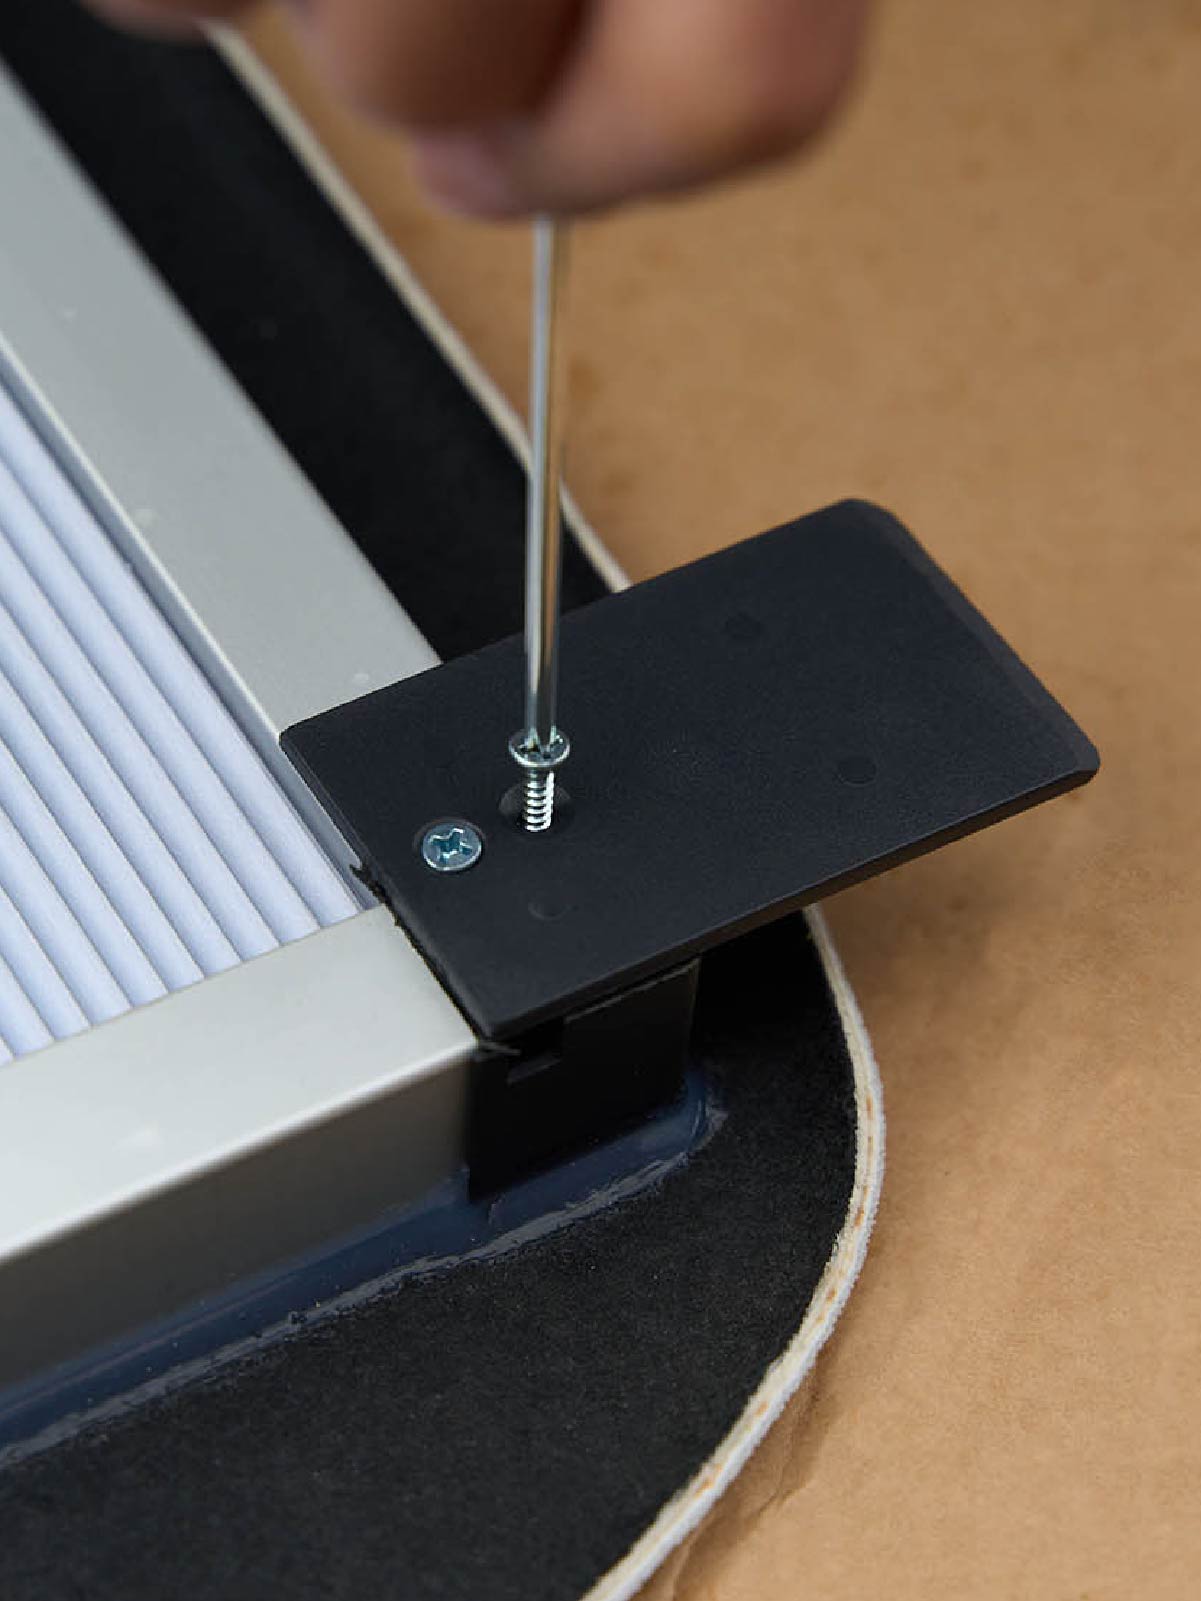
Rotate the black insert 180 degrees to ensure the insert is facing outward, then tighten the fixing screw.
Take the sunshade into the car cabin with both inserts facing the back of the car. Lift the sunshade up and push both inserts into the ceiling.
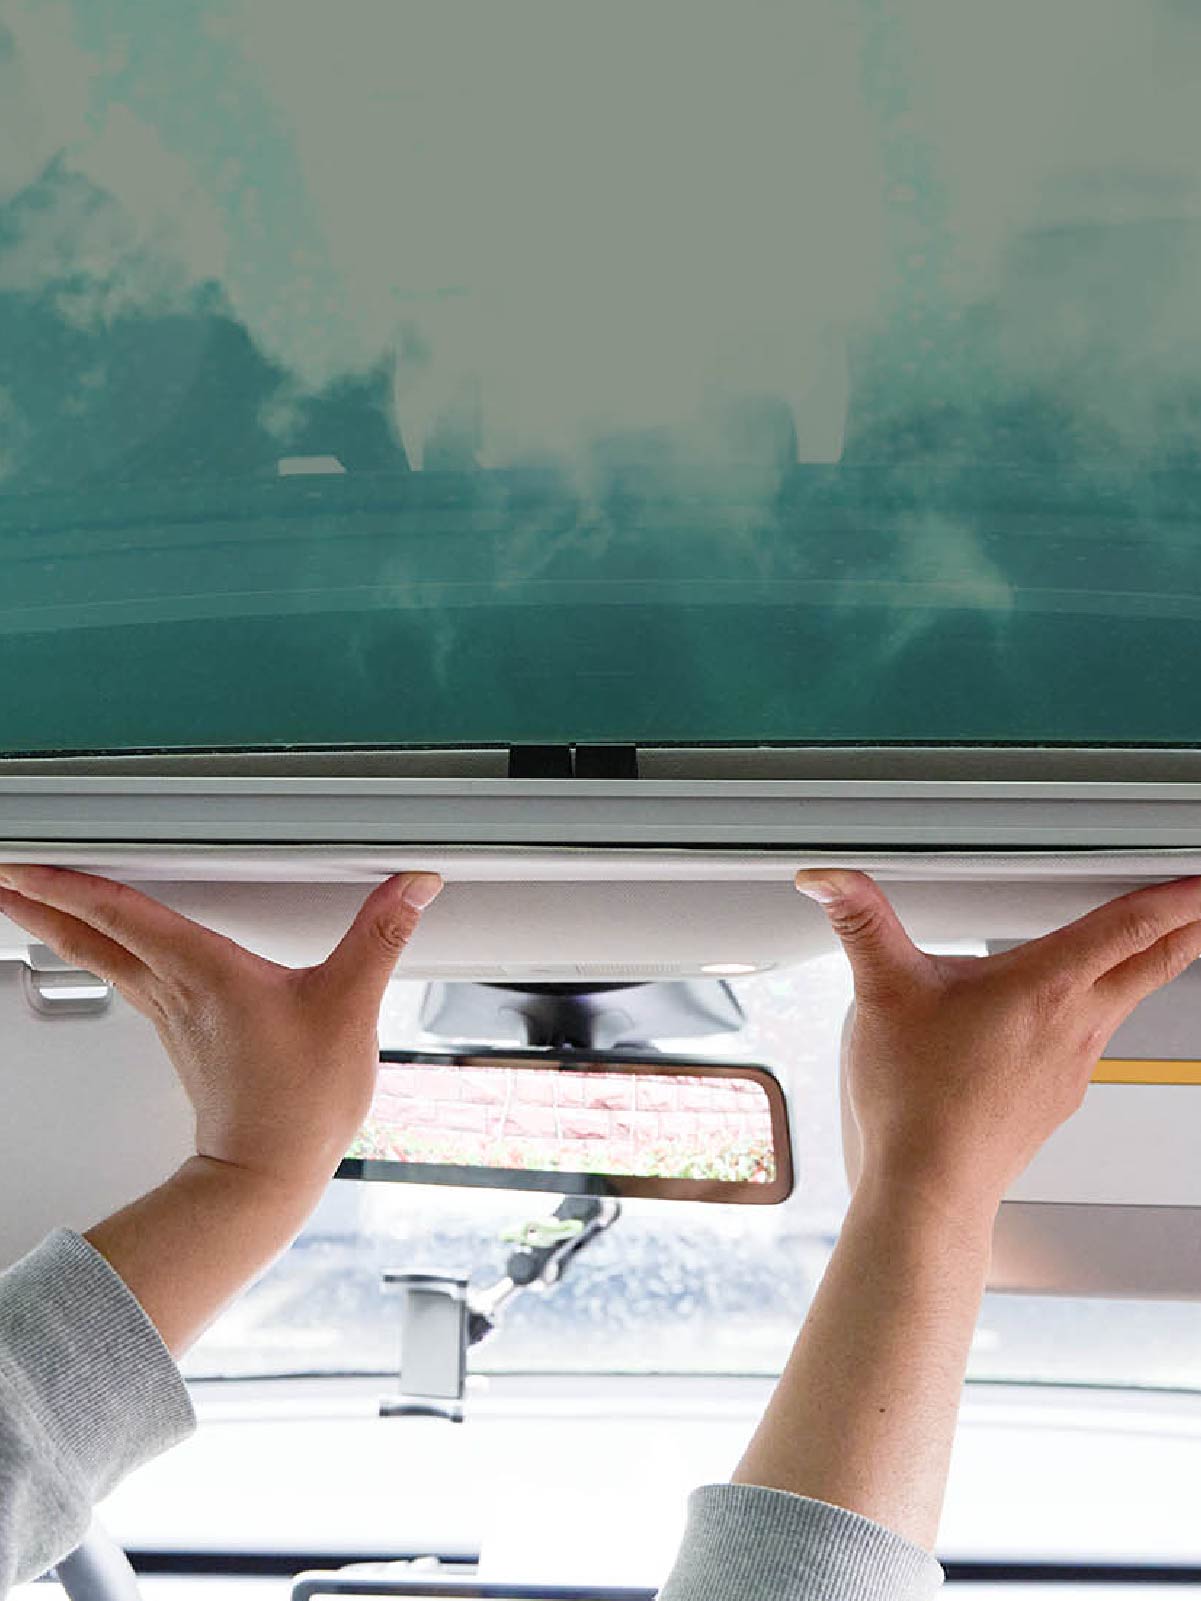
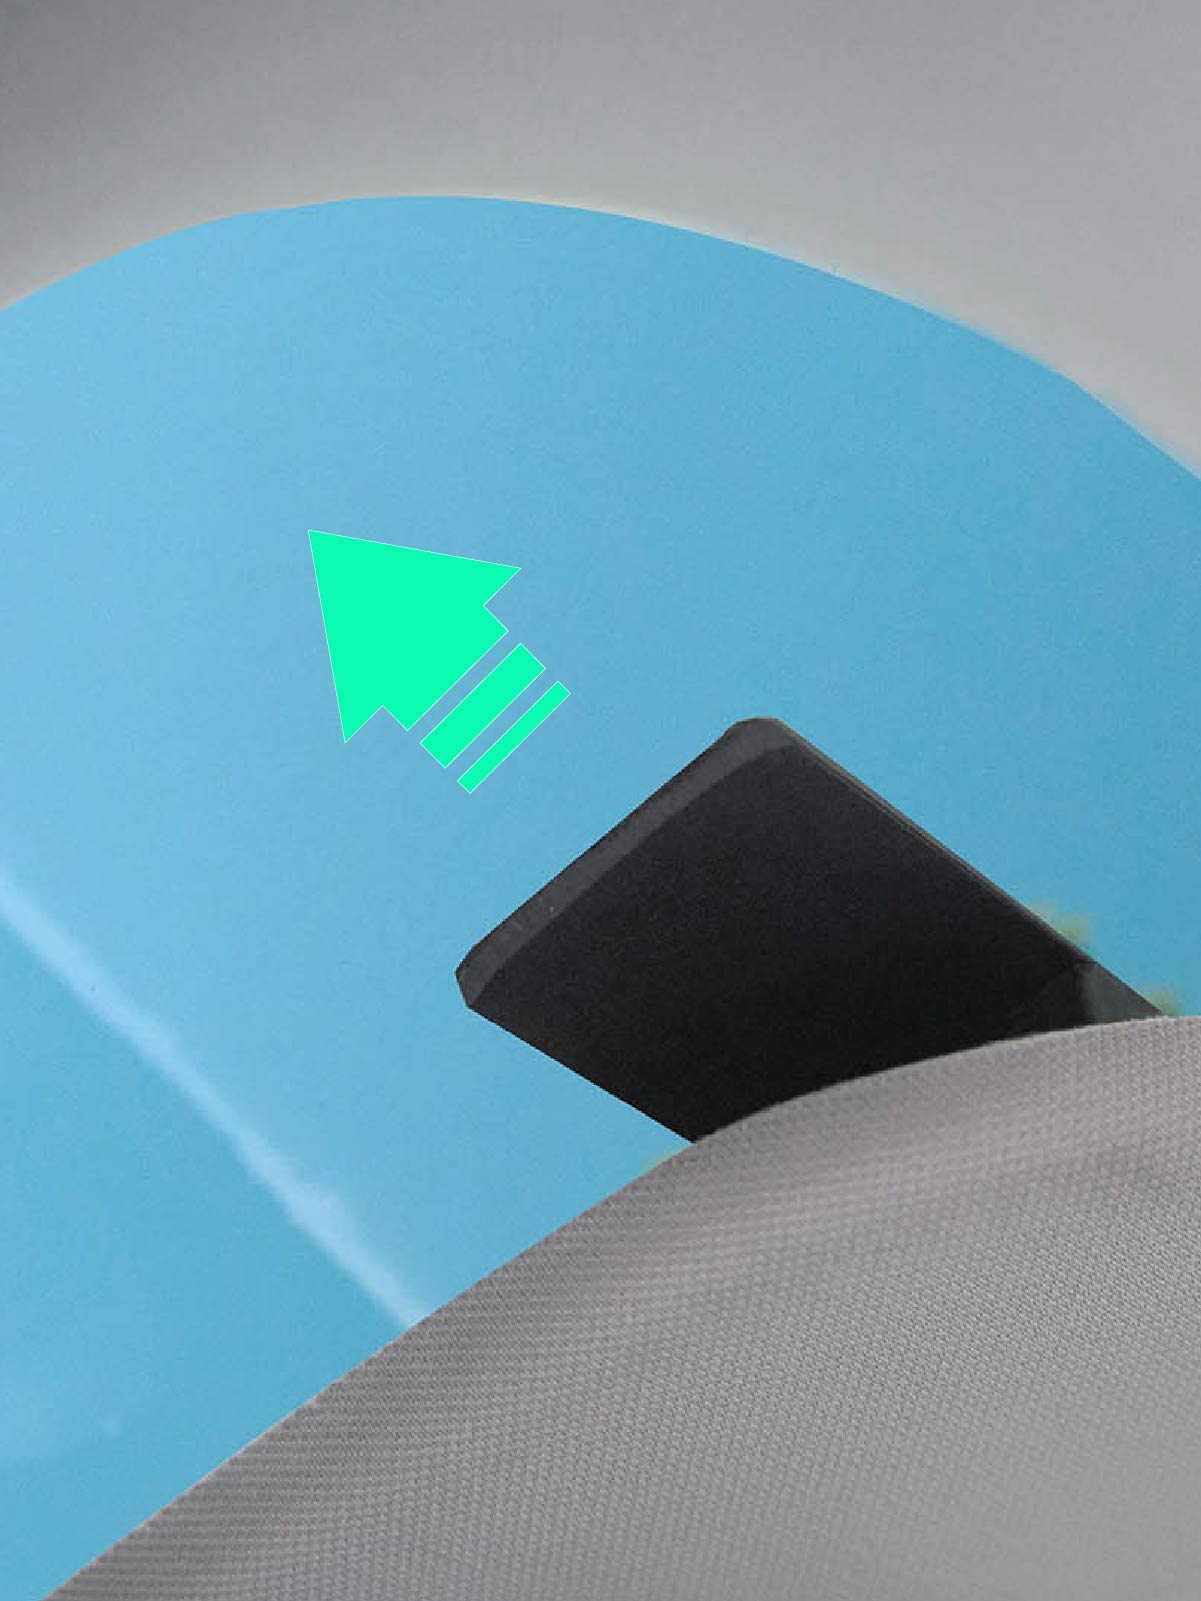
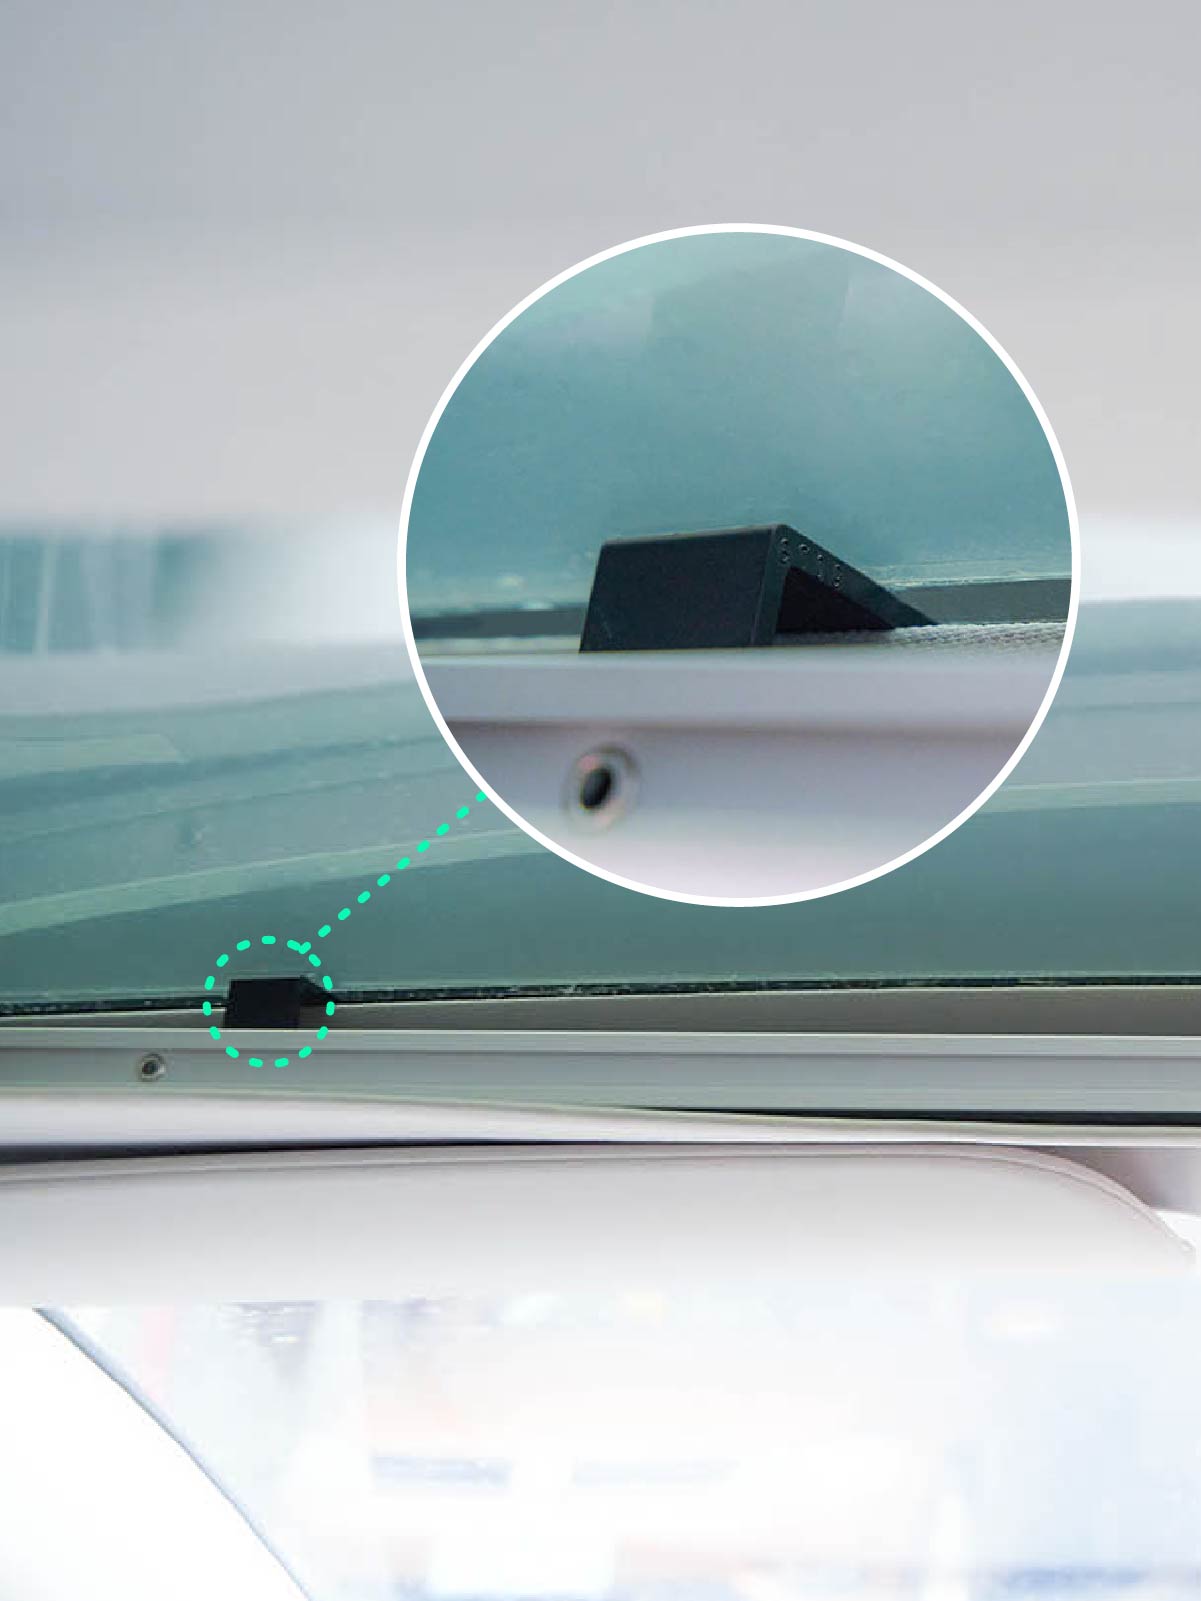
Lift the front of the sunshade up and push it close to the glassroof. Note: move both black plugs towards the middle at this step.
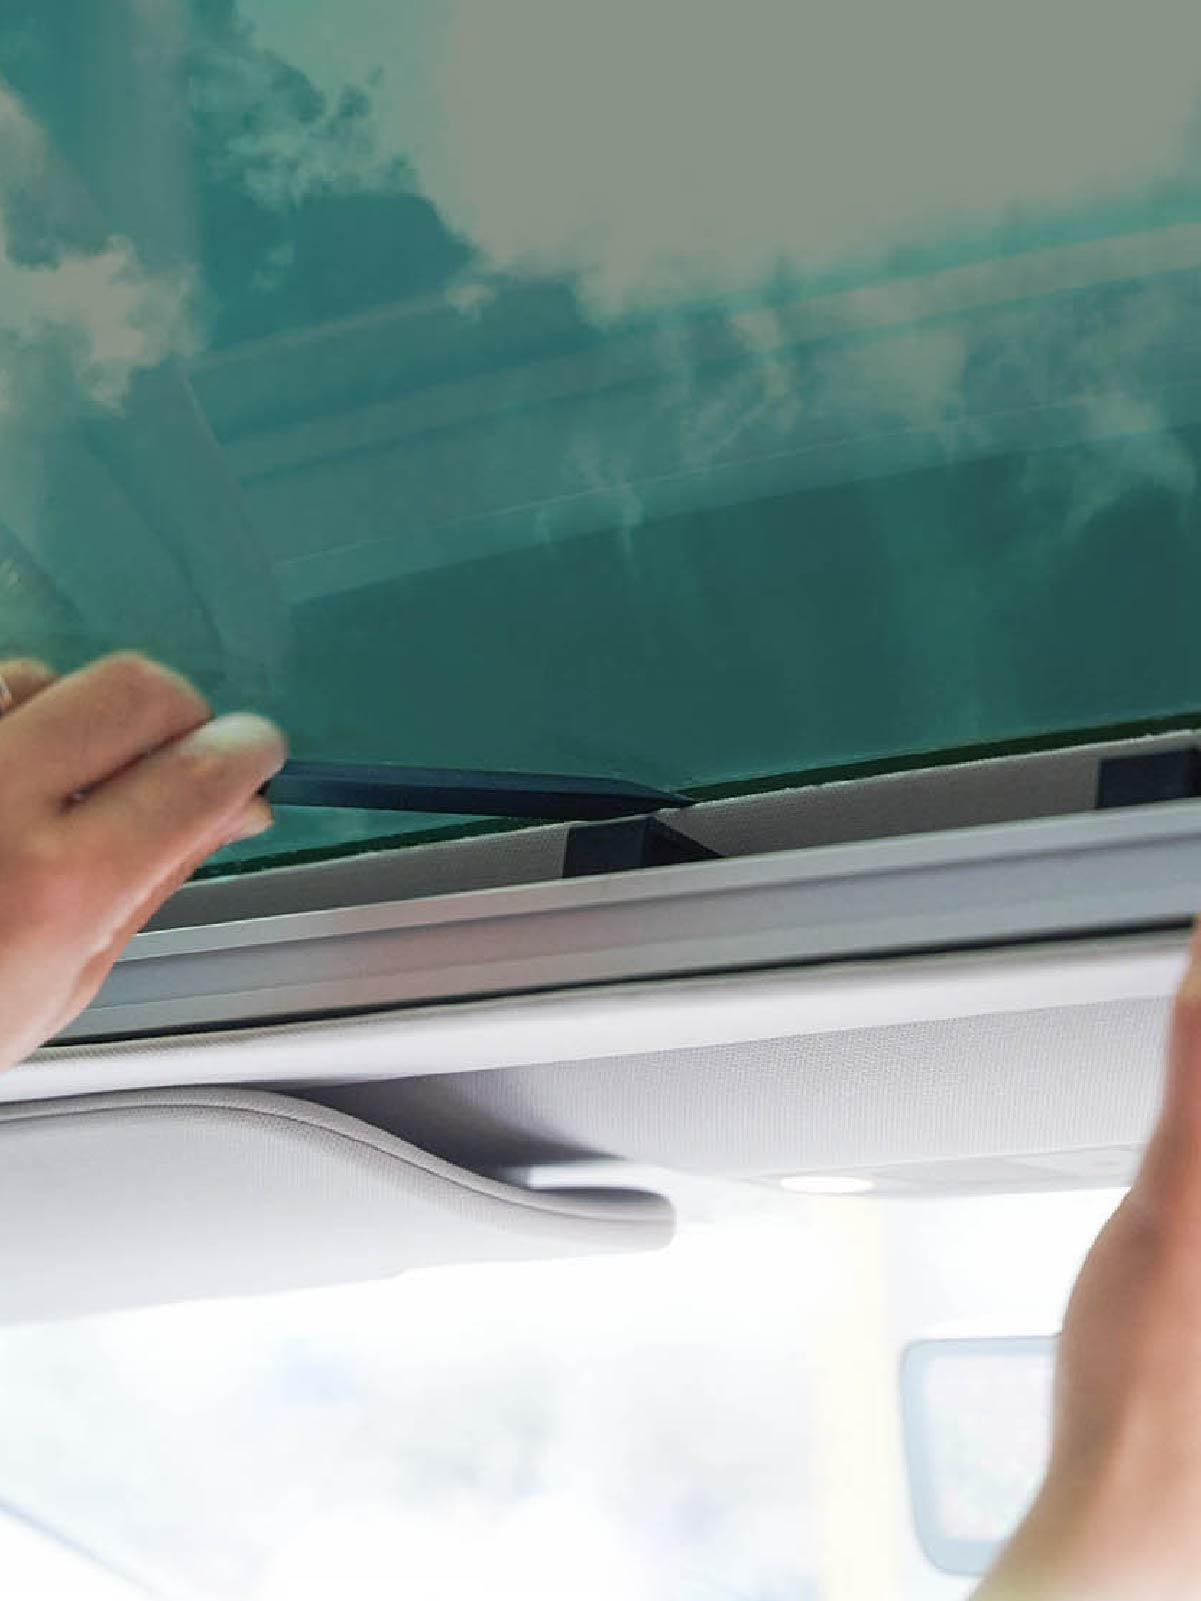
Move the left plug to towards the left side, and use a pry tool to help insert the black plug into the roof through the gap. Continue to push the plug more to the left as much as possible.
Repeat step 5 for the right side
to finish installation of the front sunshade.
Loosen the screw located behind the black insert. Repeat for both sides.
Rotate the black insert 180 degrees to ensure the insert is facing outward, then tighten the fixing screw.
Take the sunshade into the car cabin with both inserts facing the back of the car. Lift the sunshade up and push both inserts into the ceiling.
Lift the front of the sunshade up and push it close to the glassroof. Note: move both black plugs towards the middle at this step.
Move the left plug to towards the left side, and use a pry tool to help insert the black plug into the roof through the gap. Continue to push the plug more to the left as much as possible.
Repeat step 5 for the right side
to finish installation of the front sunshade.
Loosen the screw located behind the black insert. Repeat for both sides.
Rotate the black insert 180 degrees to ensure the insert is facing outward, then tighten the fixing screw.
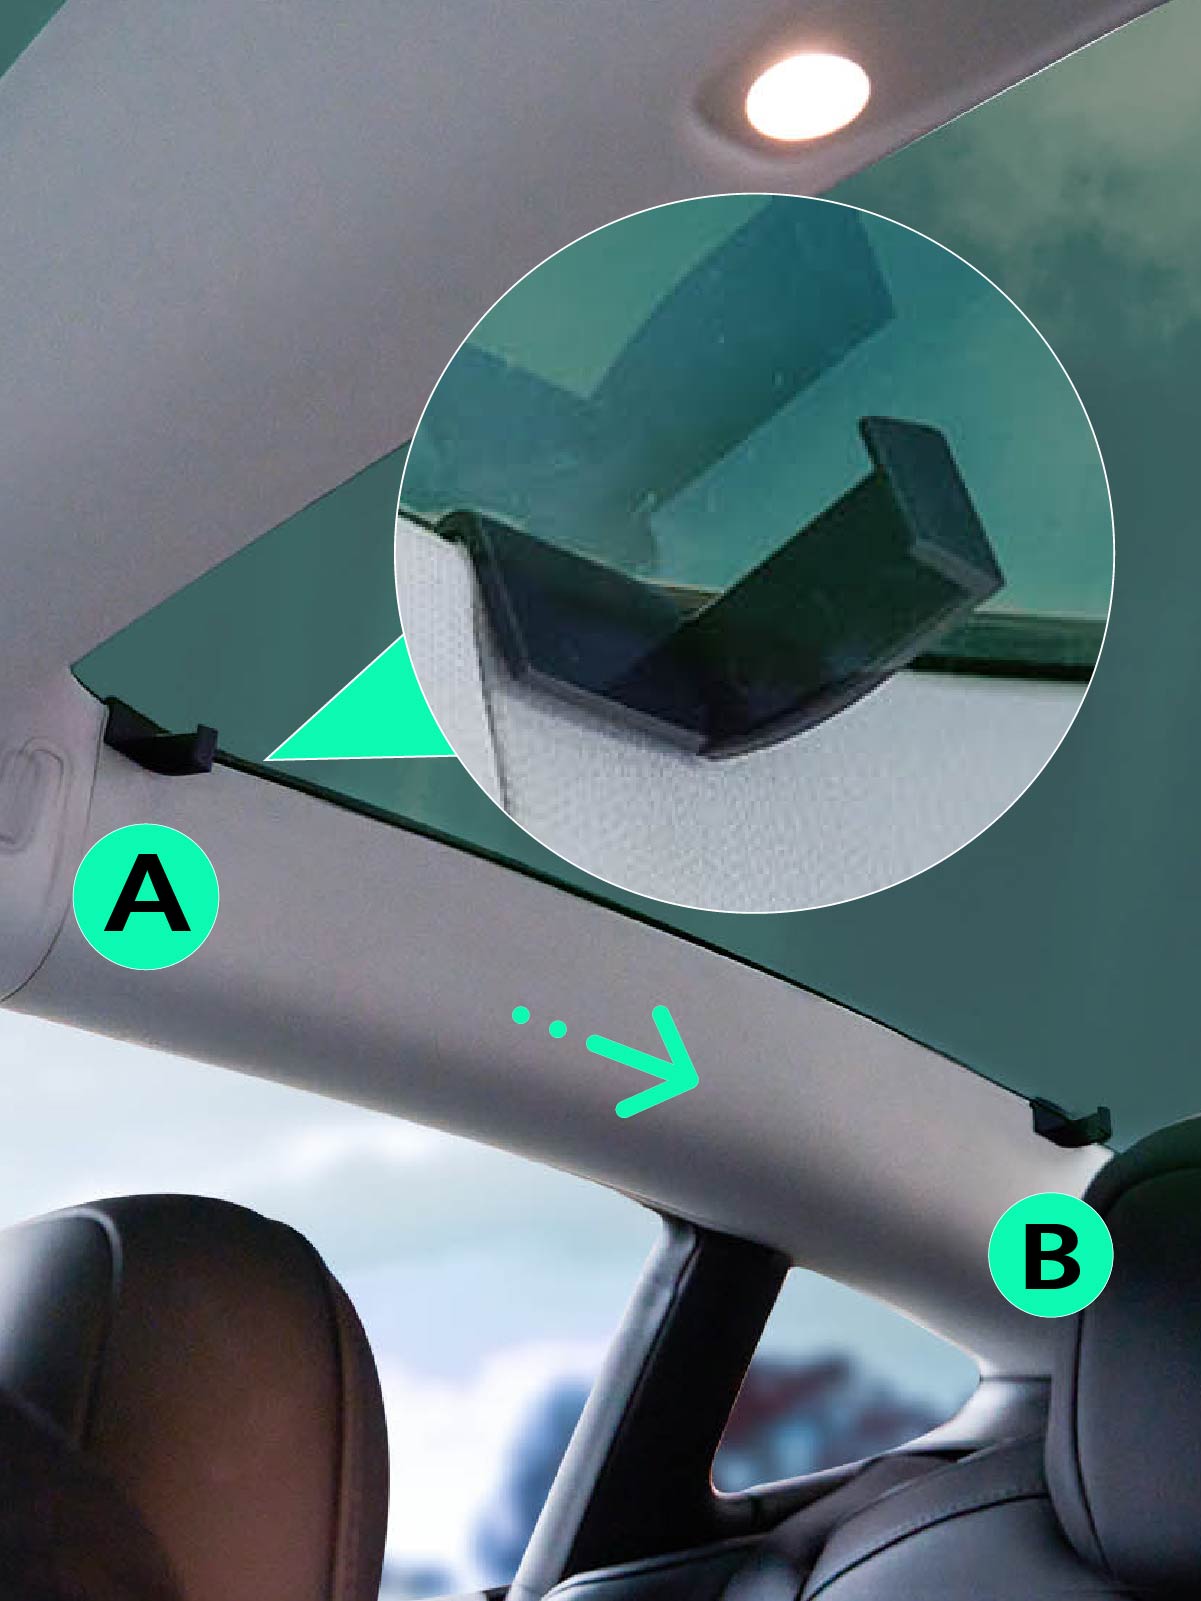
Insert the black hook for
passenger side from spot A, slowly move it to spot B;
Or insert directly to spot B.
Repeat to insert the black hook for driver side.
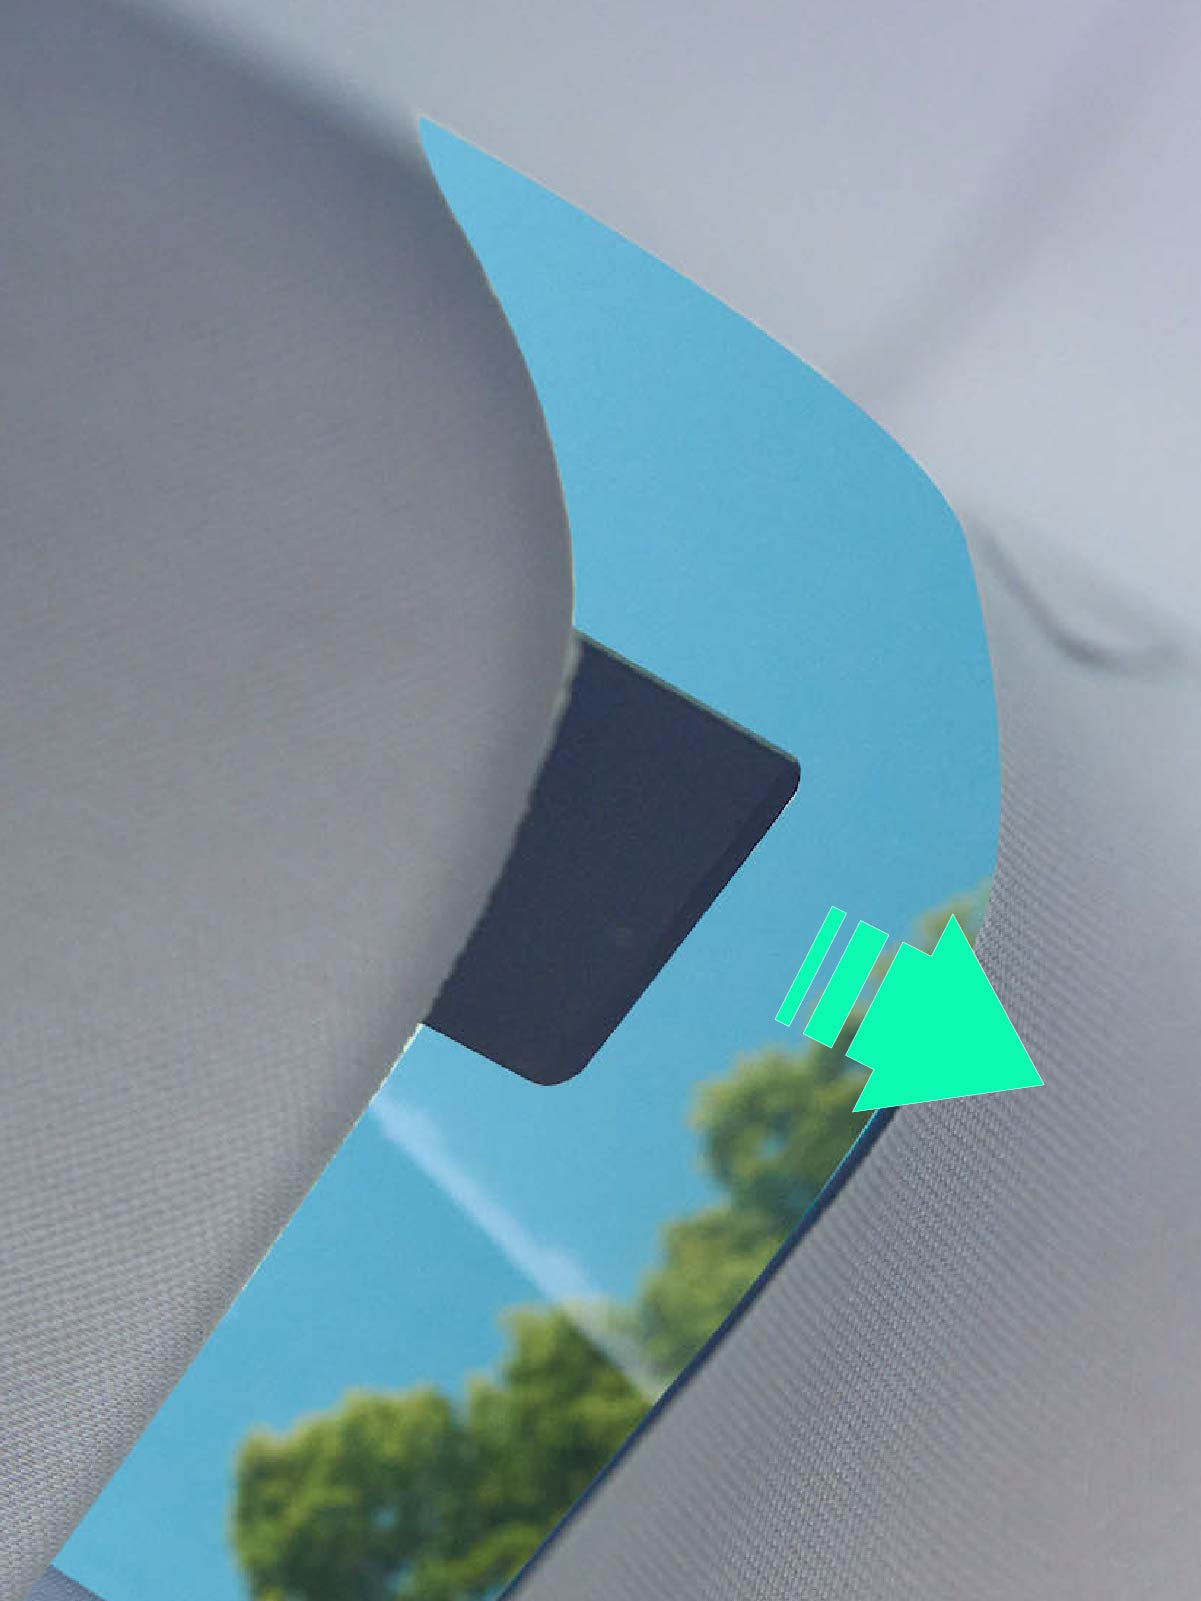
Take the sunshade into the car cabin, with both inserts facing the front of the car. Lift the sunshade up and push both inserts into the ceiling to secure the front.
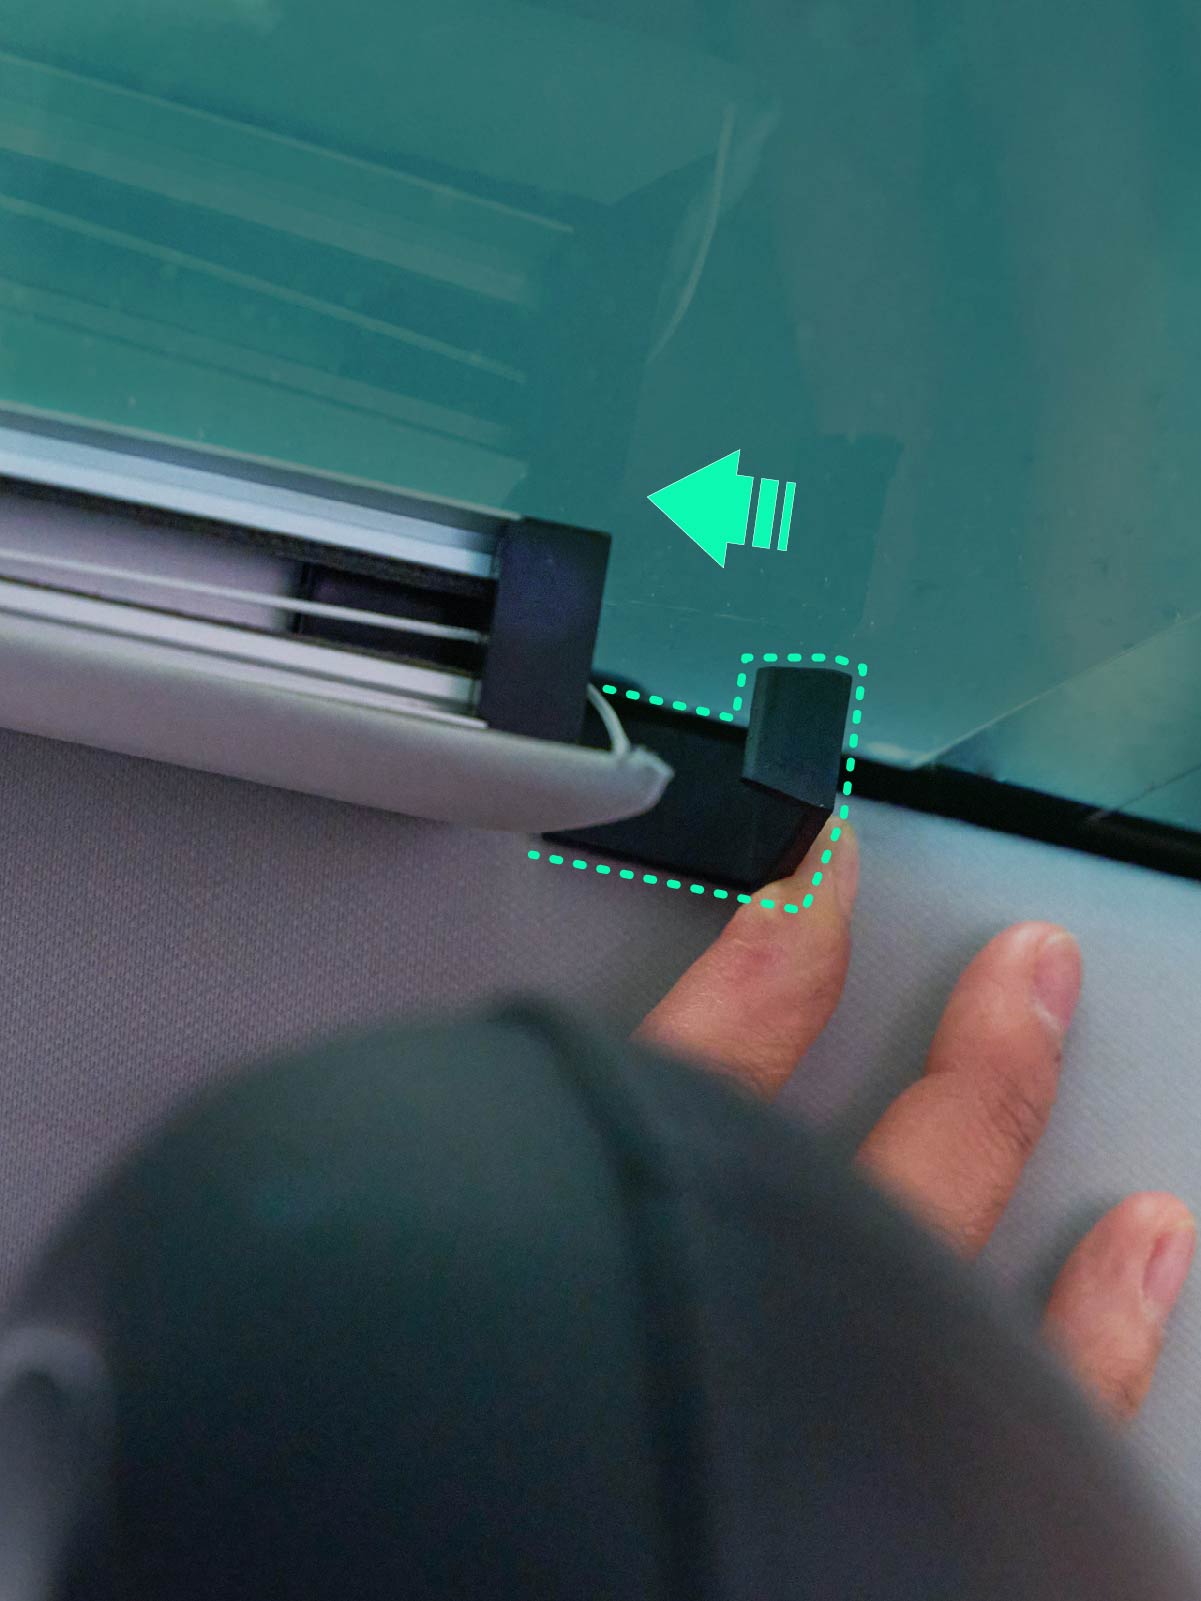
Push the hook backwards, then insert the end of it into the black square at the end of the metal frame, to secure the back of the shade.
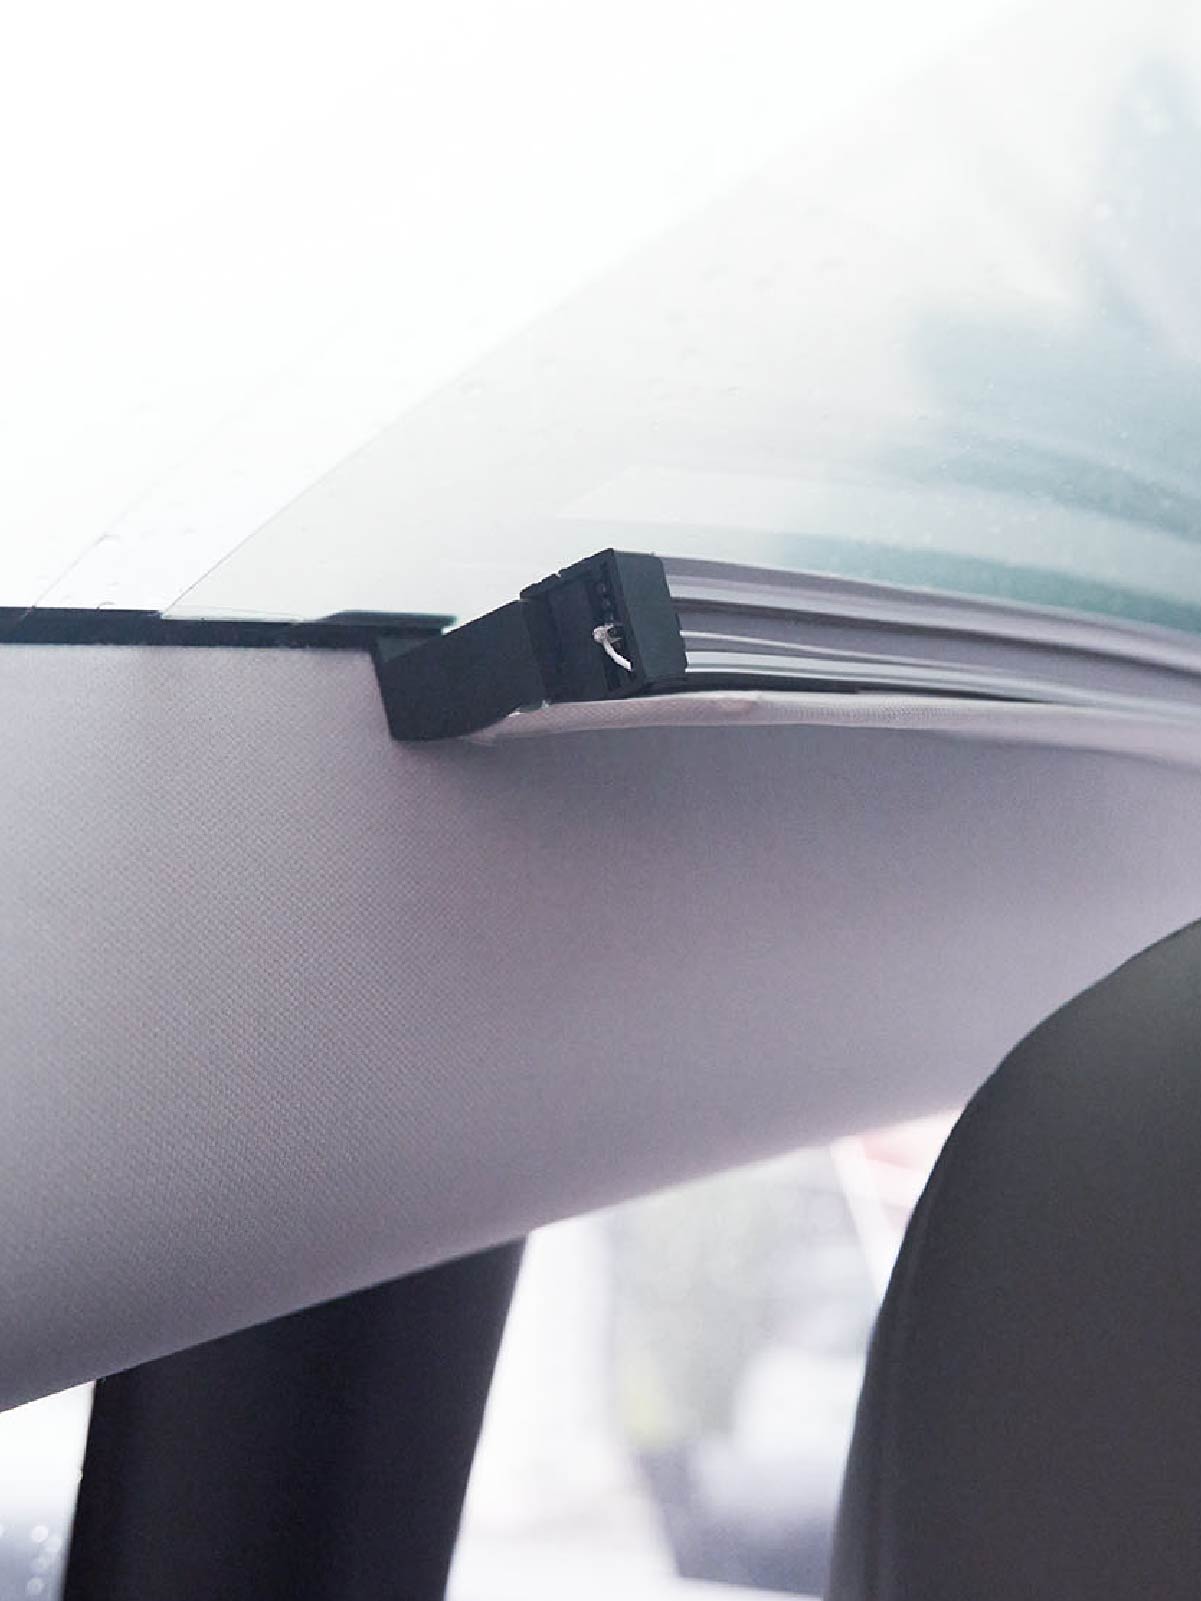
Repeat step 5 for the other side to finish installation of the rear sunshade.
Loosen the screw located behind the black insert. Repeat for both sides.
Rotate the black insert 180 degrees to ensure the insert is facing outward, then tighten the fixing screw.
Insert the black hook for
passenger side from spot A, slowly move it to spot B;
Or insert directly to spot B.
Repeat to insert the black hook for driver side.
Take the sunshade into the car cabin, with both inserts facing the front of the car. Lift the sunshade up and push both inserts into the ceiling to secure the front.
Push the hook backwards, then insert the end of it into the black square at the end of the metal frame, to secure the back of the shade.
Repeat step 5 for the other side to finish installation of the rear sunshade.
FAQ
Will it make the skylight smaller after installation?
Our Fullshade is an add-on. Without removing the original car accessories, the space of the slide rail will be sacrificed, but it can be ignored.
Can it be removed after installation?
Obviously yes, it's just an add-on, but I think it will last a lifetime when you put it on, just turn it on when you need sunlight, it's very convenient.
Will installing this Fullshade damage my Tesla?
Our snap design will not cause damage to your Tesla at all and can be installed without damage.